
|
|
|
Your donations help keep this valuable resource free and growing. Thank you.
|
Rebel SST 2D HT 1969 Streetmachine from Finland |
Post Reply 
|
Page <1 4567> |
| Author | |
REBEL X 
AMC Nut 

Joined: Nov/09/2015 Location: Winnipeg Canada Status: Offline Points: 385 |
 Post Options Post Options
") Thanks(0) Thanks(0)
 Quote Reply Quote Reply
 Posted: Apr/20/2016 at 1:37pm Posted: Apr/20/2016 at 1:37pm |
|
What a neat Rebel project! Thanks for all your pictures and write up.
|
|
|
67 Rebel SST 343 AT conv
68 Rebel 550 232 AT conv 68 Rebel 550 232 AT conv 68 Rebel SST 343 4 SP conv 68 Rebel SST 401 727 HT 70 Rebel SST 360 AT Wgn 70 Rebel SST 304 AT HT 70 Rebel Machine 390 AT |
|
 |
|
|
therebelmachineguy
AMC Apprentice 

Joined: Jan/29/2016 Location: Trenton, Ont. Status: Offline Points: 146 |
Post Options
Thanks(0)
Quote Reply
Posted: Apr/30/2016 at 3:35pm |
|
To me that's how a build should be documented. I remember how my #3 Machine was done and although pros were doing the work, they were nowhere near as thorough about how the work progressed and I was and still am unhappy at how it all turned out. Could not have done better myself mind you but this write up is inspiring because we all know how hard it is at point to stay on track with the documentation without having to deal with sub-zero temperatures.
There were a number of little tricks and insights shared here that I've never seen or heard of even when pros are doing the work. I'm going to try them and maybe I'll develop some tricks and skills of my own. Thank you for dedicating the time and tremendous effort to share your project.
|
|
|
|
|
therebelmachineguy
AMC Apprentice
Joined: Jan/29/2016 Location: Trenton, Ont. Status: Offline Points: 146 |
Post Options
Thanks(0)
Quote Reply
Posted: Apr/30/2016 at 3:38pm |
|
I hope at some point you finish off the write up and post the shots as you finally finished the car as well as what happened at the show. More importantly, how did your wife like the car? I alway try to be mindful of how I spend my time so my wife, the cars and I can all co-exist successfully.
|
|
|
|
|
HornetRWB
Supporter of TheAMCForum 

Joined: Dec/15/2011 Location: Chicago Status: Offline Points: 61 |
Post Options
Thanks(0)
Quote Reply
Posted: May/18/2016 at 4:22am |
|
thx mates, sorry for the delay in posting here - been a bit busy... but anyhow here's the continuation of the project:
Brakes continued.. Spent the day after work bleeding the brakes. Found one leaking brake line (just not fastened enough), replaced two brake line nuts and re-did pipe ends (not connecting tightly enough) and one air screw decided to get rounded off so that was replaced as well... 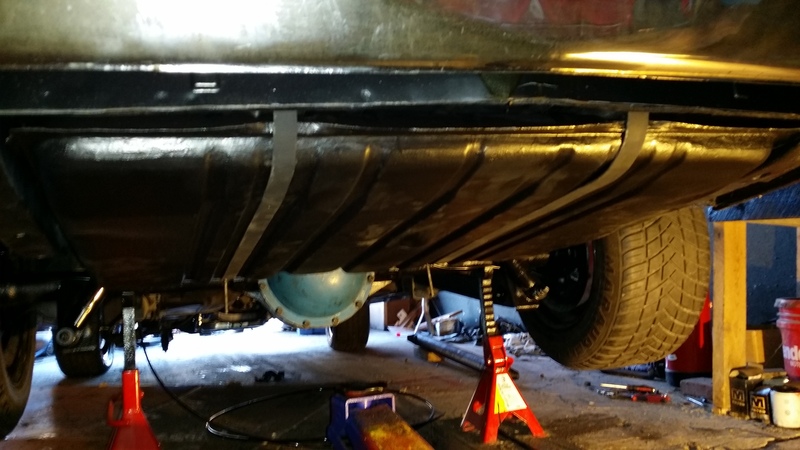 To make the car move on it's own, I installed the tank which also didn't go exactly as planned.. I was under the tank and putting on the reconditioned straps I noticed I don't have the hangers which they connect to at all. So.. Tank down and to my storage shed to look for them and about 30 minutes later decided they don't exist. Instead of falling to pieces I looked for Hornet parts instead, found them and after going thru them (clean, paint, etc) they fit exactly as they should, although being a bit on the long side so I cut them shorter by a few inches... Exact fit. ;) Then I sanded down the drive shaft and put a lick of black paint on it. Then on to the exhaust manifolds.. So I noticed that I still didn't have the exhaust gaskets that I'd need... After going thru the shed I found square port gaskets from some left over set.. 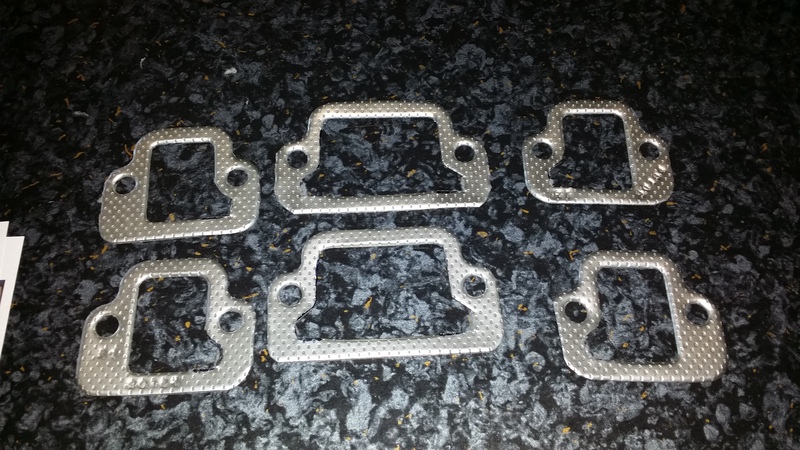 Well.. They were close enough so I used scissors to create the dogleg in about 15 minutes. At this point I had 6 days before the show and frankly getting a bit anxious on whether or not I'd make it (Hornet being the backup car which I had just taken the engine and front brakes out of...). Another problem in my mind was that I had no way of knowing whether or not the fat tires and wheels actually fit under the car while driving... |
|
|
AMC Club Finland (AMCCF) Founder
- Hornet SST 2D 1970 343+M22 RWB - Rebel SST 2D Hardtop 1969 360+727 Blue - Javelin SST 1971 401+700R4 White - Hornet 2D 1970 401+727 Primer Grey racecar project |
|
|
|
|
HornetRWB
Supporter of TheAMCForum
Joined: Dec/15/2011 Location: Chicago Status: Offline Points: 61 |
Post Options
Thanks(0)
Quote Reply
Posted: May/18/2016 at 4:42am |
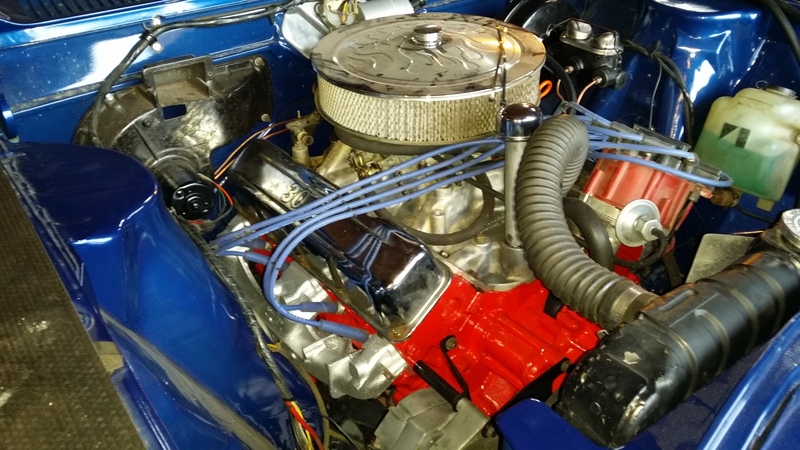 Next day I started off with the exhaust manifolds and surprisingly they went in without any issues. It's amazing how much more room the Rebel engine room has in comparison to the Hornet. ;) 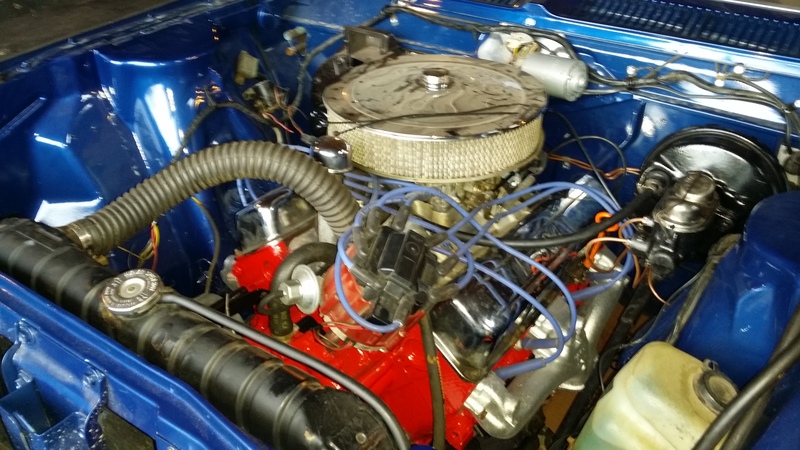 New sparkplug wires, shortened, ends made, and tons of misc related items put in the engine bay. Still have a few wires to run and put a few fuse boxes inside the car. 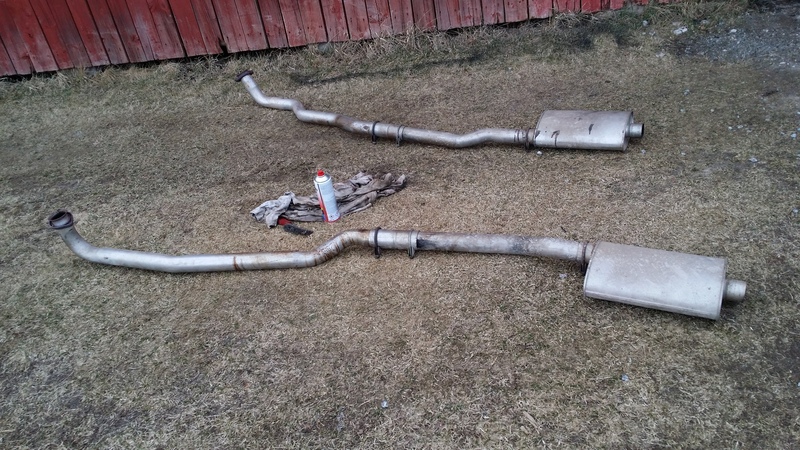 I took 30 minutes to clean up the temporary exhaust pipes borrowed from the Hornet. Basicly nothing wrong with them except tons of burnt up ATF (I broke a BW M12 a few years back), out of which most came off with brakeclean and the rest with a wire brush. Then I just basicly pushed them under the car and took a few measurements as I'll need to fabricate exhaust pipe hangers (I don't have the originals left) and we'll see where these Hornet pipes end up at. I had plans to route the pipes out from the sides, but perhaps will do that for the Hornet instead. 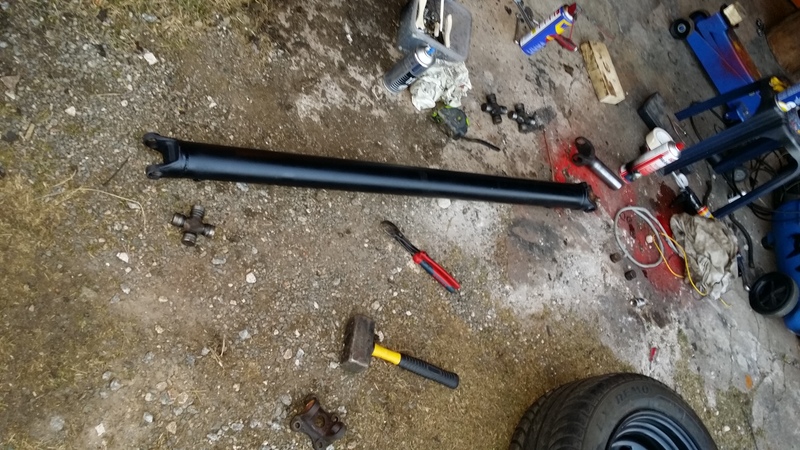 Drive shaft installation started and went thru my 'library' of joints and of course none of them fit with an A727 big joint to drive shaft normal joint so I ended up ordering new ones to the local parts store as express delivery.. It'll be tight... And then the door and window weatherseals. Fantastic and easy to install. Knick knack, push and voilá. Just like new and designed for the car... oh wait, that's right :) They did cost a fortune for me, but worth every penny. The old ones weren't lost completely, so I'll likely sell them off to cover some of the expense.  New window runners on the outside, didn't replace the inside ones because they looked brand new. Door weather seals went on well, but had to delay the window top seal installation because the shiny bits didn't shine enough. Will go thru those soon. Trunk seal was OK so I never ordered a new one, no issues with that one's installation either. 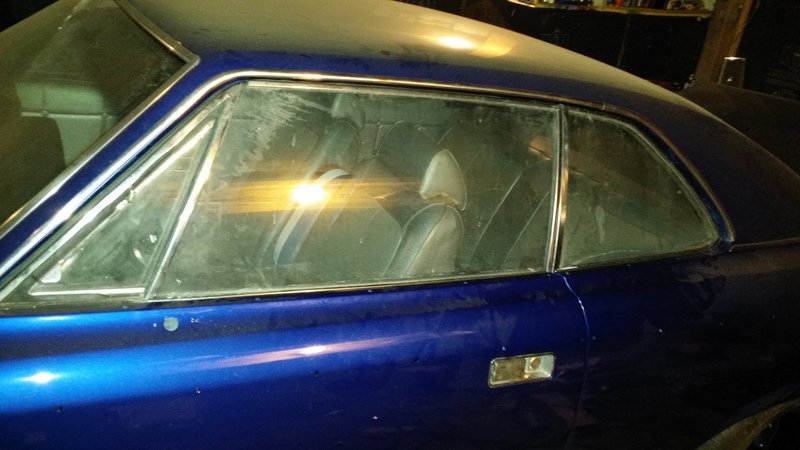 I've got to go thru all side glass with a razor blade to get rid of extra tape marks and some overspray... I also took a shot of the garage chaos in general.. No time to clean after myself it seems...  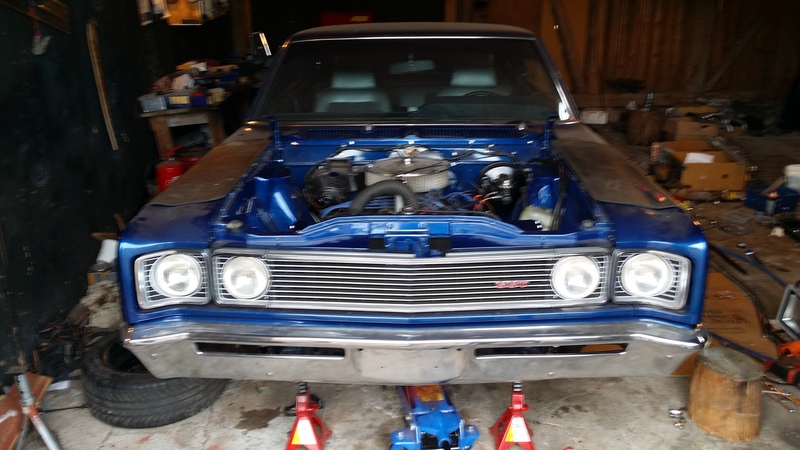 5 days to go |
|
|
AMC Club Finland (AMCCF) Founder
- Hornet SST 2D 1970 343+M22 RWB - Rebel SST 2D Hardtop 1969 360+727 Blue - Javelin SST 1971 401+700R4 White - Hornet 2D 1970 401+727 Primer Grey racecar project |
|
|
|
|
HornetRWB
Supporter of TheAMCForum
Joined: Dec/15/2011 Location: Chicago Status: Offline Points: 61 |
Post Options
Thanks(0)
Quote Reply
Posted: May/18/2016 at 6:15am |
|
At this point the original project story has a break, as I took a few days off work to finish the car and no time to sit on the computer...
  Tail SST panel got polished and after drying installed directly into it's spot. It was a bit dinged up but I carefully nudged some dings back straight with pushing (very finely sanded) two wooden blocks on both sides and a bit of fine hammering againts them here and there(don't recommend trying unless you've got plenty of spare to practice with...). It turned out OK. 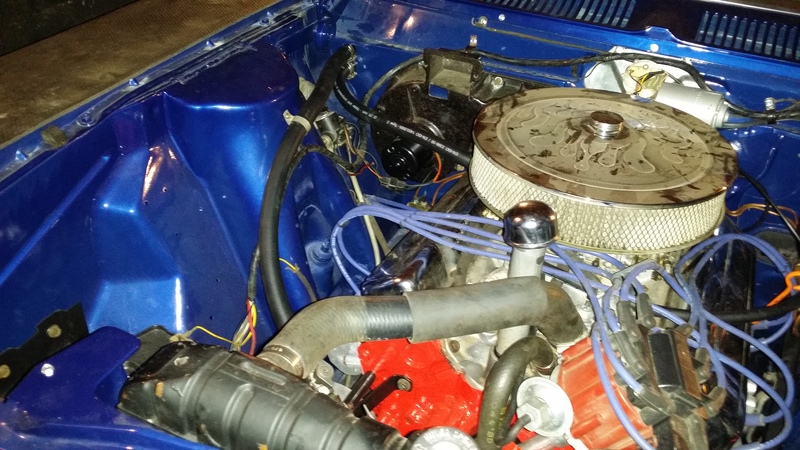 Then the water hoses to the engine. Found an old hose for the top from my garage with AMC logos and all, the others I bought new from Etra (a rubber products store chain).  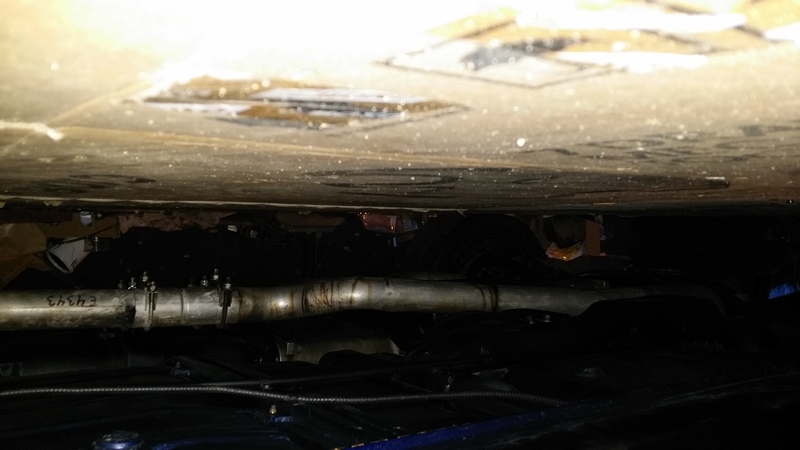 Then I went under the car (upsidedown it seems) and installed the parking brake cables to their original places. Also transmission's oil hoses found their spots and the oil cooler for the trans was installed in front of the radiator. 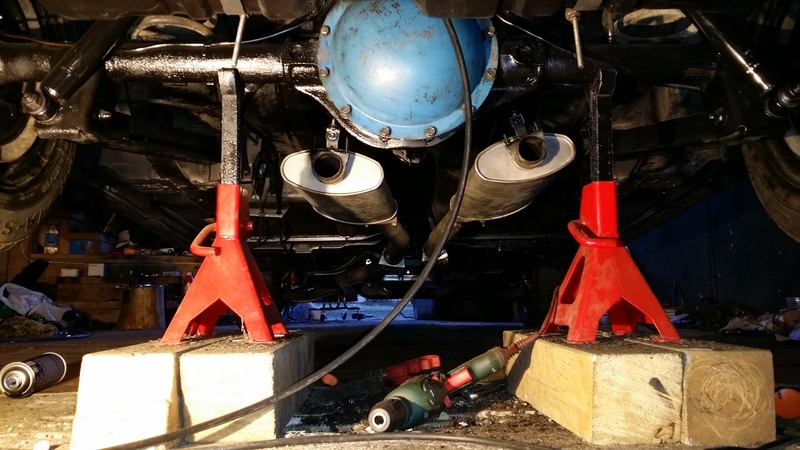 Soon after I realized that the front exhaust pipes up until the exhaust cans (including them too) are the same in Hornet and Rebel. Due to budget concerns I couldn't get new ones for the Rebel so this really made me happy. New exhaust hangers went to the same bolts as rear safety belts would have used (if I had any). 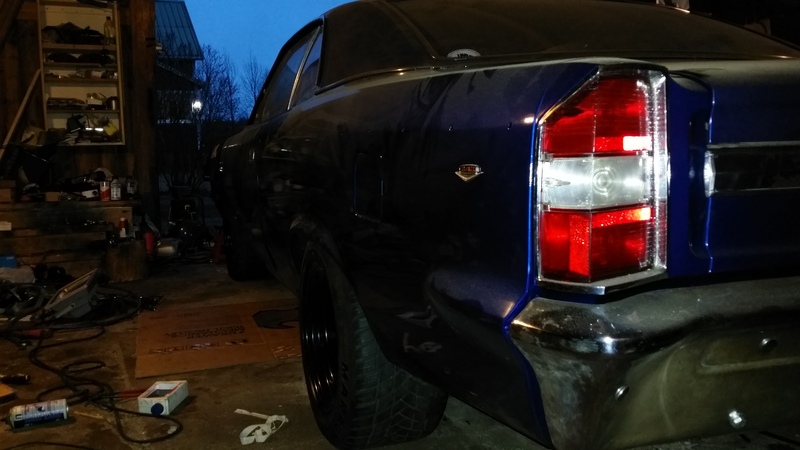 After this I took the car back on it's shoes and kept going in the rear. Gasoline line (nylon)was installed earlier, but I was still missing a way to fill up the tank... 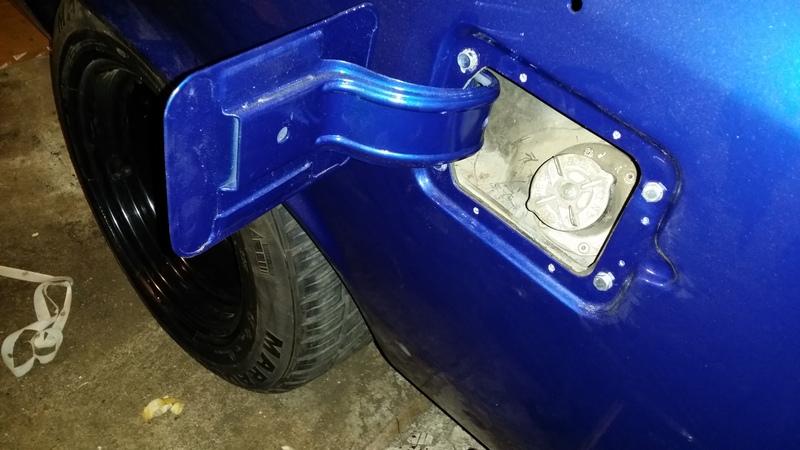 About 15 minutes of pondering I found the right way and order to install the filler pipe with it's clamps and bolts. Shortly put: First the plastic thingy with it's pipes from the trunk without fasteners plus the rubber gasket for the pipe thru the trunk floor. Then using a small screwdriver I lined up the parts and then from the outside installed the open door itself with the bolts coming in from the outside. Small adjustments, taped up a stopper to the outside (likely I'm missing a small rubber boot to stop the door from going inwards too much and finally tightened everything. 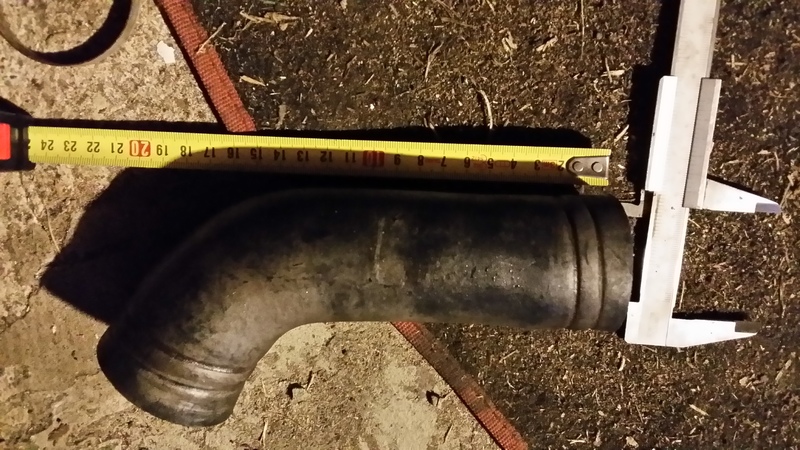 Then I was in mind to install the lower hose from the filler tube to the tank and of course at this time I realized it's hardened beyond repair and even with a heat gun (keeping in mind there's been no gasoline in the tank for 20+ years) it ripped itself apart on installation. 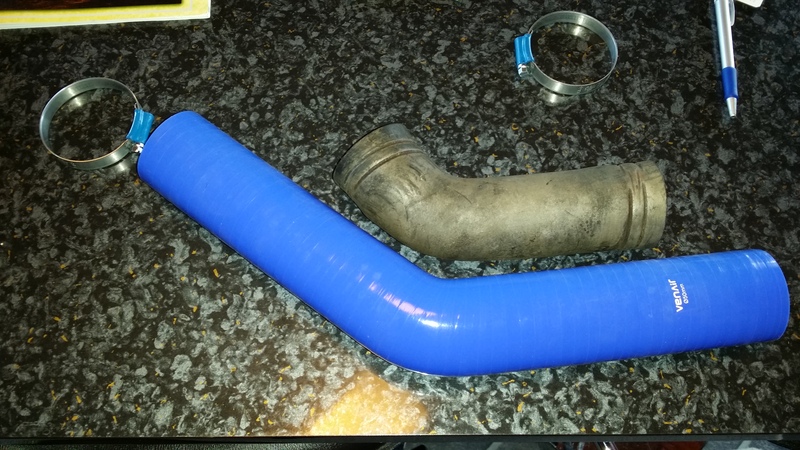 So, then off to the parts stores which had nothing in this size or corner for me. Nothing which can stand gasoline anyhow. So I took my time at the store thinking 'out of the box' a bit. Found the tuning section and some turbo piping made out of silicone. Hmm... It cost a fortune (80 USD), but I needed one so bought it and cut it to size (later a mate of mine used the remainder in his Hornet for the same purpose). 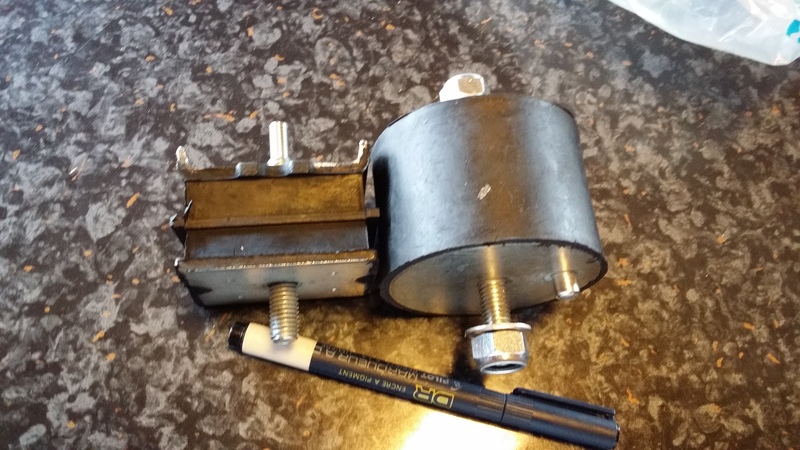 And as-if I didn't have enough to fill my days the transmission rubber fastener decided to die after installation. Of course it's a A727 and even if sitting at a Mopar dealer, they had absolutely nothing that fits my transmission crossmember. So out of the box again it is... Local parts store had some '80s Volvo transmission rubber (round one)and then a Peugeot 205 rear axle rubber (square one) in stock so I bought both to have something to work with. The square one was closer to what I needed and required only minimal angle grinding (shorten bolt, make a hole in the original metal plate, weld a nut so I can fasten the rubber well, etc). Took too long, but got it done. Those driveshaft parts didn't arrive yet, so I went on to the electrics. Staring with front parking/turn signals, which I got some help from my electrics guru who installed new bulb sockets to replace the old ones (which I couldn't find). It was getting late and I was laughing my @ss off at random things.. like: 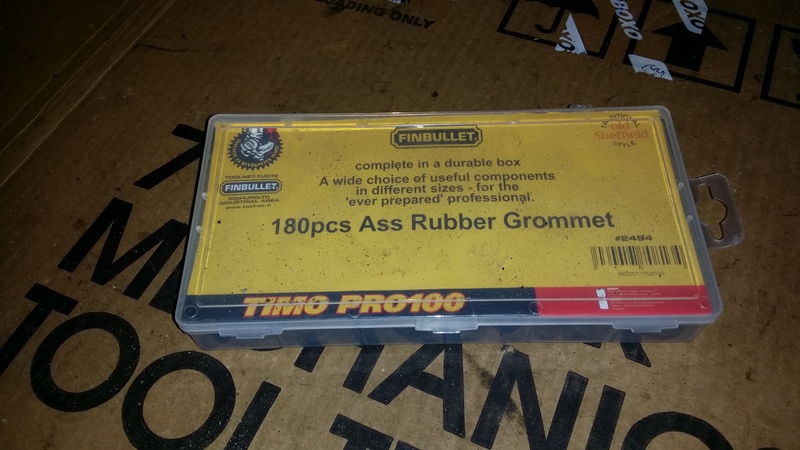 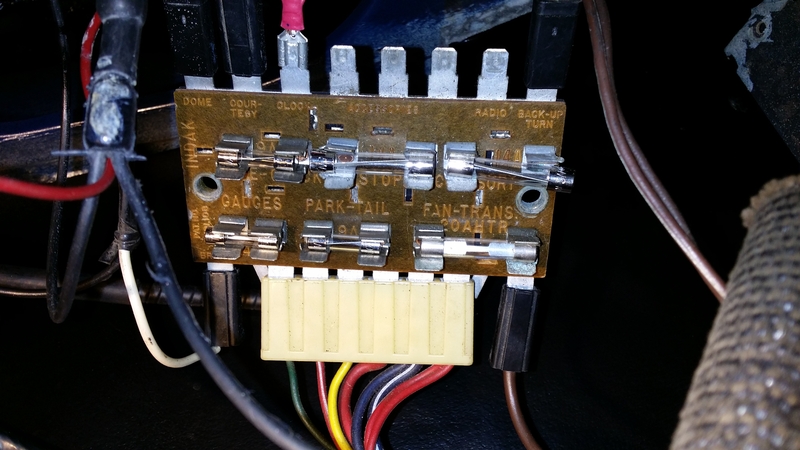 This is what I started up with. Old fusebox hadn't been used for that many years but it had heated and partly cracked and collected a nice set of wires and other hazardrous hack jobs (which I first replaced with proper fuses). Of course it didn't work (you can see one broken tab in the picture too)... 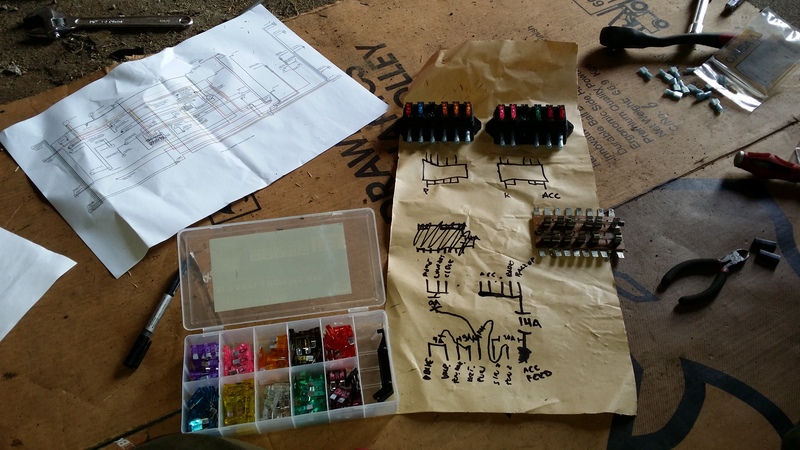 Then about 30 minutes to find out what's what.. 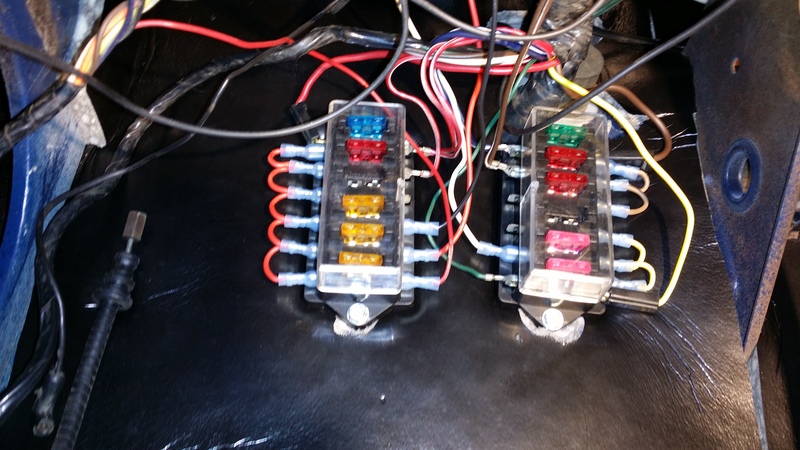 Earlier acquired fuse boxes found their spot between the dash and firewall, inside above parking brake pedal (pretty much where the original one sits). Shortly put, one fuse box for constant current (always on +) and one fusebox for ignition-on current (+, when key is turned to to ignition). I've found out that's the easiest way to go about it and using original level (if it had 10A, use 10A) fuses for all systems. I got everything working the first time, which shows that I've done this before. Be prepared to hunt misconnections and burn a few wires if doing it the first time. At this point I also went thru the engine room electrics, however no pictures exist. In practice I routed new wires based on my previous diagram.. 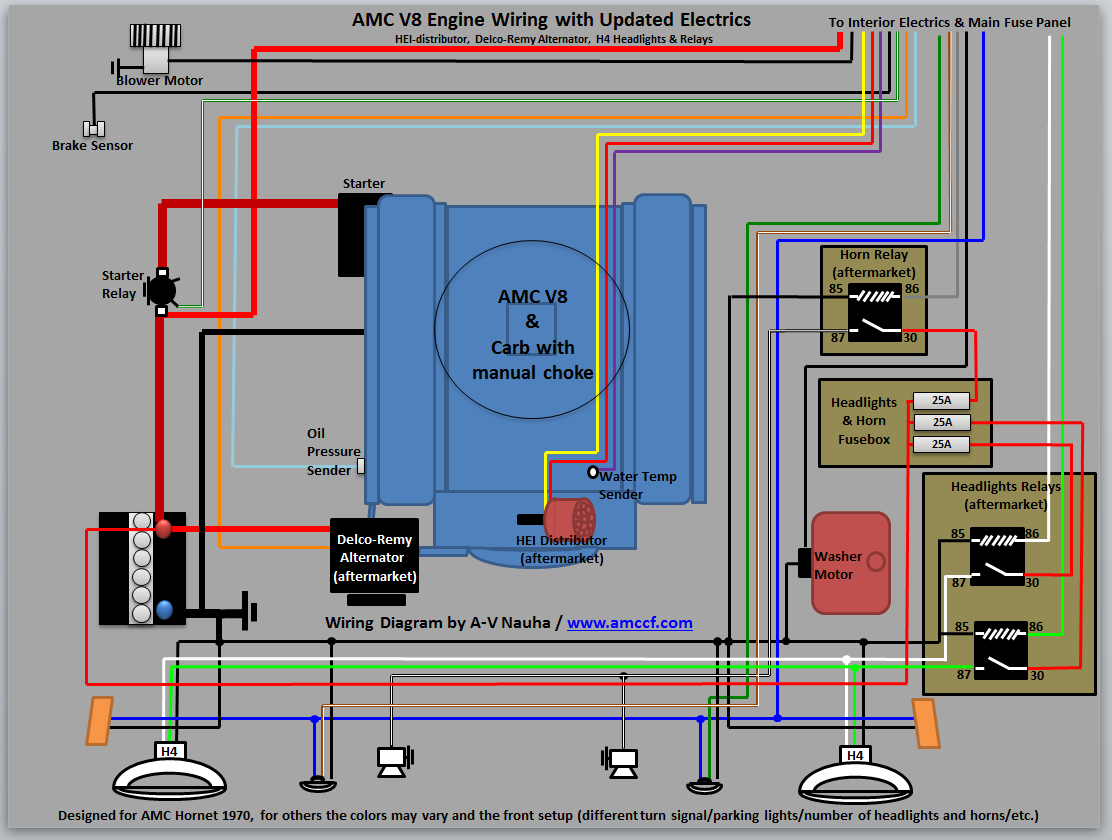 So new relays to lights, horn and one fusebox in the engine bay for them. Of course I didn't replace all wires due to the fact that some were still like brand new, but all headlight wiring was upgraded to reflect the raised need for power for the dual H4 halogens I'll be running. I'm using a new HEI distributor and a Jeep made Delco alternator so I got rid of all resistance wires that typically are found in wiring of AMCs. Small detail was the horn itself, which meant taking apart the steering wheel, adding a 6mm metal rod and a ball point pen spring to get everything working as it should. 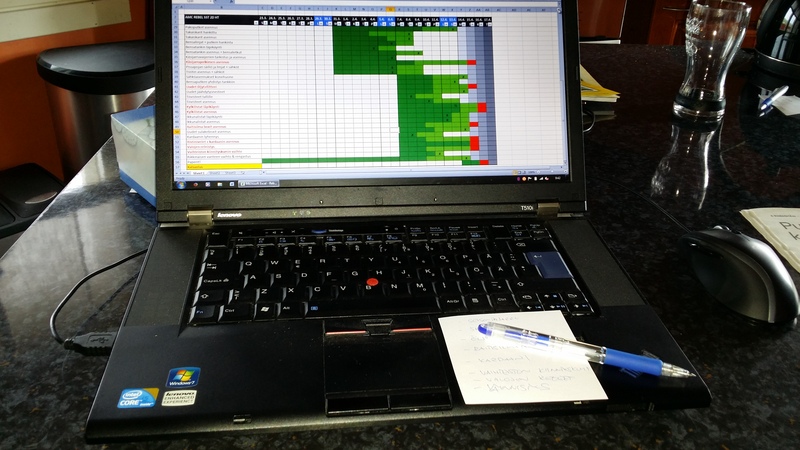 Oh yeah, days rolled past quite quickly before the show, so I had to make a real schedule - otherwise there's no way I could have found everything I needed to do and have time to get it done. Also it's difficult to measure if you're in schedule when you've got no schedule. 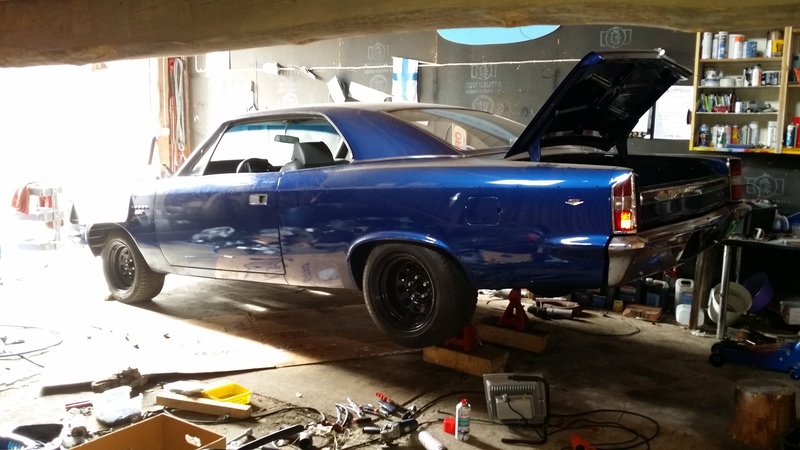 Then came the glorious day of putting the car back on it's tires without any intention of jacking it up again in a few months... So the driveshaft parts finally showed up! 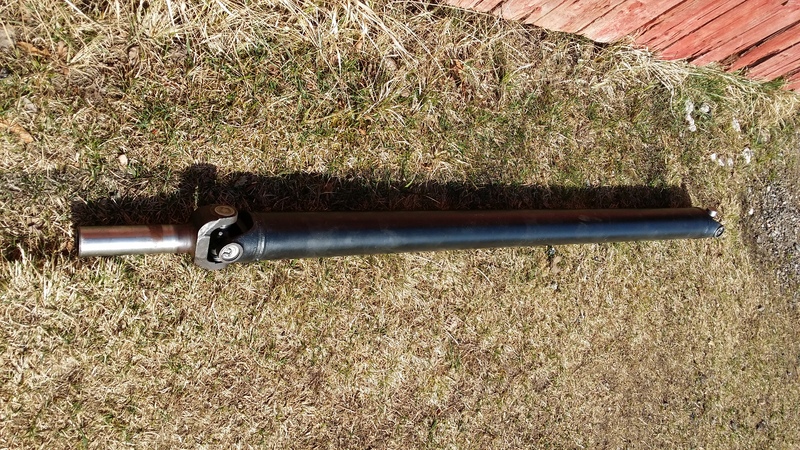 And there it is! Thanks to my local parts guy, he did quite a lot of backtracking and calling to get these in time. And Yes - the driveshaft fits in. 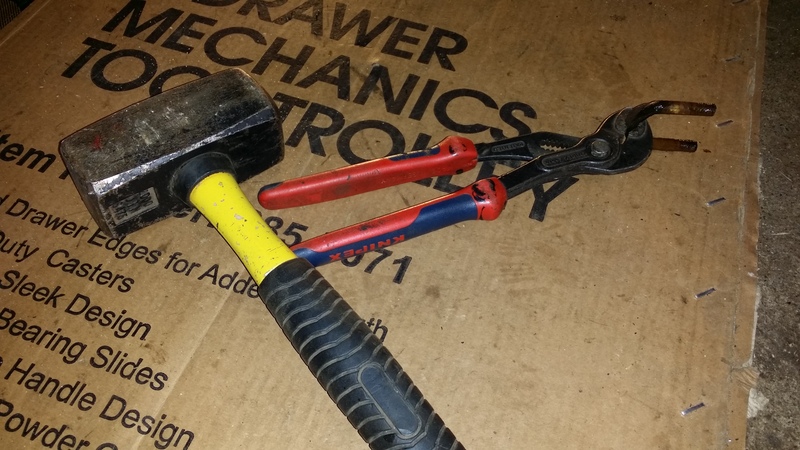 But of course not on the first try, because someone had hammered in one U-bolt into the back yoke with some considerable force. I noticed this weeks ago and had some WD40 and other stuffs soaking on it without any success. So now, lack of time forced me to take a hammer and hope for the best. And off it came, didn't even break anything.. :) I did however replace the u-bolts and nuts. Days fly by and at this point I tried to start up the car with my mates help and of course it didn't even connect anything. I was amazed because I had everything measured up with the electrics so I went and slept over night before continuing. The next day after some further measurements I noted that the ignition wasn't working as it should have, not connecting power to the fusebox. So I doublechecked the shifter connections and found a loose one (the connection that stops the car from starting except in P or N), then noticed that the start-up power (turning the key to start up the car, doens't work). So then I was off order a new ignition for 'one year 1969 model' below the steering shaft system... Funny, but out of blind luck one popped up on Ebay the same week, ordered that but didn't help my schedule... So, went thru my boxes and put in a button for the starter, rerouting the start up wire out of the wire loom into the button but still using the ignition lock itself. and WOW. It starts! 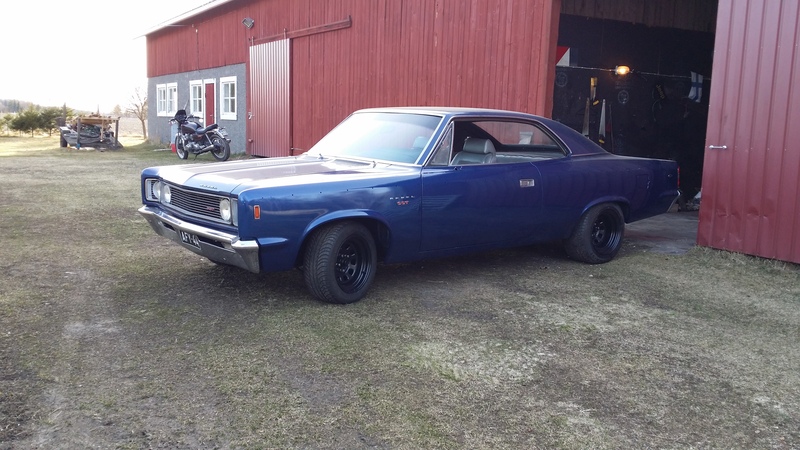 And a few minutes later the car was outside. Moving on it's own for the first time in 30+ years... !!! I felt fantastic. 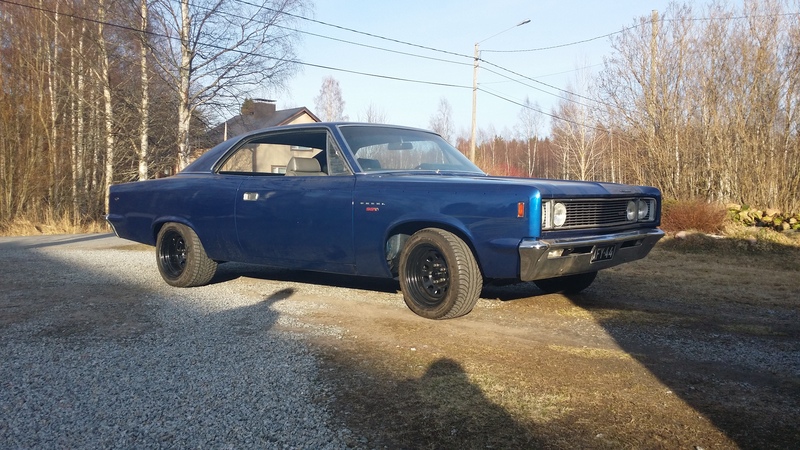 And of course a few test drive pictures were taken... 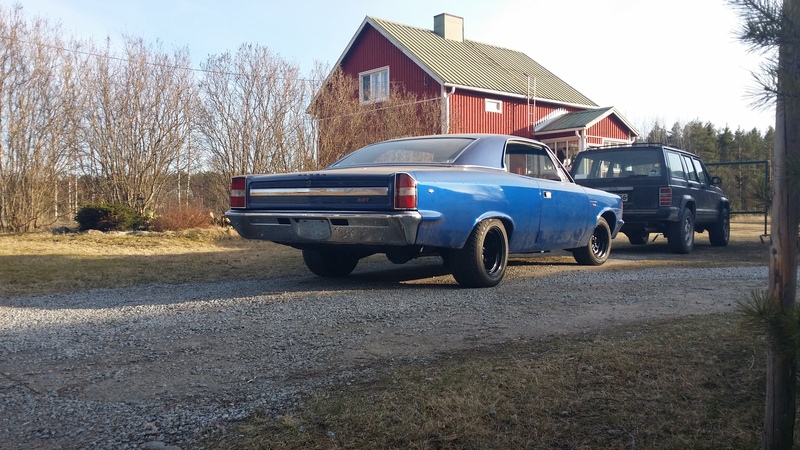 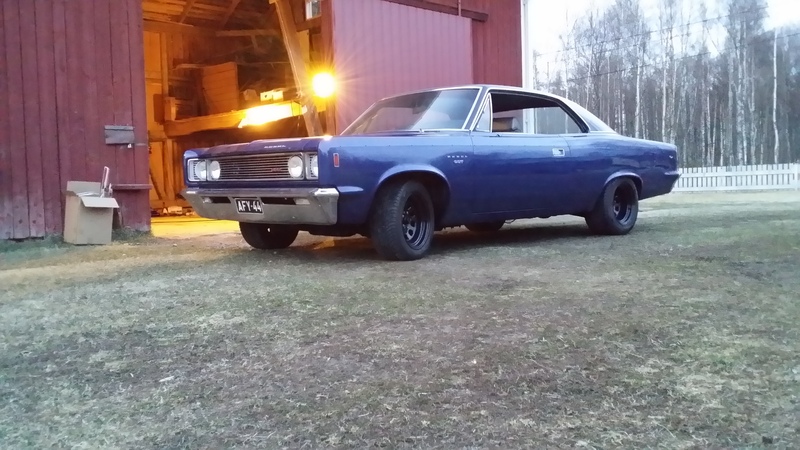 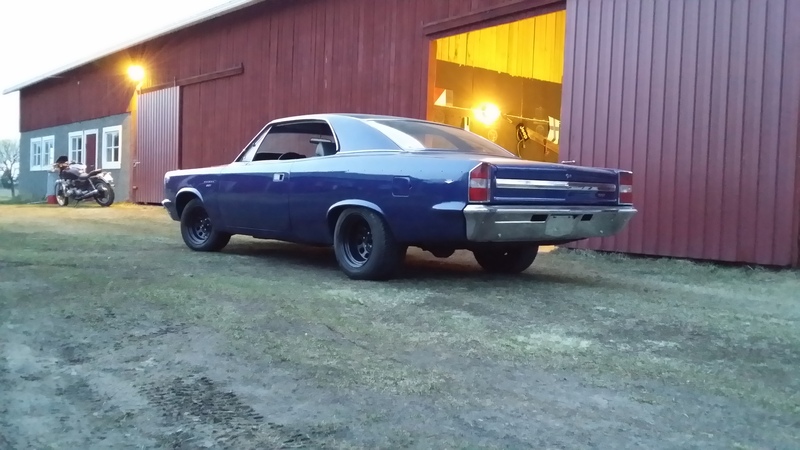 And about after this picture I noticed that the rear wheel rubs the fender when driving around. Lightly put I was pi$$ed out of my head especially since the reason wasn't that I had measured wrongly or the axle was too much on one side, or such.. The offset of the right wheel was 3-4mm more outside than the left one...  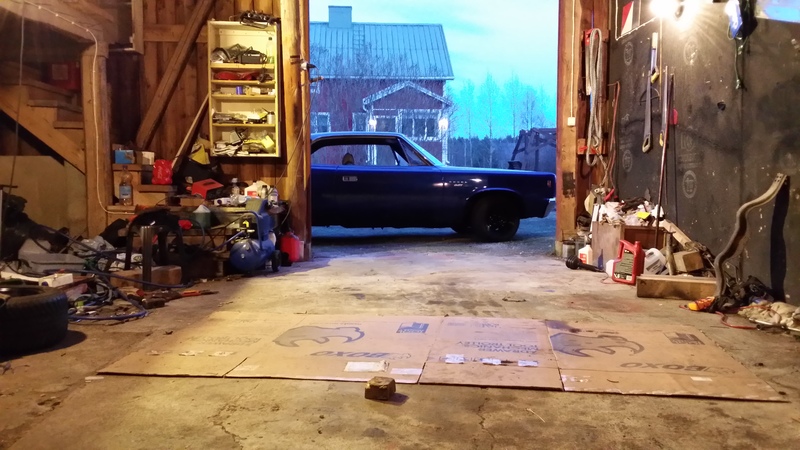 One more pic before sweeping up the garage and putting the car back in. So.. Disappointed but not given up. Wednesday afternoon, rubbing wheel, no inspection and show starts on Friday. I did call the inspection bureau to find out if my 'last minute ordered' original white on black license plates had been sent to them yet... No luck yet..  And my Thursday was made early in the morning when I got a call from inspection bureau saying that they have the plates now, come anytime...  So back to the work-list (shown earlier) and a short to-do list left.One small detail was the rearview mirror on driver's side which was nice, other than missing the actual mirror so I dropped by the local glass handcraftsmanshop and a guy there made me a round fitting mirror in less than 10 minutes and fastened it in place right there. Amazing service and price was 10 euros, so back to the car and bolted it right in. So back to the work-list (shown earlier) and a short to-do list left.One small detail was the rearview mirror on driver's side which was nice, other than missing the actual mirror so I dropped by the local glass handcraftsmanshop and a guy there made me a round fitting mirror in less than 10 minutes and fastened it in place right there. Amazing service and price was 10 euros, so back to the car and bolted it right in.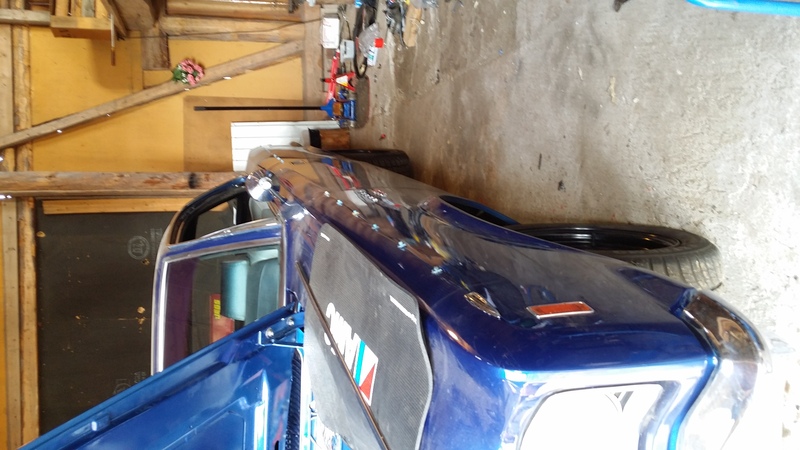 And then last but not least, what I had dreaded for weeks now. Installation of the SST-side mouldings. Really, really not my thing to put metal mouldings on newly painted surface so I went with extra precautions, cleaned up everything first, checked holes to be right size and clean, used antirust lubricants, etc. One by one the plastic clips went on (tiny hammer in use)... 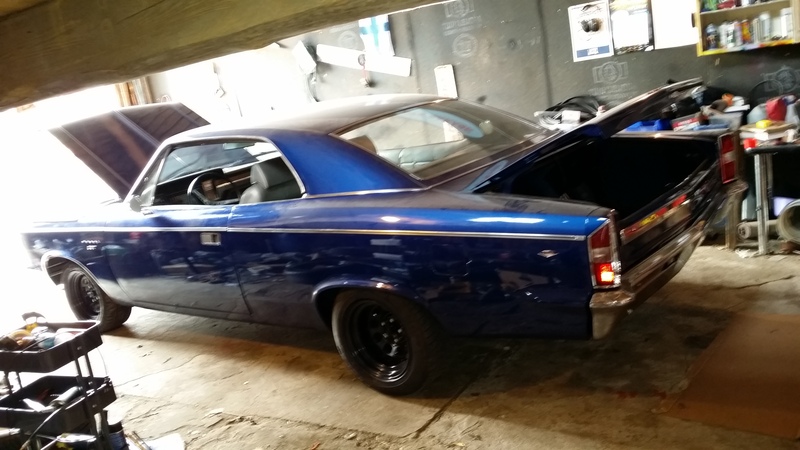 And hah!. There they are. About 3 hours later I truely felt like I need a break from all this...  And off we go, into the traffic. 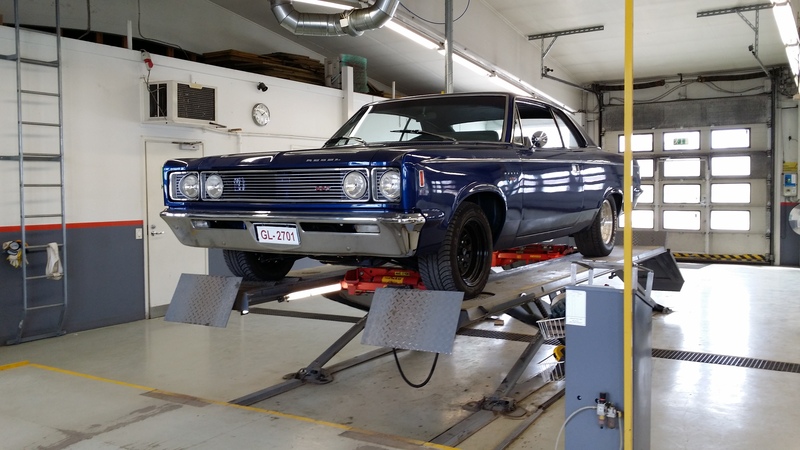 And as you may have guessed I borrowed the rear wheels and tires from the Hornet to get the car inspected. 33 years after the previous inspection the car passed without any issues(!). 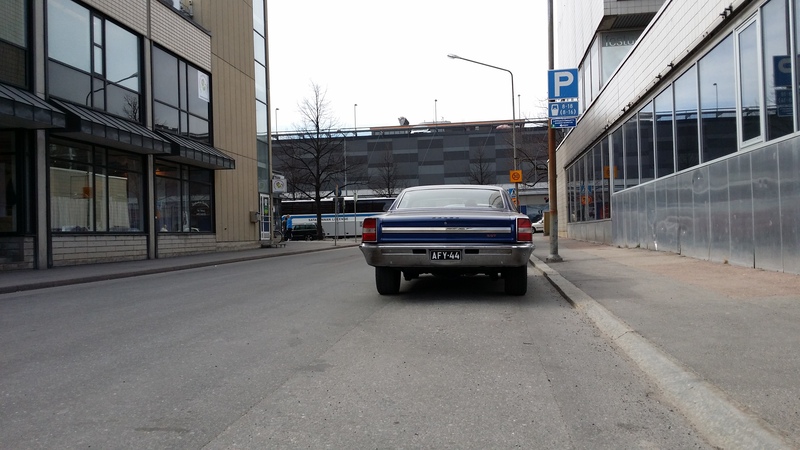 And the satisfactory moment was crowned by stopping by my favorite fast food joint Grilli-Pori, after which back to the garage to swap front wheels (for a uniform look) and put on the rest of the mouldings (although some still 'to-do today', still thinking whether or not to put them on). Was also missing a few flathead bumper bolts, but nothing big. And being Thursday, last day to get the car in to the show, I packed my tools and a few possibly needful things into the trunk, my mate got on and we drove to the Helsinki American Car Show. We were a bit late of course and first time I washed the car was outside the show hall. After just 2 hours of waxing and cleaning (and maybe a few refreshments of the canned nature) the staff told us to go to sleep so you'll show up early in the morning to open the show.  In the morning, nothing bothered me anymore. :) 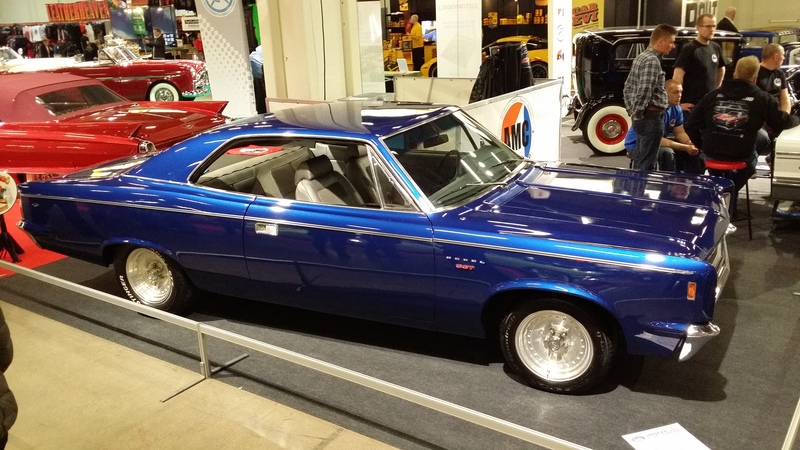 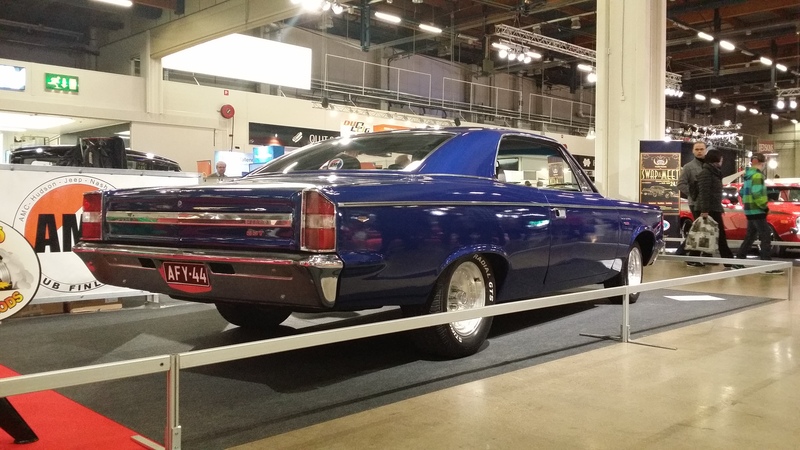 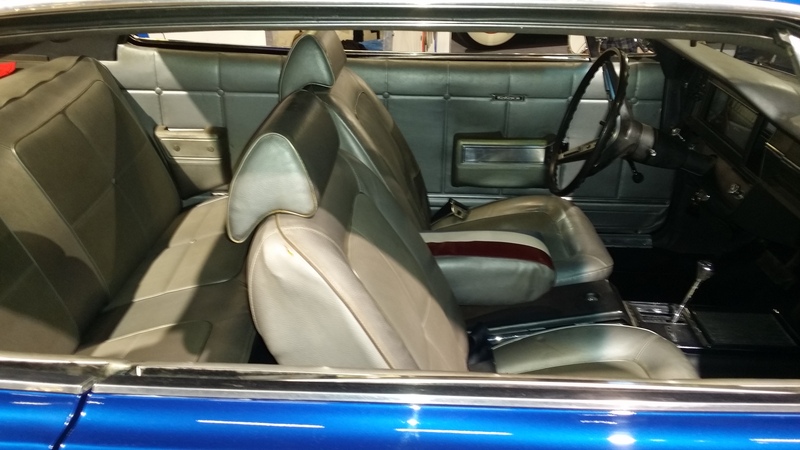 Still some things to do, but small things and starting from this day the Rebel worked as my daily driver all summer. A lot of updates done afterwards, and I will be posting them soon too...  By the way, it's amazing how my lovely wife withstood all this living in the garage (and putting together a car in 6 months that was supposed to take "maybe 5-10 years"). Thanks to her for everything, and also to all my AMC Club Finland clubmates whom helped my motivation and kept me going by commenting on the original project story (in Finnish) in our club forum. |
|
|
AMC Club Finland (AMCCF) Founder
- Hornet SST 2D 1970 343+M22 RWB - Rebel SST 2D Hardtop 1969 360+727 Blue - Javelin SST 1971 401+700R4 White - Hornet 2D 1970 401+727 Primer Grey racecar project |
|
|
|
|
pit crew
Supporter of TheAMCForum

Joined: Jul/08/2007 Location: delete Status: Offline Points: 5341 |
Post Options
Thanks(0)
Quote Reply
Posted: May/18/2016 at 6:25am |
|
Great job and great story. Thanks for sharing.
|
|
 73 Hornet - 401EFI - THM400 - Twin Grip 20 |
|
|
|
|
therebelmachineguy
AMC Apprentice
Joined: Jan/29/2016 Location: Trenton, Ont. Status: Offline Points: 146 |
Post Options
Thanks(0)
Quote Reply
Posted: May/18/2016 at 8:04am |
|
HornetRWB you certainly set the bar high for those of us at the bottom of that steep hill even if we have more resources. Pretty impressive. Your Pine-sol tip has been working very well for me with all sorts of projects, not just cars so thanks for that too. I think you've been a big influence on this side of the pond. More than you could have imagined when you started your project. Congratulations on a beautiful job.
|
|
|
Manufacturing the only authentic Rebel Machine Stripe Kit since 1996 and now manufacturing new sheetmetal panels for AMC Automobiles
|
|
|
|
|
304-dude
AMC Addicted

Joined: Sep/29/2008 Location: Central Illinoi Status: Offline Points: 9082 |
Post Options
Thanks(0)
Quote Reply
Posted: May/18/2016 at 9:17am |
|
Great story, great find, great work! Only if I had a garage as big, well I should state only if I had a garage all to my car so I can really get down and dirty.
As for the Pine Line or Pine Sol tip, great to see options like that with a bit of elbow grease. Thanks! |
|
|
71 Javelin SST body
390 69 crank, 70 block & heads NASCAR SB2 rods & pistons 78 Jeep TH400 w/ 2.76 Low 50/50 Ford-AMC Suspension 79 F150 rear & 8.8 axles Ford Racing 3.25 gears & 9" /w Detroit locker |
|
|
|
|
HornetRWB
Supporter of TheAMCForum
Joined: Dec/15/2011 Location: Chicago Status: Offline Points: 61 |
Post Options
Thanks(0)
Quote Reply
Posted: May/19/2016 at 6:01am |
|
Thanks mates for the feedback, I'll continue to push updates to this story as the car will likely never be fully finished (it's my summer daily driver).
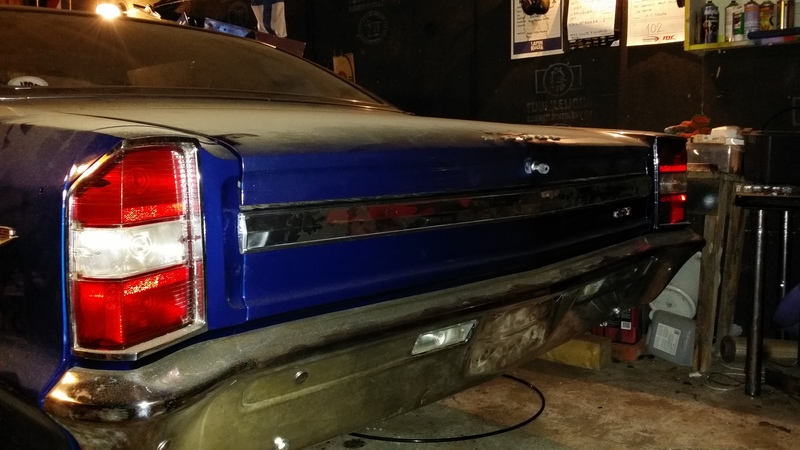
After the show I found the time to put on some missing trim from this car. I thought long and hard of actually keeping all trim and mouldings off the car, but you know how rare a '69 Rebel SST 2D HT is in USA, try guessing how rare it is in Europe? (as far as I know there's 4 in whole of Europe). 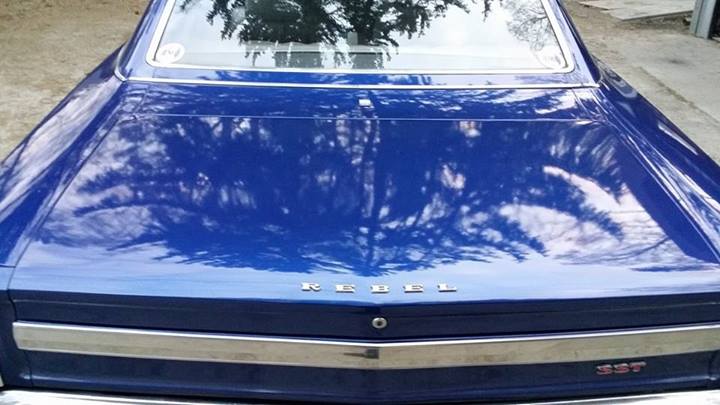 Here's the only AMC emblem on the car. It is tiny, and I get asked quite a lot what the car is when driving around... 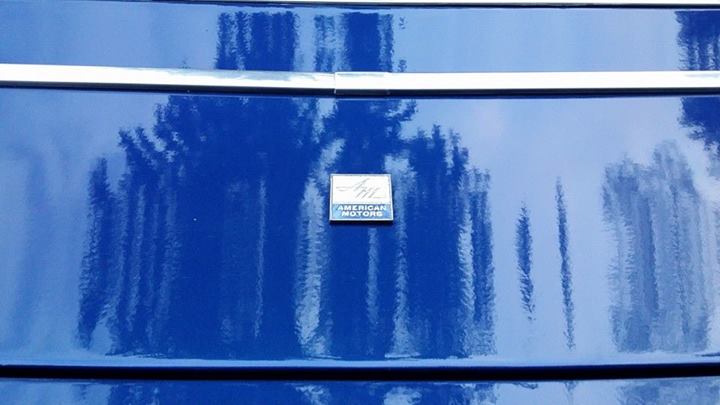 And a close-up... 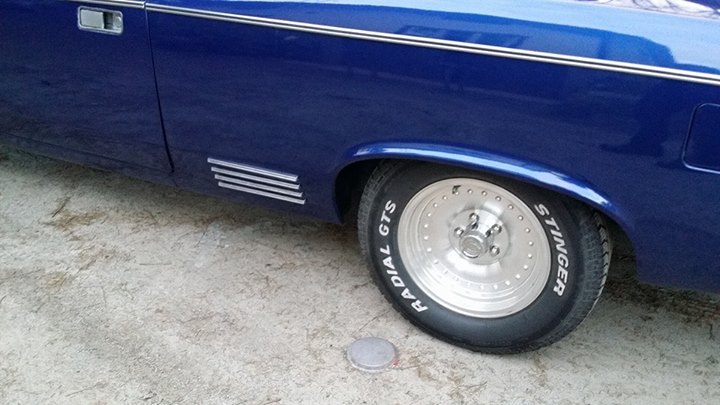 And here's the 'one year only' gills found only in this particular model. 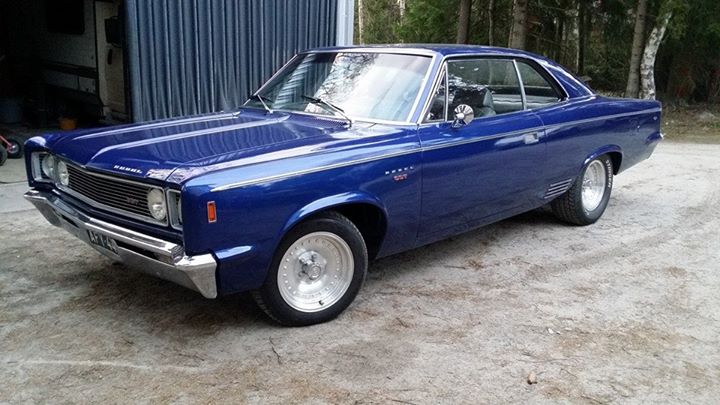 And a quick pick of the whole car, back wheel still awaiting a small adjustment to the ET, so I had the best of times burning out my Hornet's rear tires... (sorry no pics of that..) And on with the project... Smaller details: - Ordered and installed the bumper flat bolts, ended up replacing all of them. The back bumper isn't too good actually (and wrong year) and looking to get that replaced (coming soon). - The carburetor to pedal cable connection to the pedal's side isn't correct for the Rebel, been looking out for a replacement locally but no real luck yet, it's still zip-tied to the pedal - works, but... - Speedo cable arrived and took my time installing it.. And while under the car I also noticed that the trans needed a new oil pan gasket, so I ended up swapping that too. Inside the trans, still looked brand new (I had it redone 3 years back), which made my day. :) 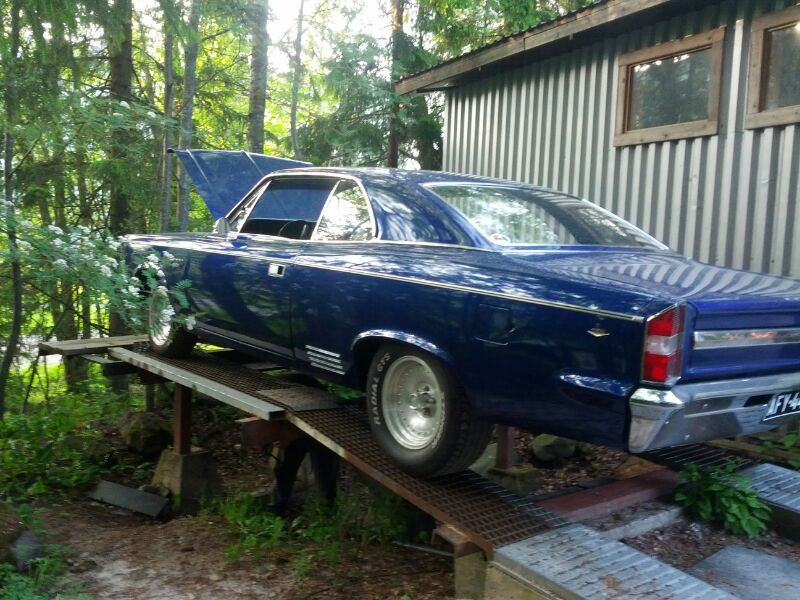 - Gasoline and engine temp gauges don't work, I'm guessing this is missing the regulator.. Have a spare modern one, but haven't had time to get around to it... - Some small adjustments to the kickdown cable helped the trans to work better, it's a wonder how much more drivability it brings :) - The vinyl in the seats was really hard and toughened when I put them back in, but surprisingly it's gotten a bit softer with use. I do still think that it won't last, it's just sat without usage for too long. I'm seeing smaller cracks appear already.. We'll see. The seats themselves aside during installation I was missing the side plastics completely, since they were in pieces when I bought the car (in boxes). Decided to fix this problem. After a full cleanup I filled the holes and cracks with fiberglass filler (Upol Fibral) and it worked like a charm. I used quite a bit of hardener due to the low temp in the garage so I had to work quickly - other than that fairly straightforward. 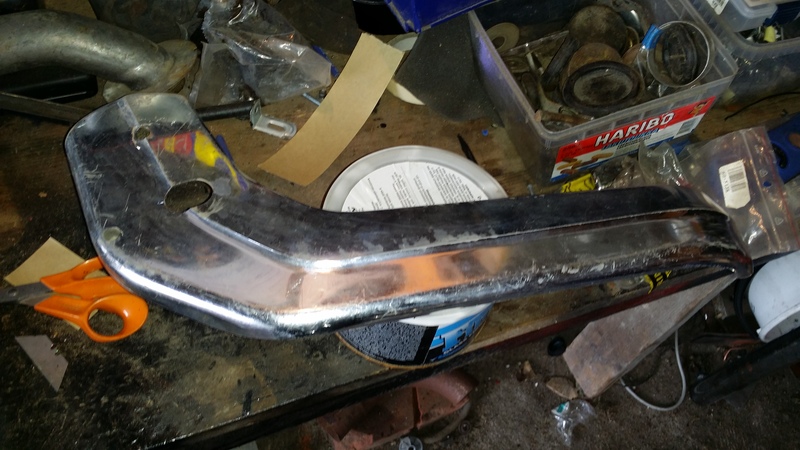 Started off with passeger's side. Looks decent with chrome in the picture, but was actually really scratched and worn. 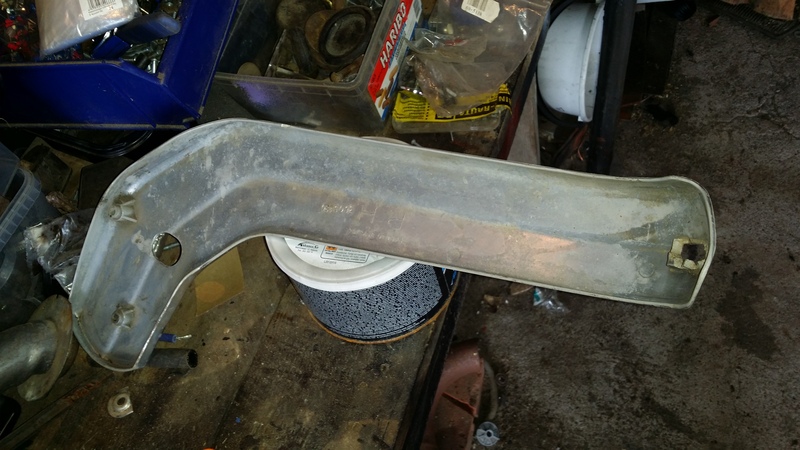 Backside of the same panel you'll see that out of the 3 fastening points only one was still intact.  Some hand sanding later and a de-greaser, I filled the extra cracks and holes. 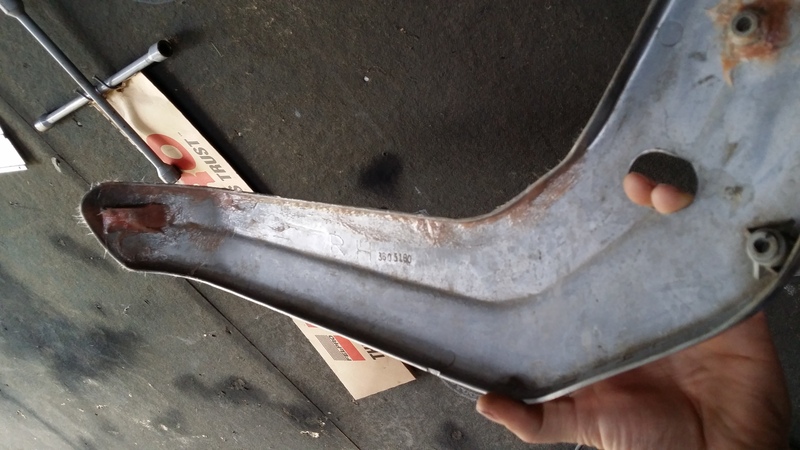 The topmost side of the plastic (when installed) had at least 7 cracks in it so I reinforced that side all the way through, this won't be visible from the outside but will help to last a few years more. 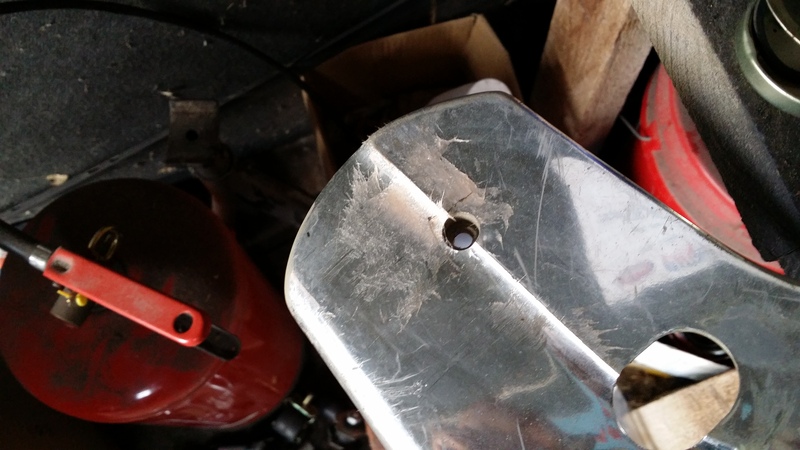 Here's another crack fixed. Passenger's side wasn't really the issue, so all I had left was to fill drill some holes next.. 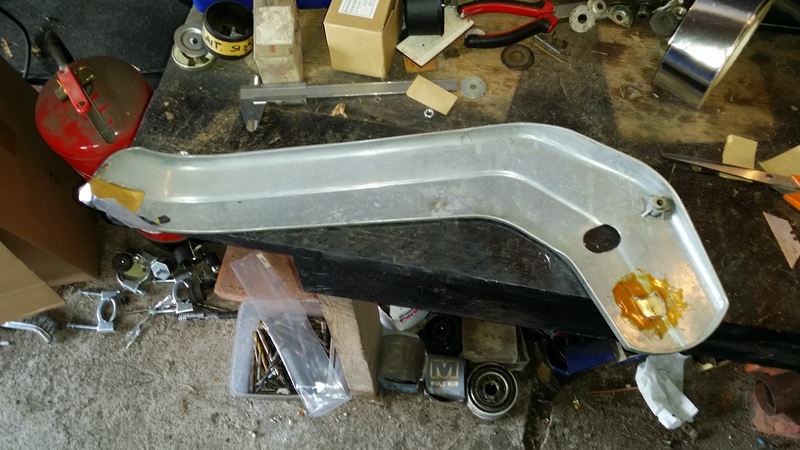 Driver's side was pretty bad, but not being an optimist in finding replacements I had to give it a try as well. I started off by a light sanding, degreaser and then some paper tape to model where the original plastic should have been... 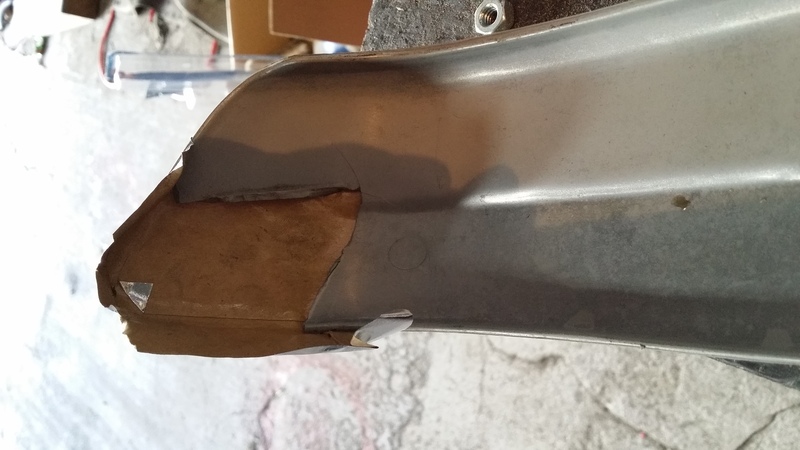 And there was quite a bit missing, but I used the passenger side as a template. 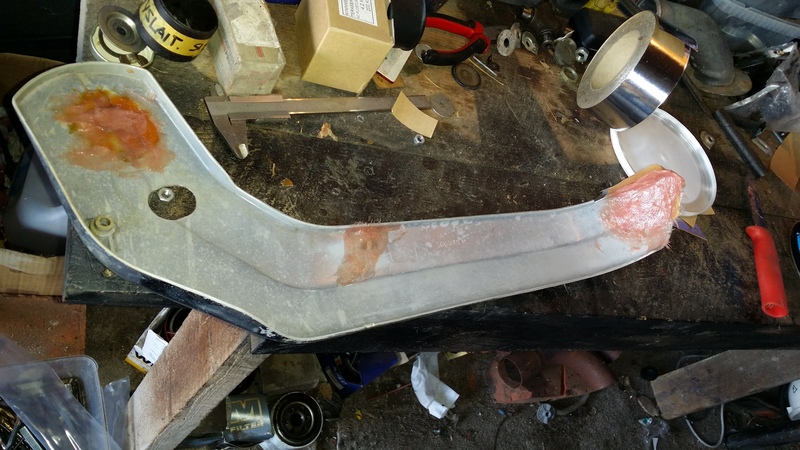 And then some fiber glass filler to create the major missing parts... 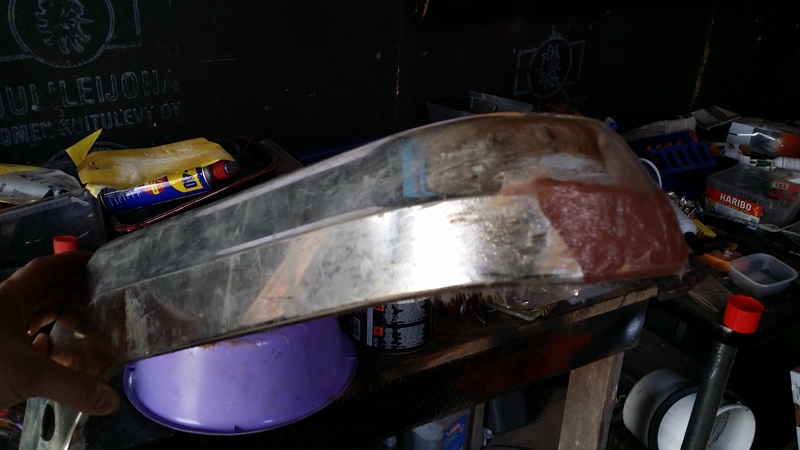 After drying, I removed the tape and first draft didn't look like much., so I added more material as long as it looked like it needed it.. 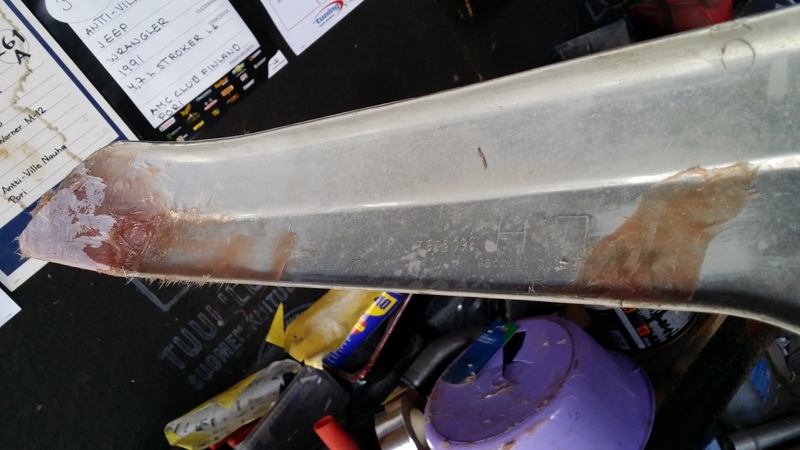 the back side got some shaping... 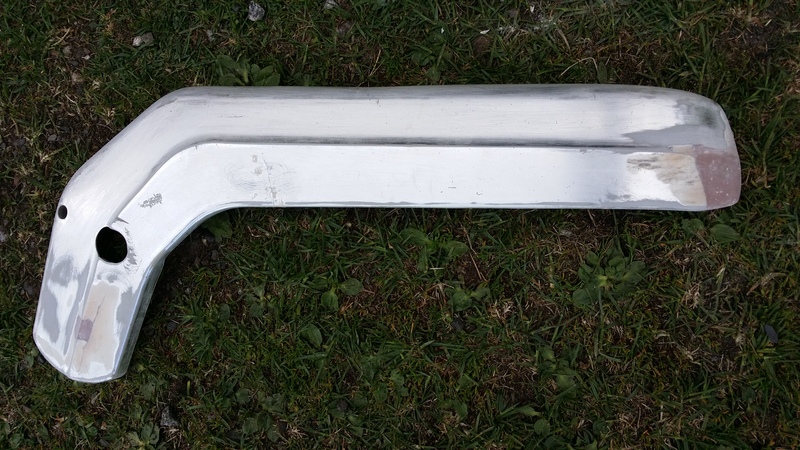 And here is the final draft before pre-paint. I filled some bigger scratches also with normal filler. 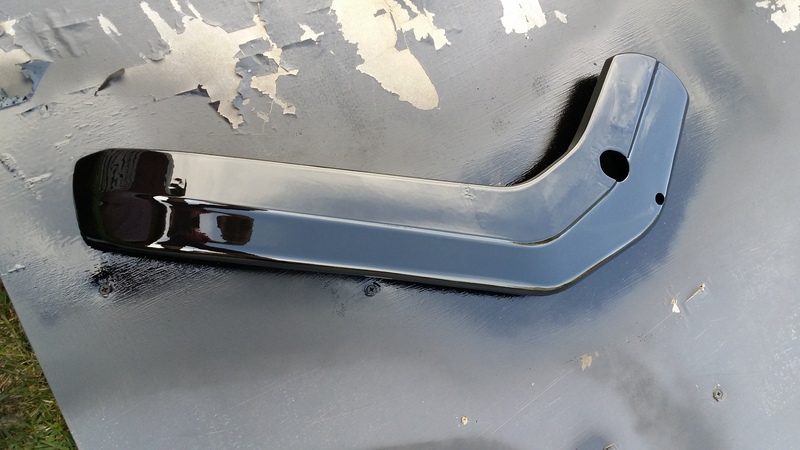 I used plastic primer and then normal rattle can paint.. 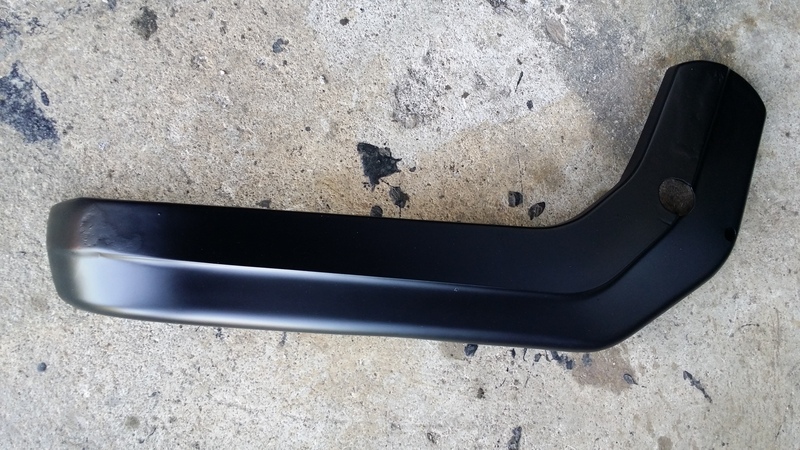 And after the paint turned flat, I used some more filler to even further... 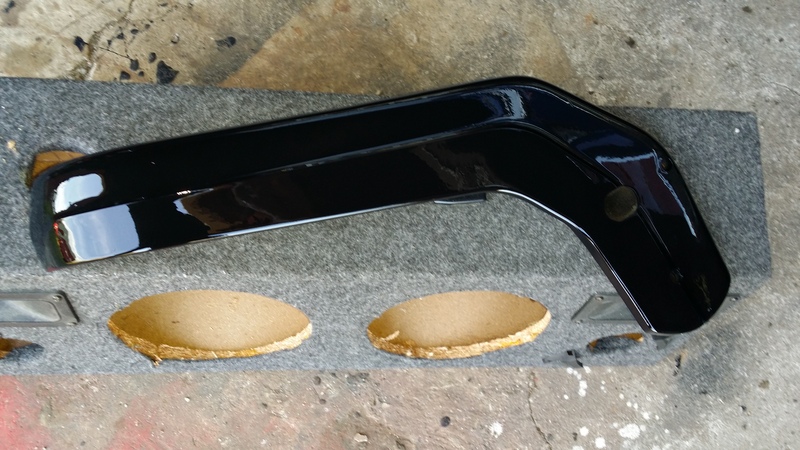 Here's the passenger's side after first paint job, this one turned out better and quicker due to being in better condition to start with.. 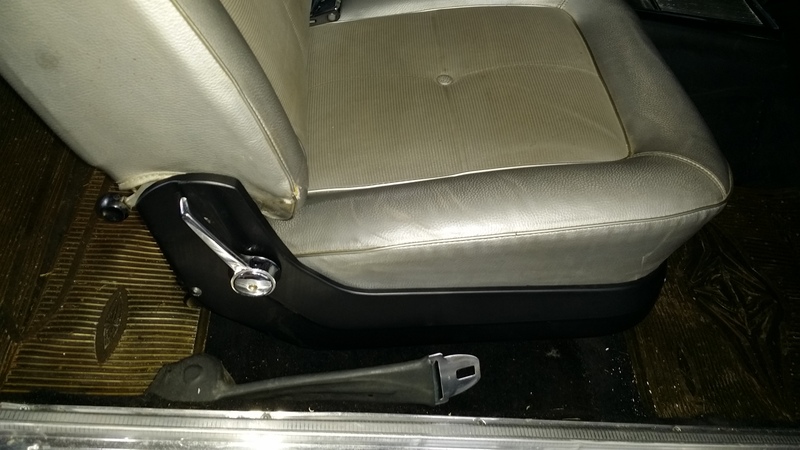 Then all I had left was to drill a few holes in the right places and while installing it I ended up changing the lower rear install screw to a bolt fastened to the seat from inside. It really makes the installation more sturdy and less likely to move around. To put it on the bolt, I just used a small nut and spacer. I plan to wrap these in 3M chrome tape, I actually bought the stuff already, just having trouble finding the time.  And the car is driven daily, here's a pic with the wife (from June 2014, first summer with the car). |
|
|
AMC Club Finland (AMCCF) Founder
- Hornet SST 2D 1970 343+M22 RWB - Rebel SST 2D Hardtop 1969 360+727 Blue - Javelin SST 1971 401+700R4 White - Hornet 2D 1970 401+727 Primer Grey racecar project |
|
|
|
|
Post Reply
|
Page <1 4567> |
 Tweet
Tweet
|
| Forum Jump | Forum Permissions You cannot post new topics in this forum You cannot reply to topics in this forum You cannot delete your posts in this forum You cannot edit your posts in this forum You cannot create polls in this forum You cannot vote in polls in this forum |


 Click for TheAMCForum Rules
 Topic Options