
 |
|
Your donations help keep this valuable resource free and growing. Thank you.
|
1970 Javelin, back at it!! |
Post Reply 
|
Page <1234 9> |
| Author | ||
TheHubble 
AMC Apprentice 
Joined: Aug/21/2013 Location: United States Status: Offline Points: 97 |
 Post Options Post Options
 Thanks(0) Thanks(0)
 Quote Quote  Reply Reply
 Posted: Mar/10/2014 at 6:15pm Posted: Mar/10/2014 at 6:15pm |
|
|
||
 |
||
232jav3sp 
AMC Addicted 
Joined: Jan/09/2013 Location: Texas Status: Offline Points: 2451 |
 Post Options Post Options
 Thanks(0) Thanks(0)
 Quote Quote  Reply Reply
 Posted: Mar/10/2014 at 7:37pm Posted: Mar/10/2014 at 7:37pm |
|
I understand. I had a 49 GMC truck that I was going to restore before I got the Javelin. The more I thought about it, the more I came to realize that truck needed A LOT of body work! So, I sold it and bought this old girl. I did try to get the El Camino before I stumbled across the Javelin. Although it needs much work, that Elco has it's original 396, q-jet, m20 4sp, posi 12 bolt, a/c, AND vinyl top! Rare! Anyhow, I'll be posting all progress as/when it happens. Hoping for a productive night Wednesday! |
||
 |
||
TheHubble 
AMC Apprentice 
Joined: Aug/21/2013 Location: United States Status: Offline Points: 97 |
 Post Options Post Options
 Thanks(0) Thanks(0)
 Quote Quote  Reply Reply
 Posted: Mar/12/2014 at 7:31pm Posted: Mar/12/2014 at 7:31pm |
|
|
Its wednesday night! Have any updates for us?
|
||
 |
||
232jav3sp 
AMC Addicted 
Joined: Jan/09/2013 Location: Texas Status: Offline Points: 2451 |
 Post Options Post Options
 Thanks(0) Thanks(0)
 Quote Quote  Reply Reply
 Posted: Mar/14/2014 at 5:15pm Posted: Mar/14/2014 at 5:15pm |
|
|
Sorry, got in late Wednesday night from working on the car. Then, didn't have my computer yesterday. Will post up what I got done Wednesday night in an hour or so.
|
||
 |
||
232jav3sp 
AMC Addicted 
Joined: Jan/09/2013 Location: Texas Status: Offline Points: 2451 |
 Post Options Post Options
 Thanks(0) Thanks(0)
 Quote Quote  Reply Reply
 Posted: Mar/14/2014 at 7:58pm Posted: Mar/14/2014 at 7:58pm |
|
|
Okay, this is all that I accomplished Wednesday evening. Sorry for not having a ton if info. This is going to be fairly slow goings as this is my first time welding body panels. Been welding for a few years now, and have never done anything this thin, for this purpose. Trying to take it slow and get a feel for it.
Passenger side rear quarter from donor car, before new lower corner. 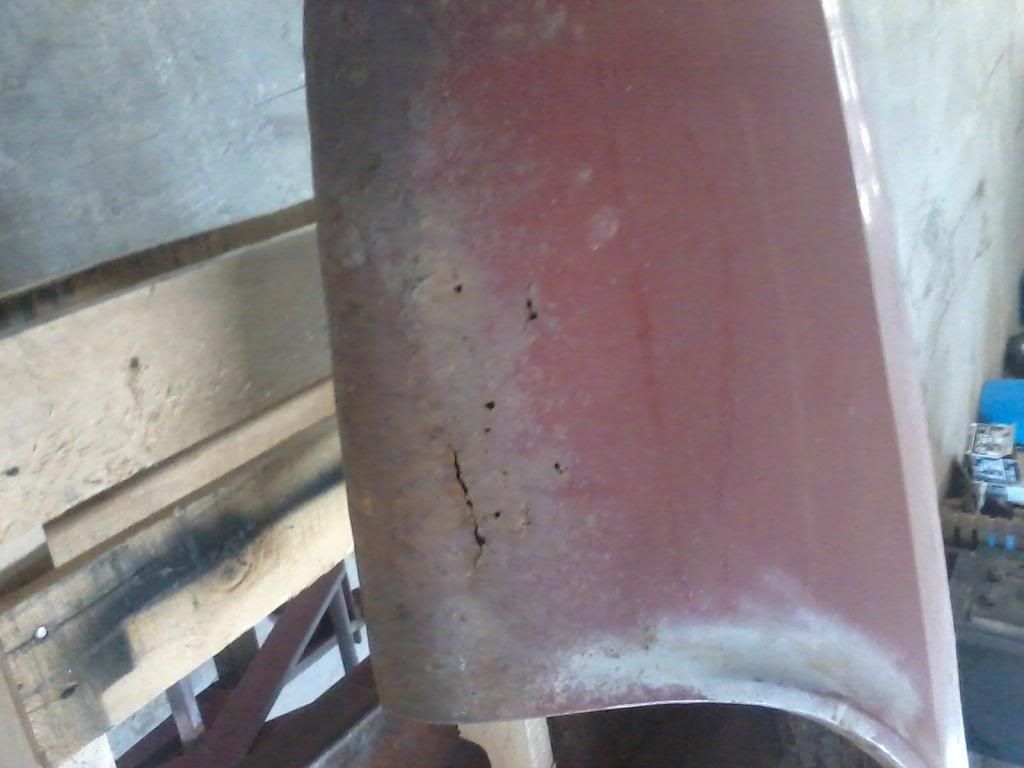 Here it is with lower panel cut out. Some unknown perforation in the trunk drop off. Going to replace with the new one I have, once I get the quarter cut out and hung on the car. 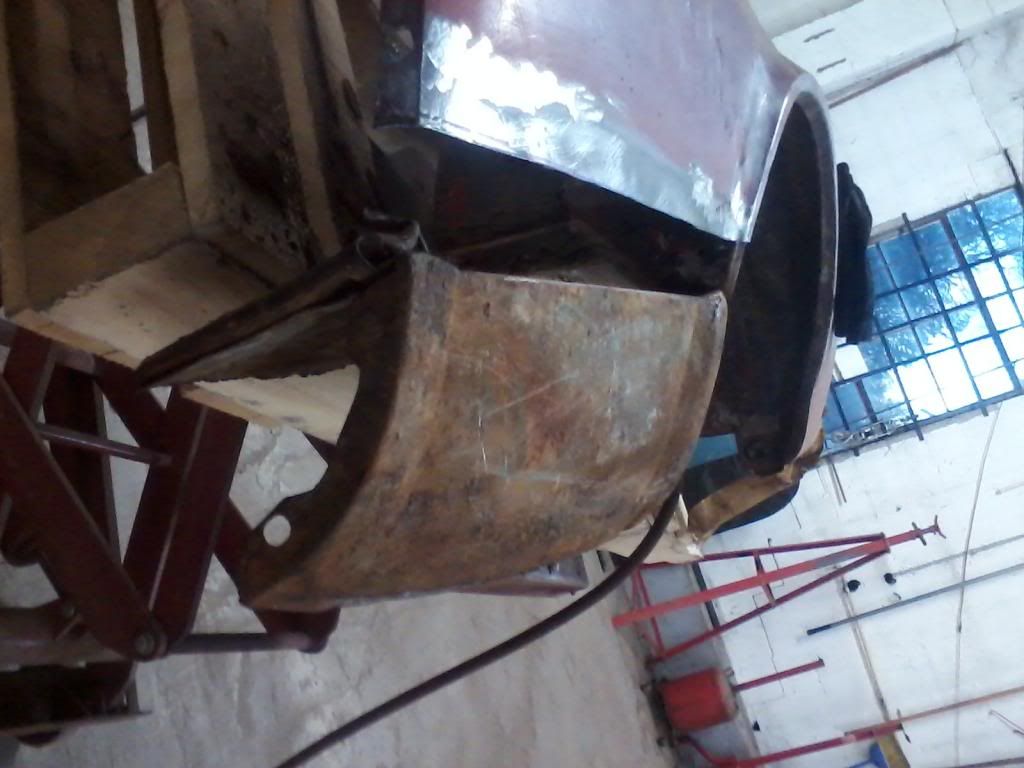 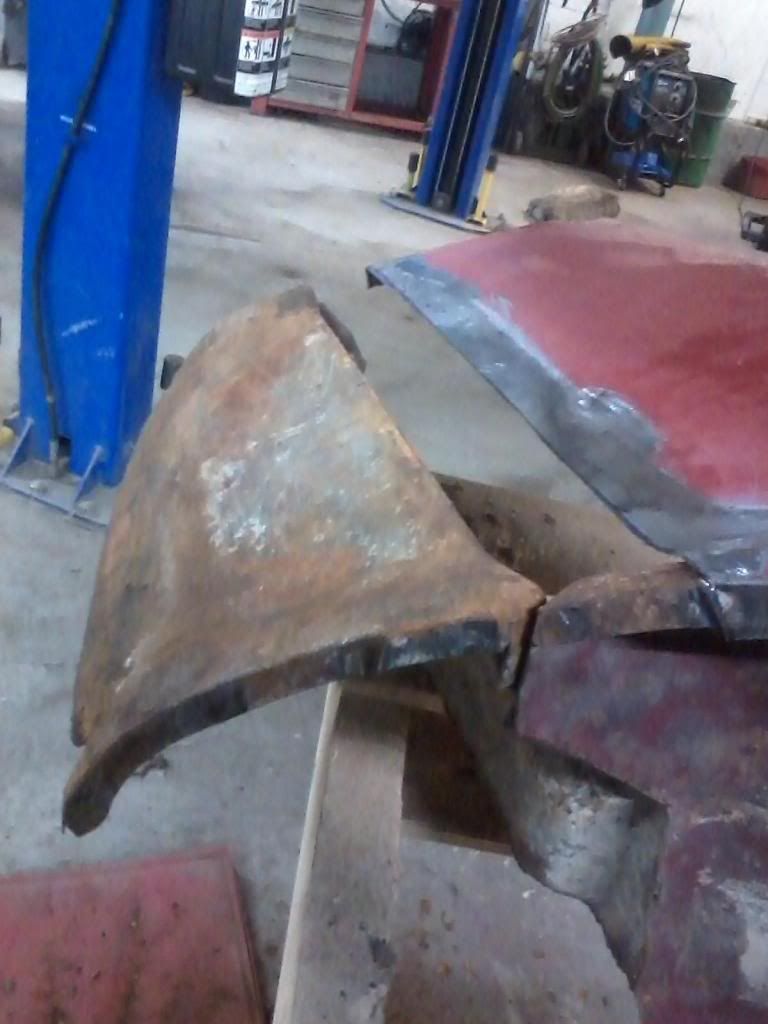 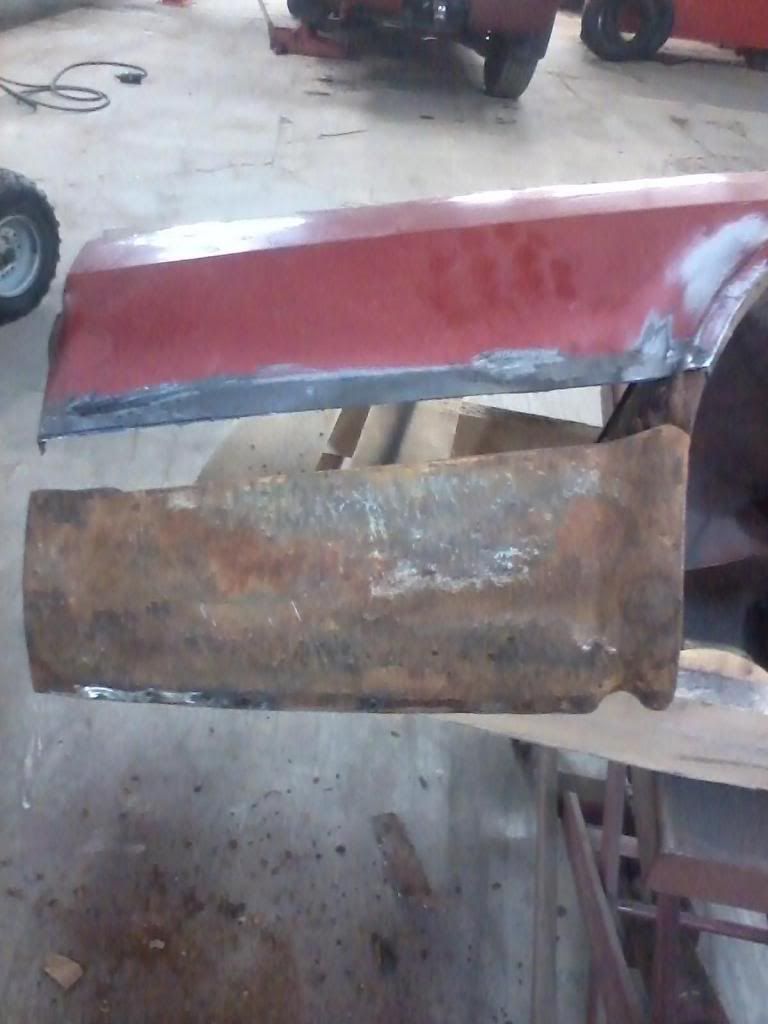 New lower panel clamped in place. 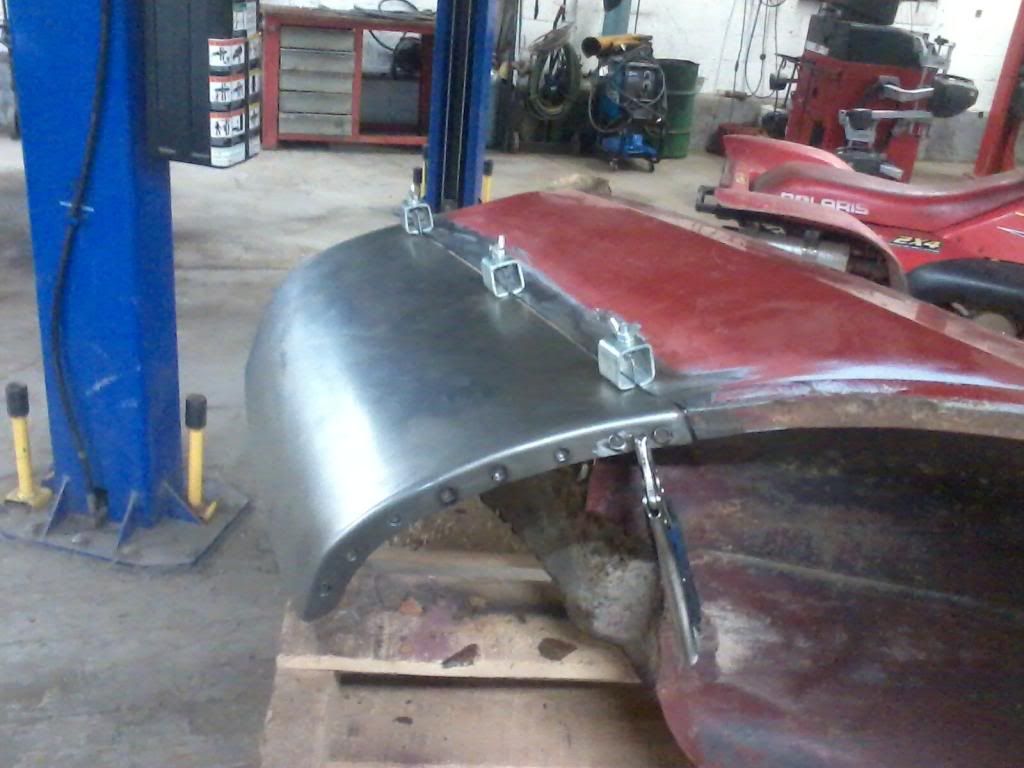 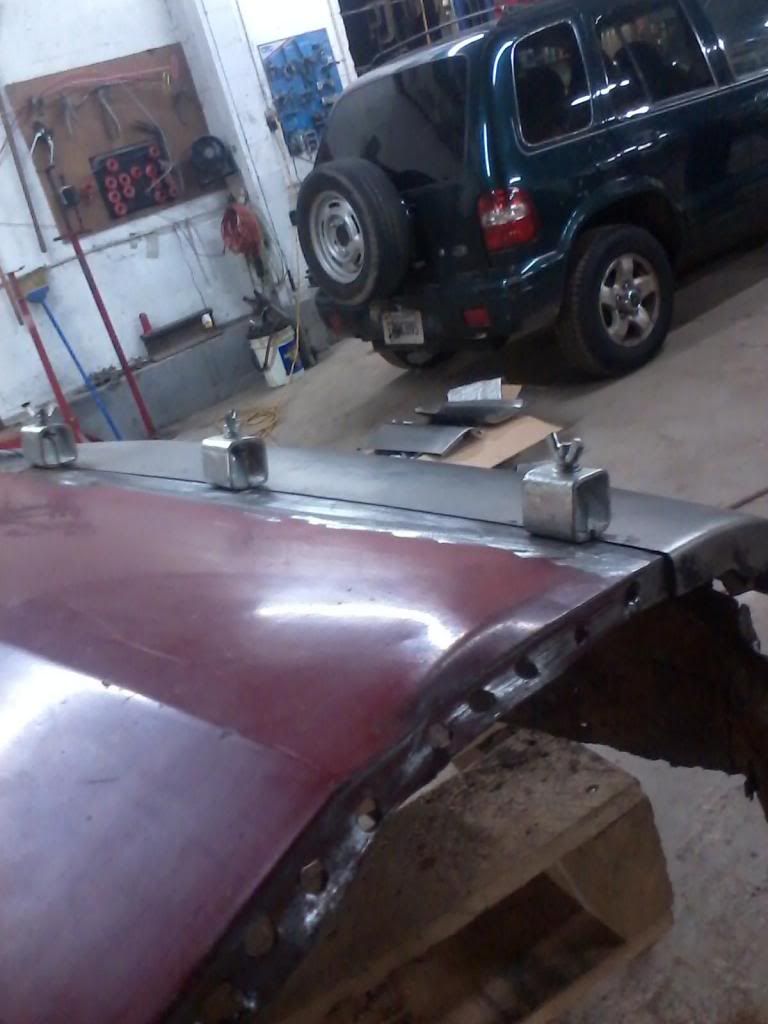 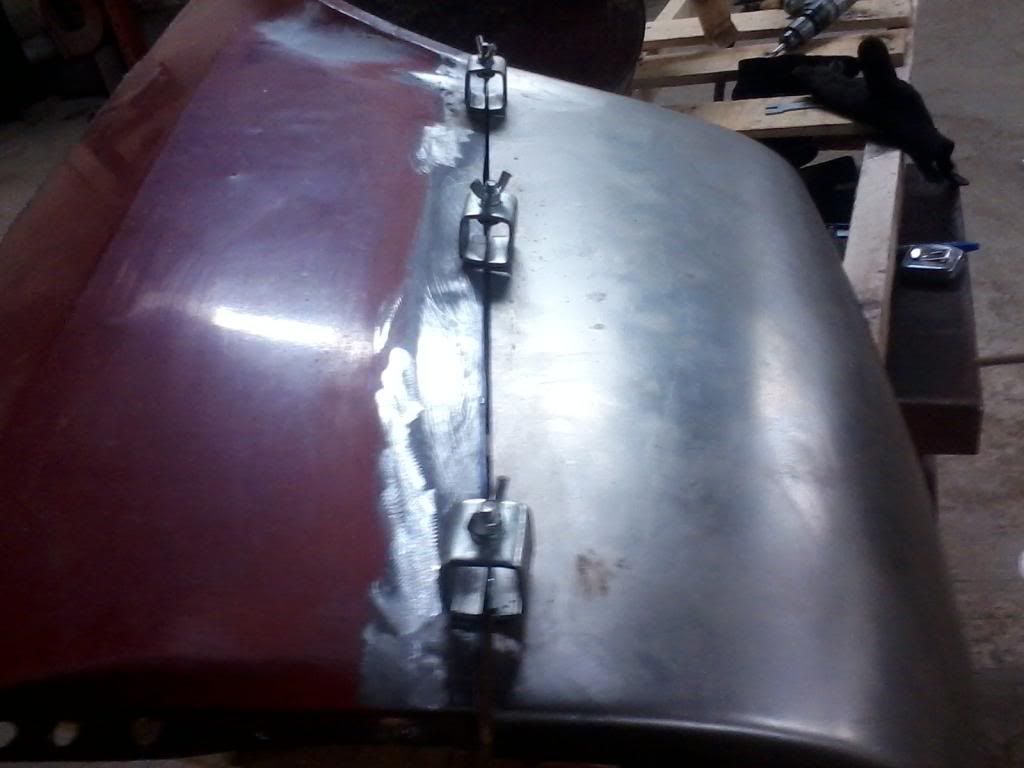 First complete welded seam. Now, remember, I am a mechanic, not a professional body man by any means. 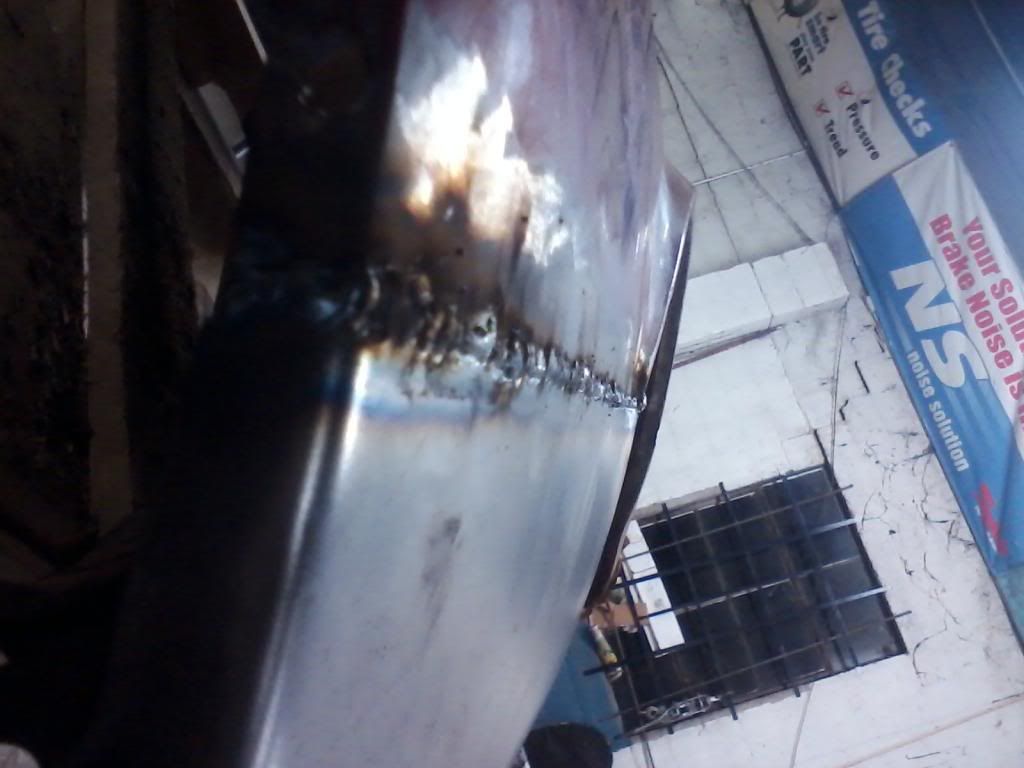 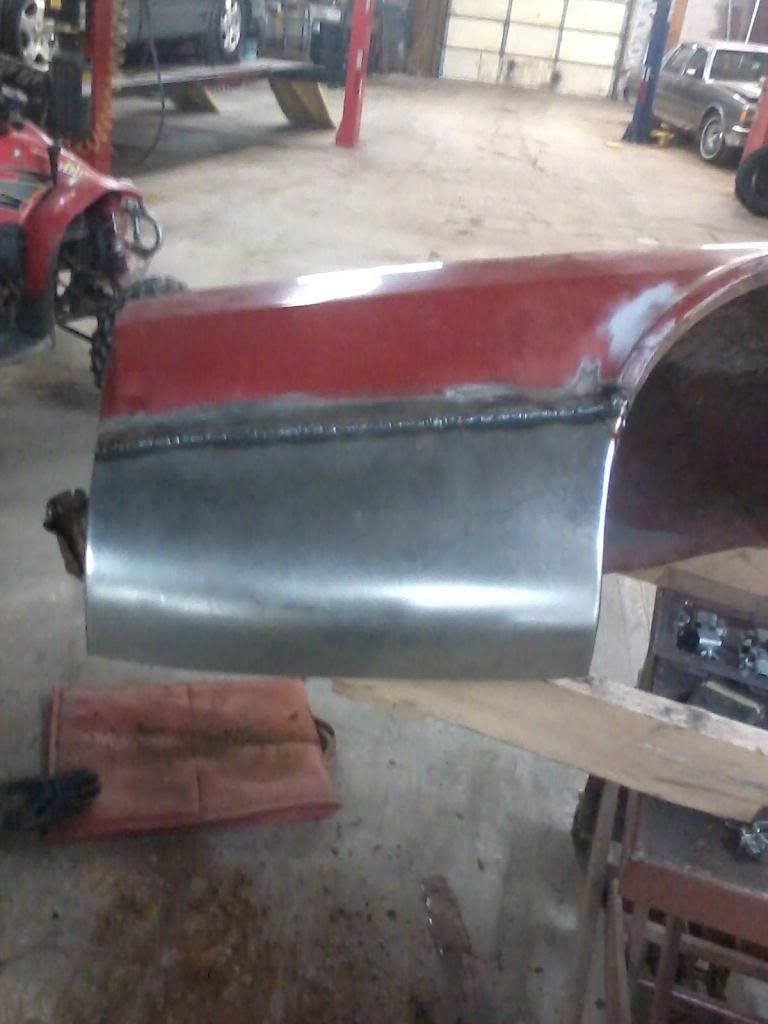 Welds ground down. There is one low spot in the weld near the wheel opening, and high spot near the tail panel. Nothing too major. Got a lot of it out with a little heat and hammer and dolly. 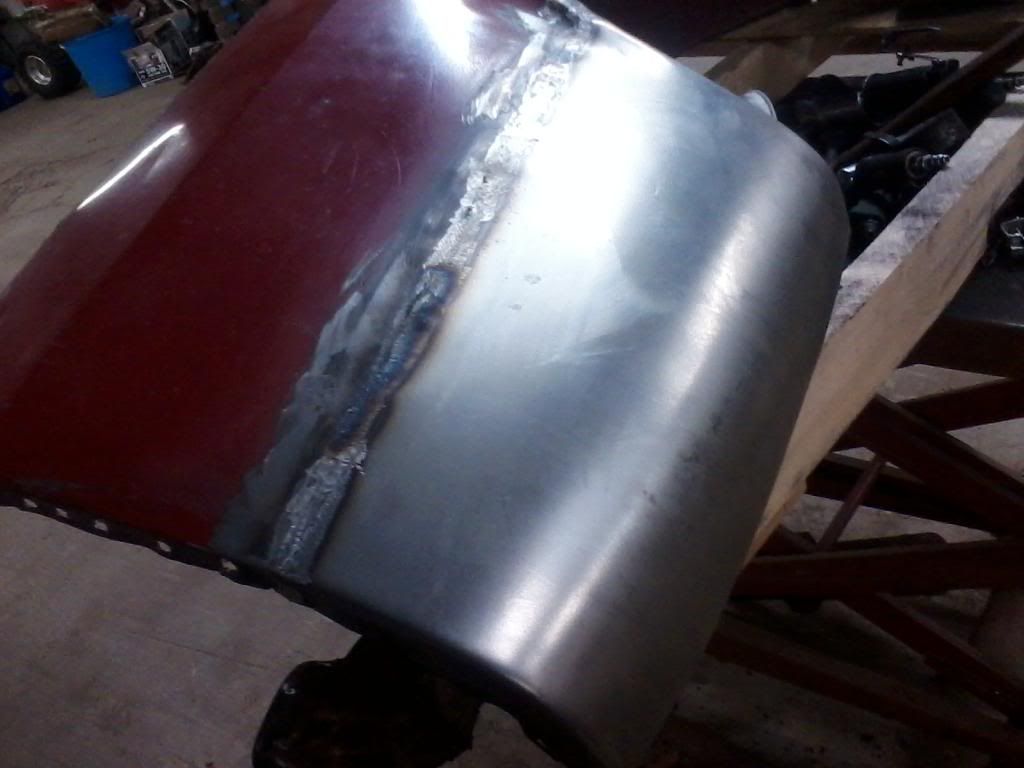 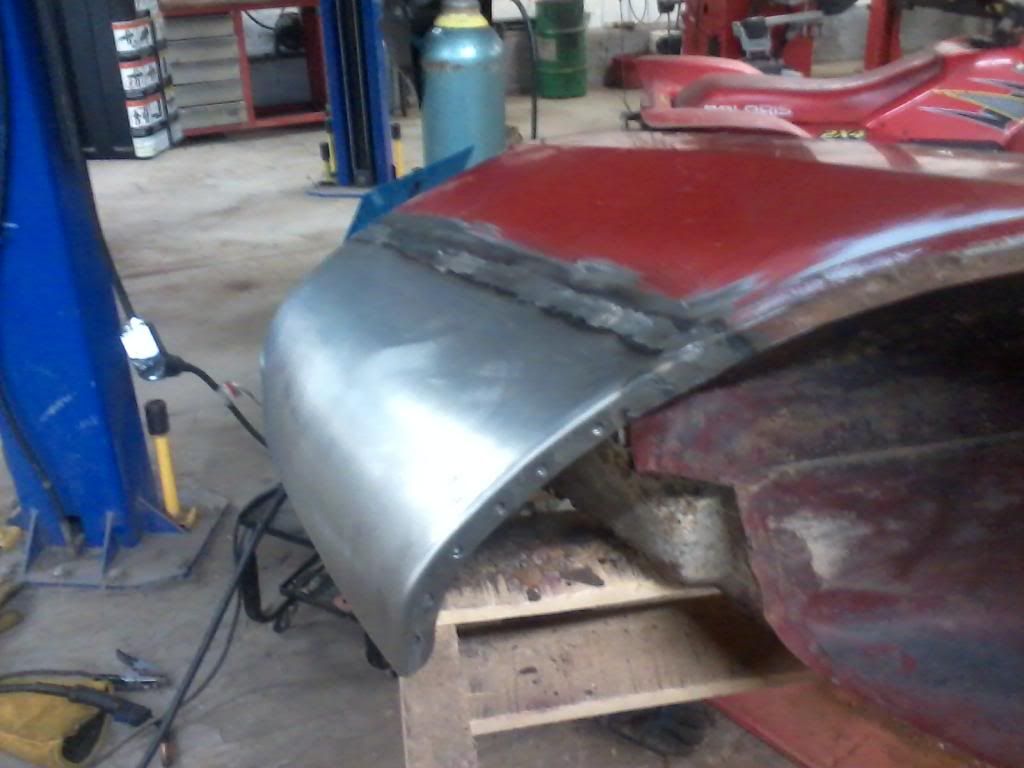 Here it is sanded with 80 grit. Sorry for the poorer quality pictures. Just using my phone. 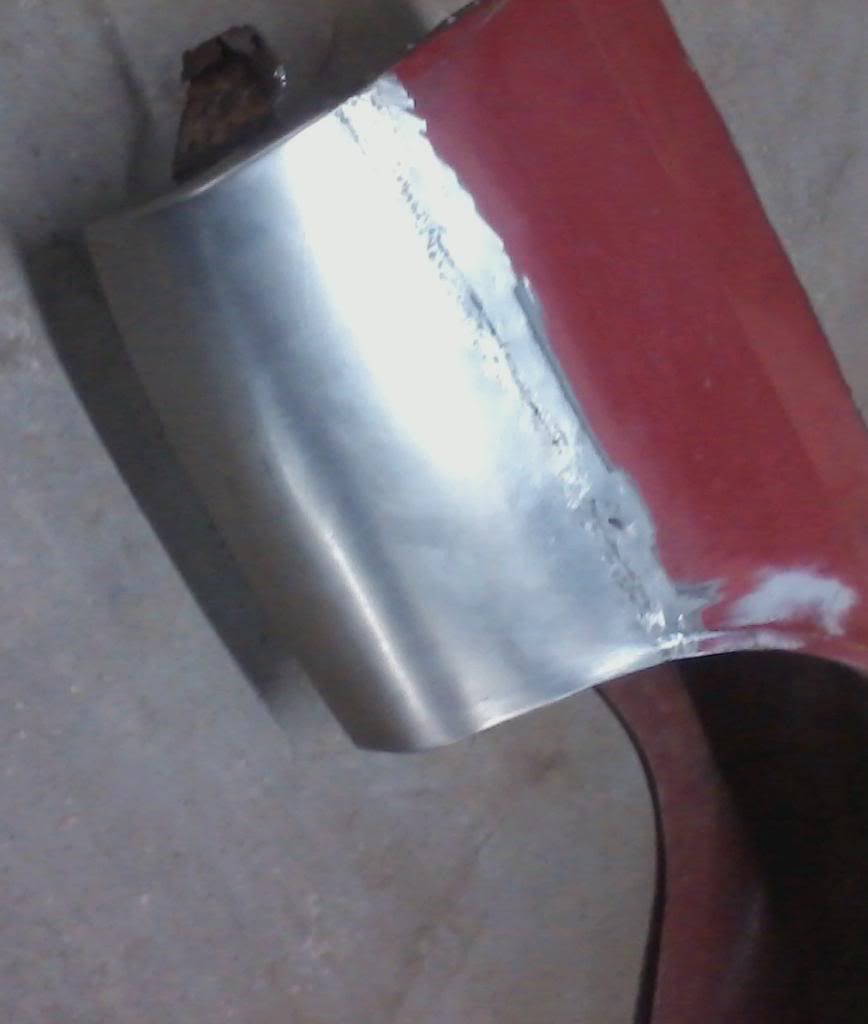 Only other news is that I got these really nice, driver quality, original sun visors. In green! You can see the one has a small dimple from a clip of sorts being left on for a while. Not too bad. 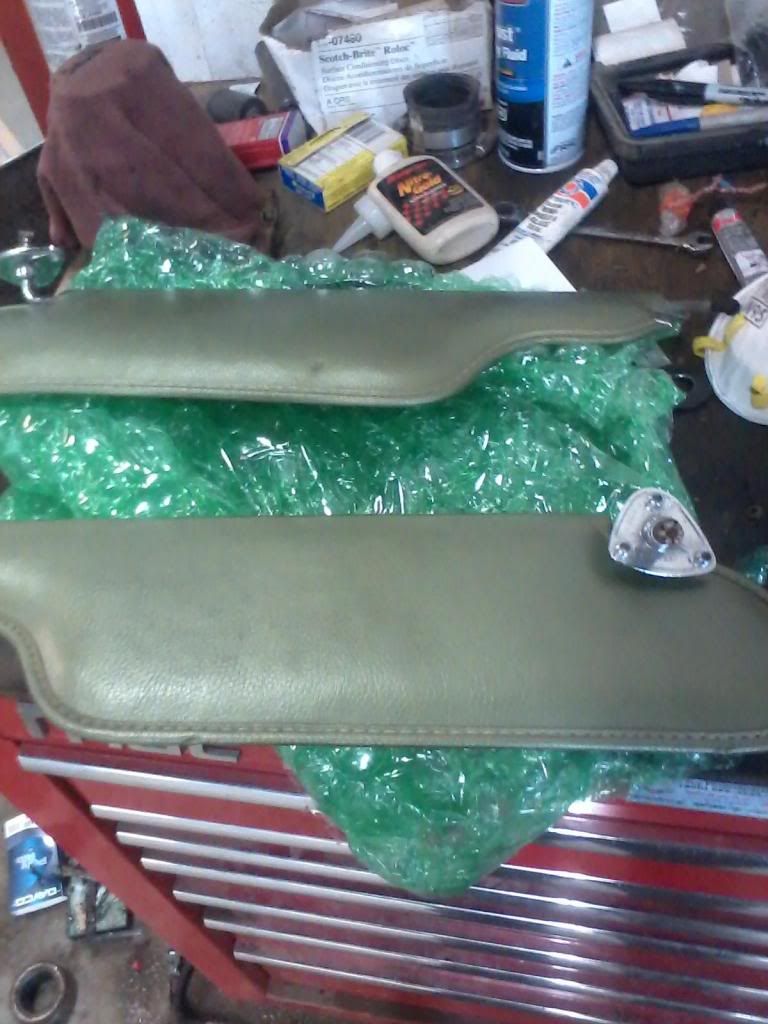 I did had my girlfriend wire-wheel the all the welded seams around the tail panel. She couldn't get there as early as we had hoped. So that was all she was able to do. Will have here clean up the sun visors next time, and pull the rear seat back out. I did sand down the quarters on the car right where I will be cutting them out and welding the new ones in. All in all I'm pretty happy with how I did considering this was my first time doing such welding. The bottom of the wheel opening came out really well. No offset body line there! |
||
 |
||
RSX 401 
AMC Addicted 

Joined: Oct/21/2010 Location: Southeast Texas Status: Offline Points: 689 |
 Post Options Post Options
 Thanks(0) Thanks(0)
 Quote Quote  Reply Reply
 Posted: Mar/14/2014 at 8:56pm Posted: Mar/14/2014 at 8:56pm |
|
|
Great mechanic skills you have there. I think I'm going to enjoy this thread.......
|
||
|
I'll follow these lines a little ways more,
Until I can find what I'm looking for. With the pedal to the metal, I'm gaining my speed. Riding down low in my AMC..... |
||
 |
||
232jav3sp 
AMC Addicted 
Joined: Jan/09/2013 Location: Texas Status: Offline Points: 2451 |
 Post Options Post Options
 Thanks(0) Thanks(0)
 Quote Quote  Reply Reply
 Posted: Mar/15/2014 at 3:55pm Posted: Mar/15/2014 at 3:55pm |
|
|
Thanks. I'm just anxious to get on to the chassis work. Love doing steering, suspension, brakes, alignment! lol
|
||
 |
||
232jav3sp 
AMC Addicted 
Joined: Jan/09/2013 Location: Texas Status: Offline Points: 2451 |
 Post Options Post Options
 Thanks(0) Thanks(0)
 Quote Quote  Reply Reply
 Posted: Aug/01/2014 at 6:05pm Posted: Aug/01/2014 at 6:05pm |
|
|
Wow, been a good while since I have updated this! Only now I actually have updates! Put my dad's Nova in our side bay the week before last, moved the Mercury Comet, and turned my Javelin around with it's butt to the door so I could work on the front end. Last week, I got the grill, bumper, hood latch, fenders and hood off. Found some nice little "gifts" from some long evicted tenants of the fender troughs.
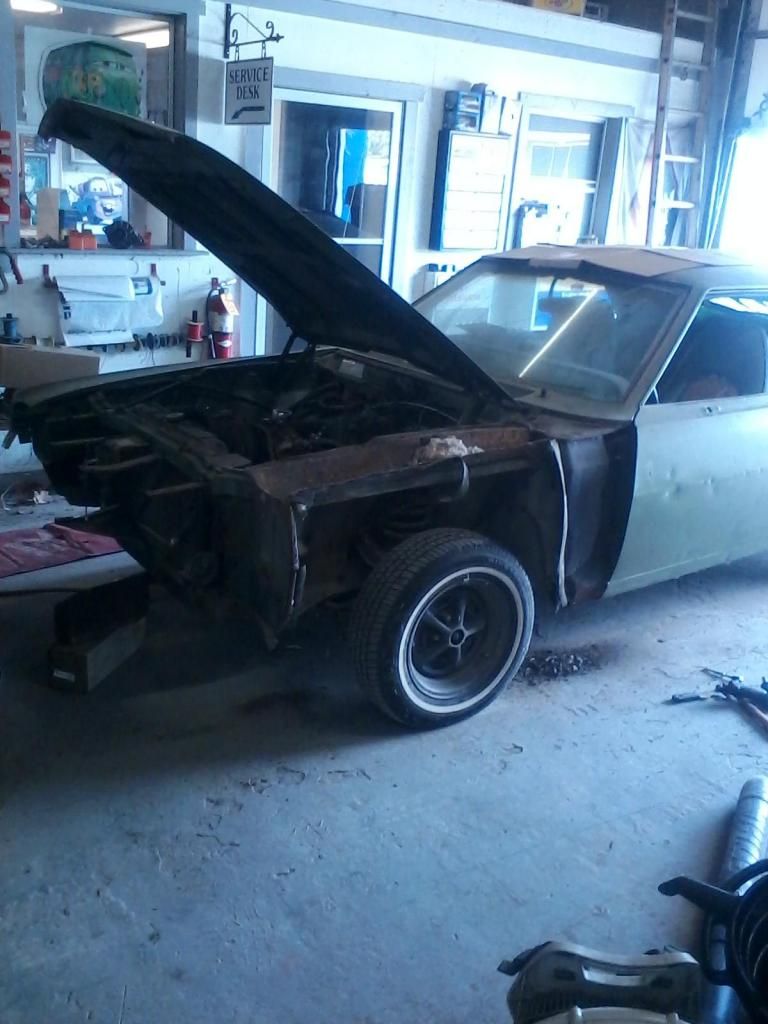 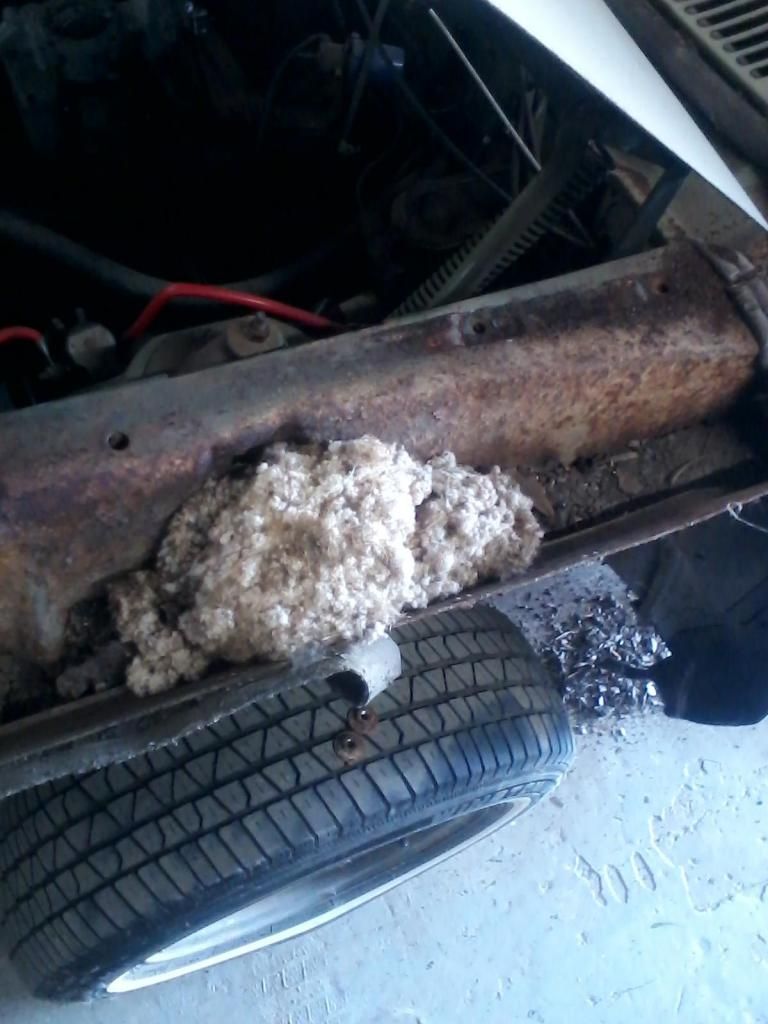 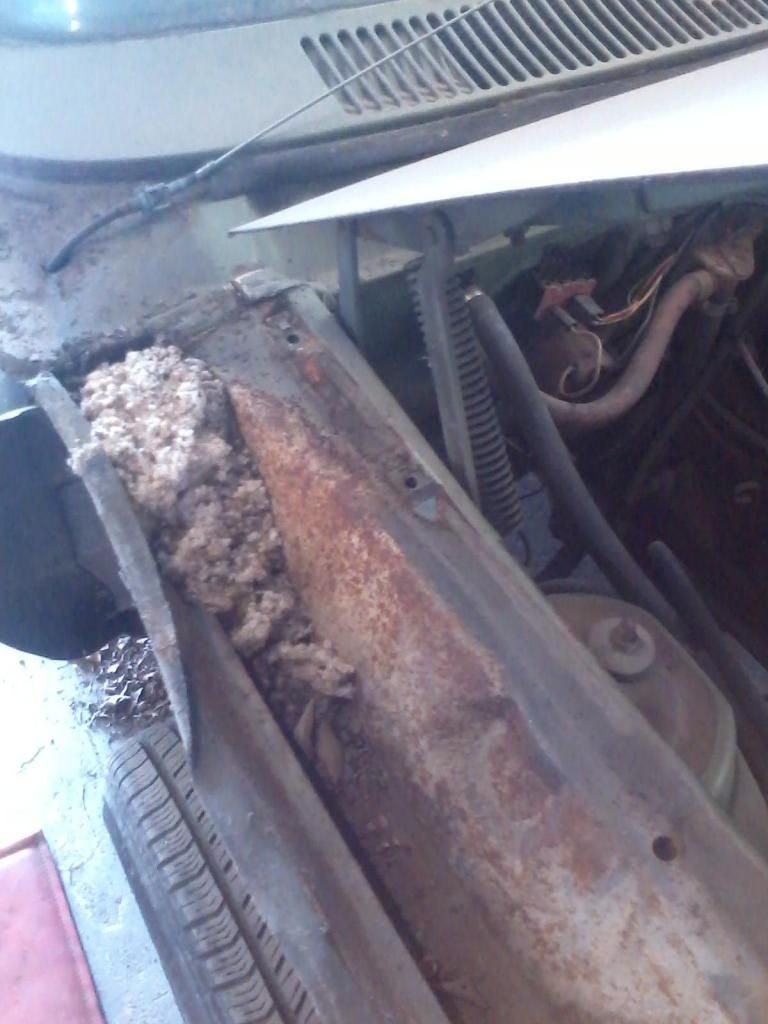 Found another rot hole :/ 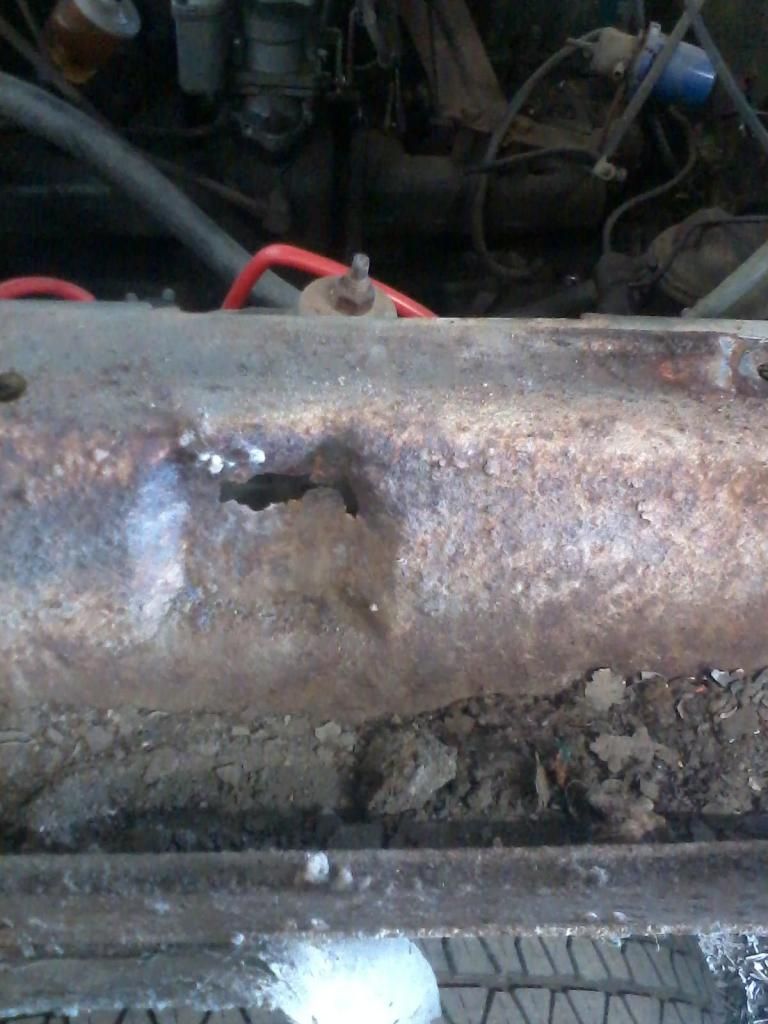 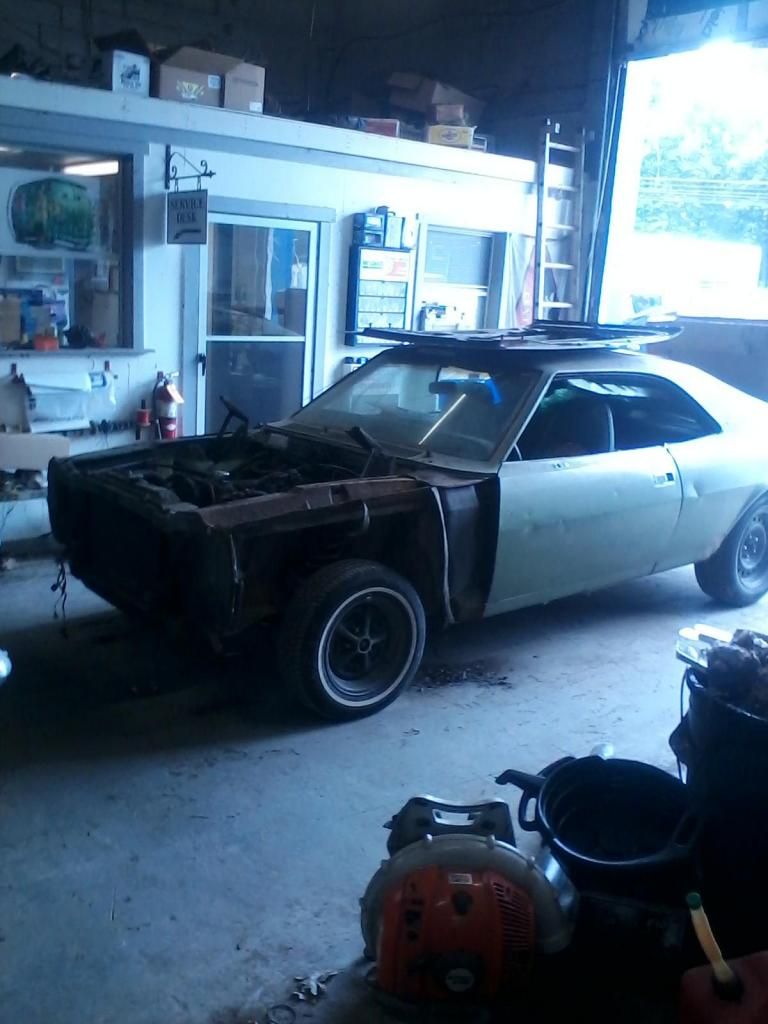 Got the radiator out, and everything disconnected from the engine and trans this week. The coolant that came out was cleaned than many of the cooling systems I service on cars 35-40 years newer! Today, the engine and trans came out. Will raise the car higher come Monday, and roll the engine and trans out from under it. 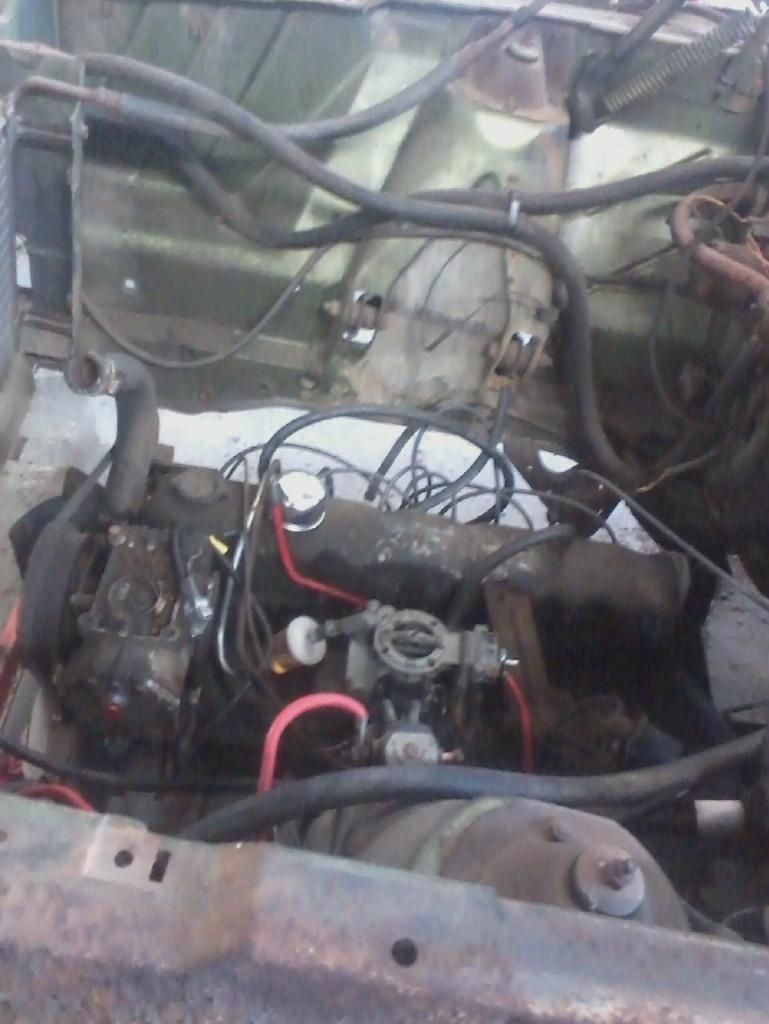 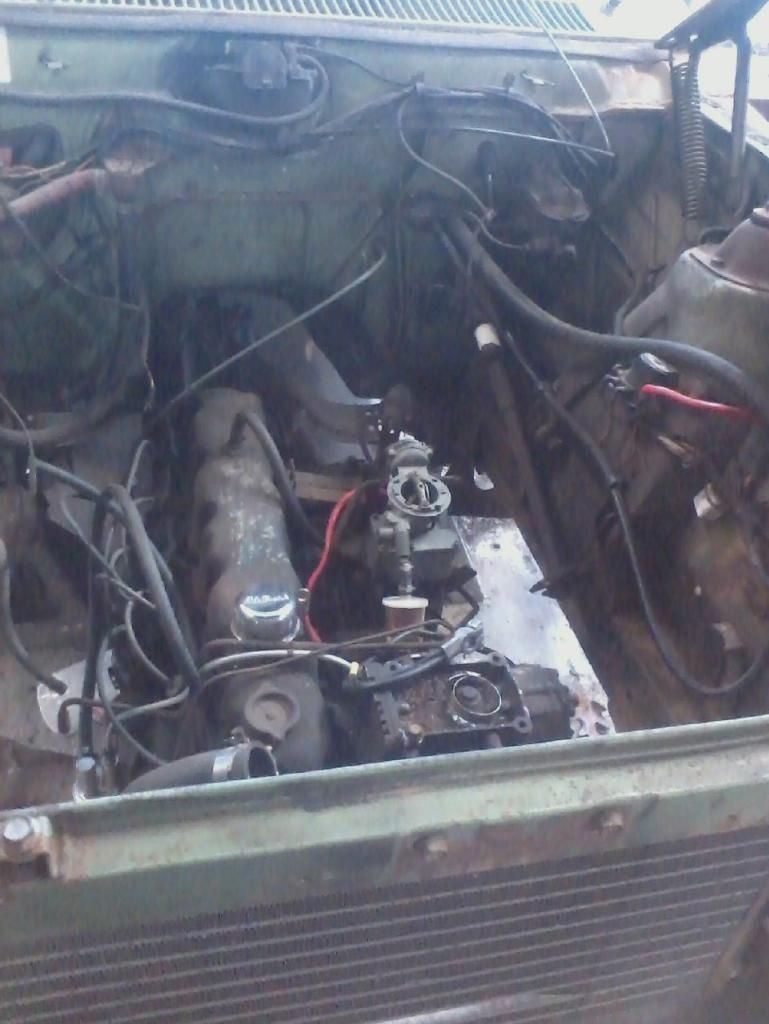 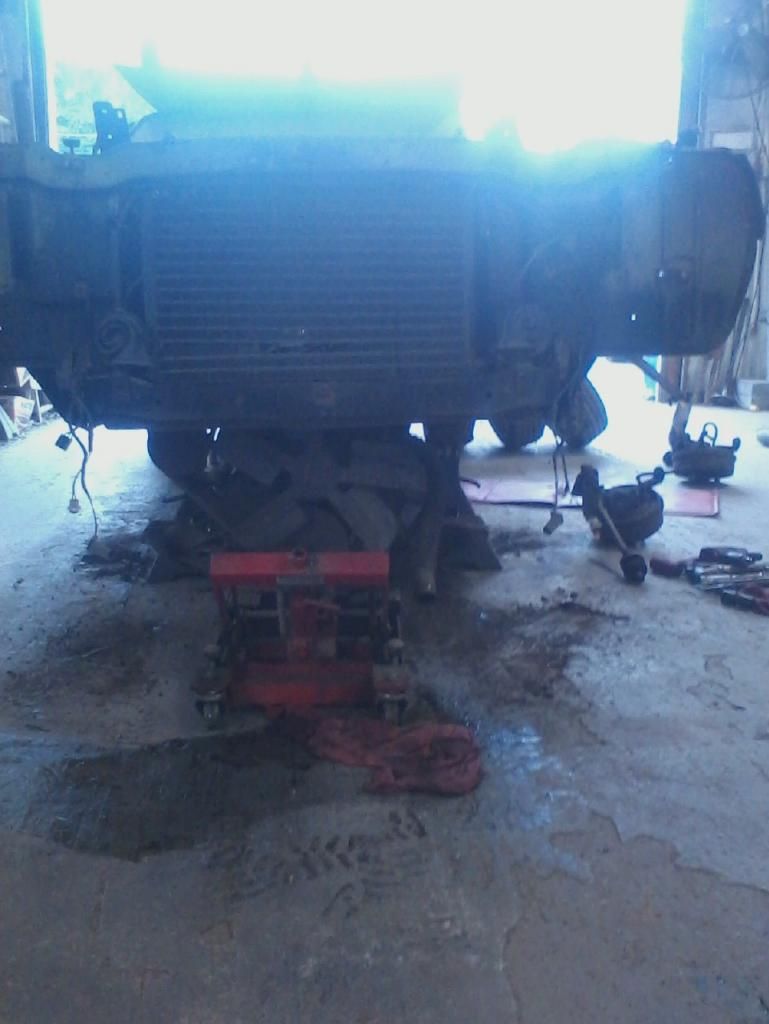 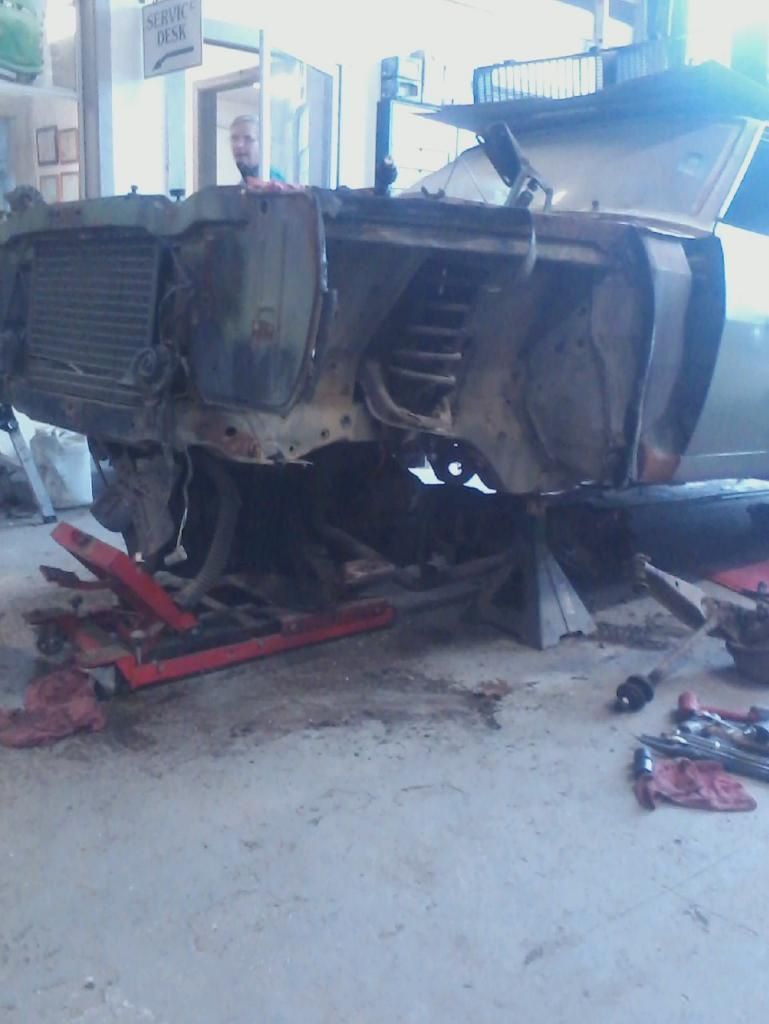 By the way, this was THE easiest engine and trans I have EVER had to remove from a car. Only one that I can remember that was nearly as easy, was a Chevy HHR I put an engine in, back in April. Now that the engine is out I can start removing the driver's frame rail and fender trough. Should be fun... Other things I have gathered for her are a Clifford singe plane intake (prefer dual, but it was a great deal), forge Keith Black - Icon pistons for the 4.6L, power wiper motor and bracket, all new MOOG steering and suspension parts, KYB shocks, and MOOG coil springs. |
||
 |
||
232jav3sp 
AMC Addicted 
Joined: Jan/09/2013 Location: Texas Status: Offline Points: 2451 |
 Post Options Post Options
 Thanks(0) Thanks(0)
 Quote Quote  Reply Reply
 Posted: Aug/09/2014 at 8:28pm Posted: Aug/09/2014 at 8:28pm |
|
|
Big progress the last two days.
This was the rot hole in the driver's side frame rail. Right below the rear upper control arm mount. 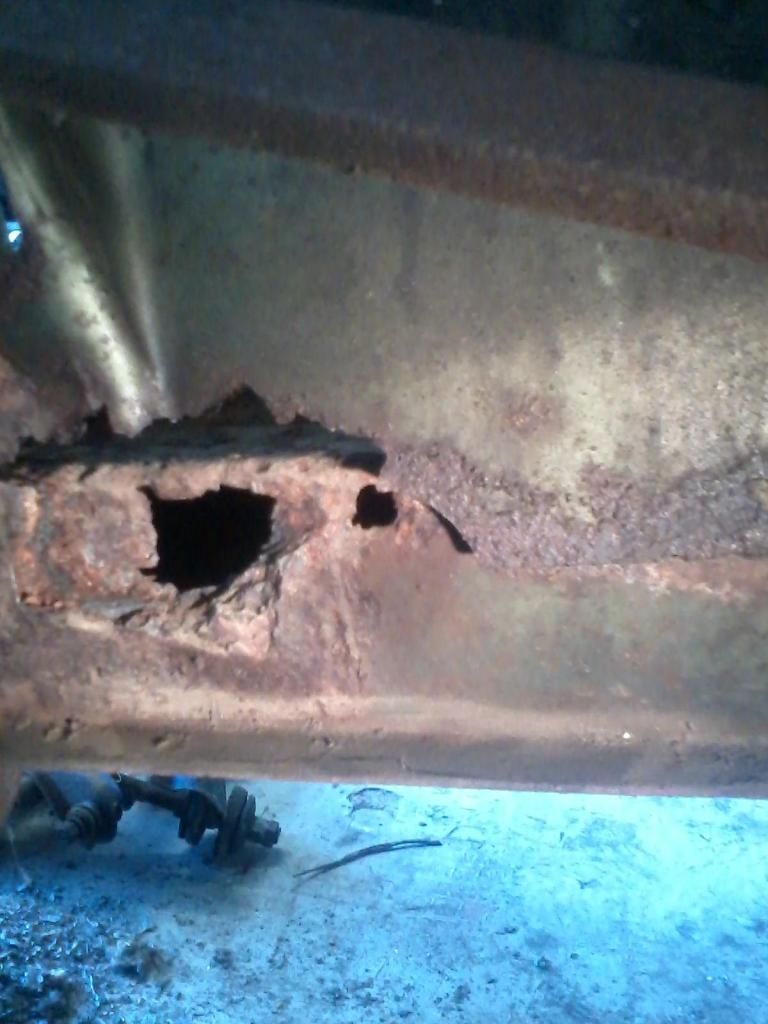 As you can see, the strut tower was rotted out, too. 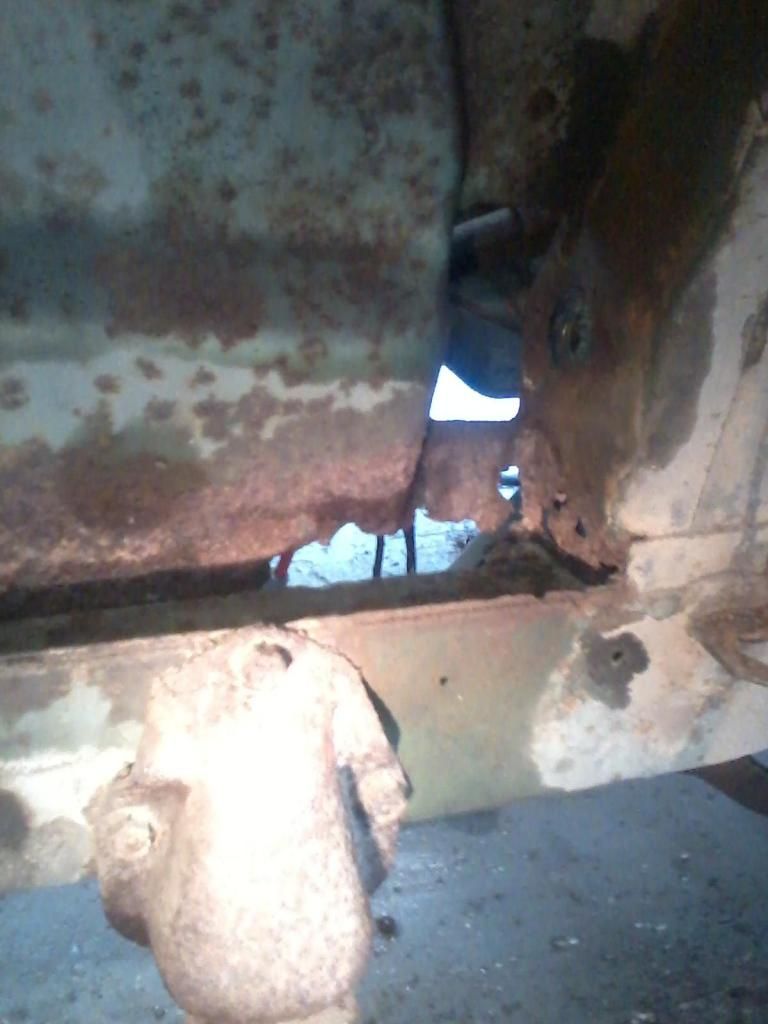 All the spot welds drilled out and separated on the headlight panel. 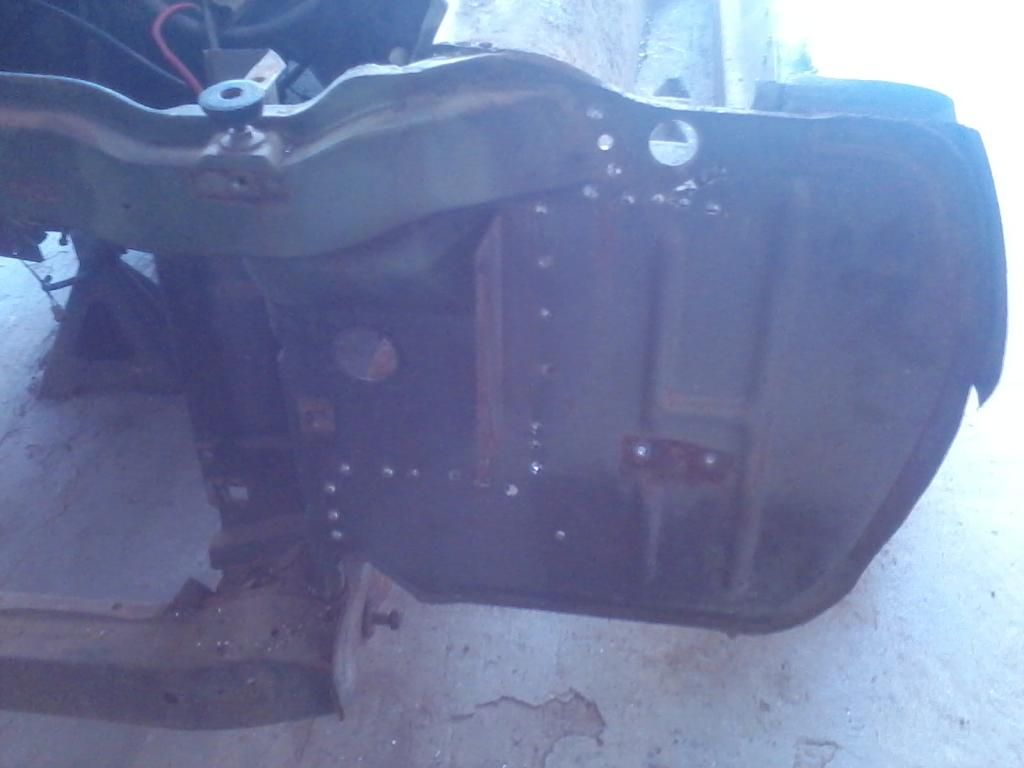 After drilling out the firewall spot welds, I cut the frame rail right behind the front through bolt for the radius rod bracket. I did this because the rest of the frame from that spot back, under the floor, is in very good condition. Yes, I have a parts car, and it would have been better to replace the entire rail. But, that car has rot in the rail below the radius rod bracket. So, I am going to build a tube inside the frame rails to help join them together. It'll add strength, help to keep the rails inline (as will the engine crossmember and radius rod bracket). This, in addition to the radius rod bracket acting as a "bolt on gusset", should prove to be a strong repair. 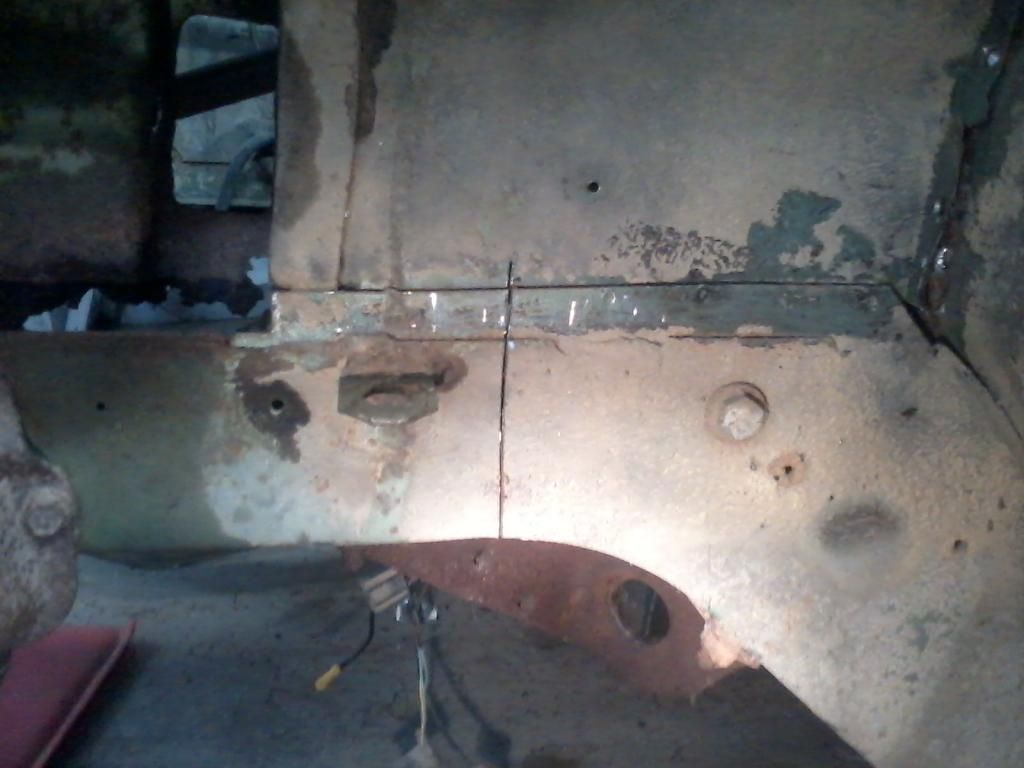 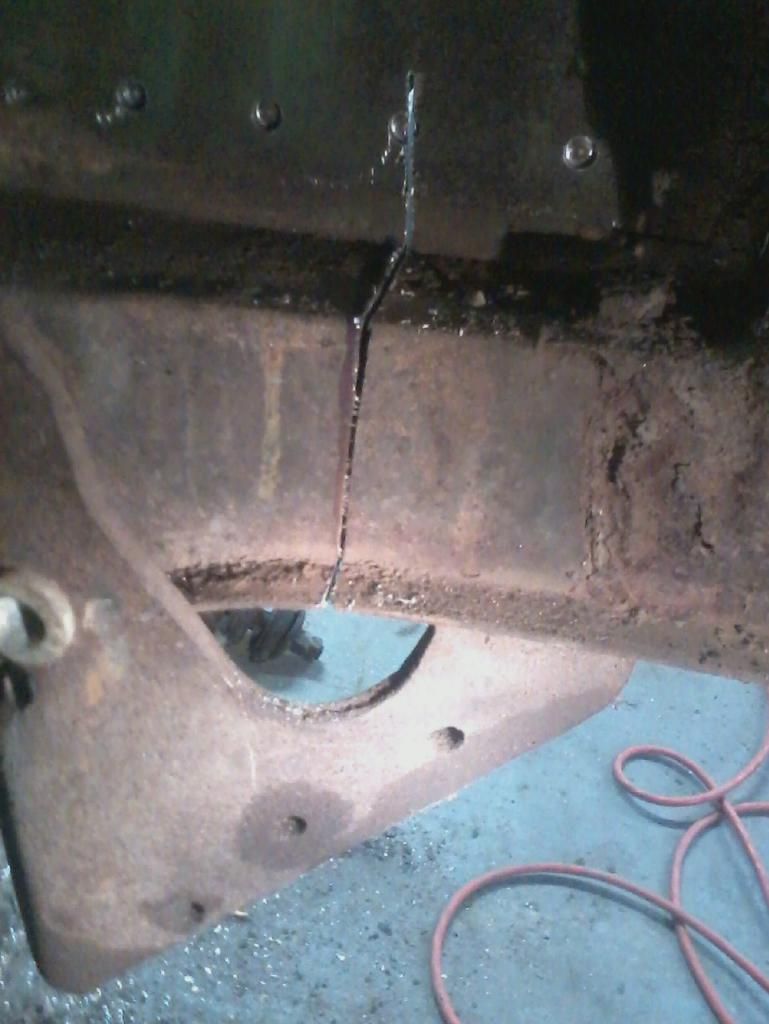 Some nut shells from mice, but, clean inside otherwise. 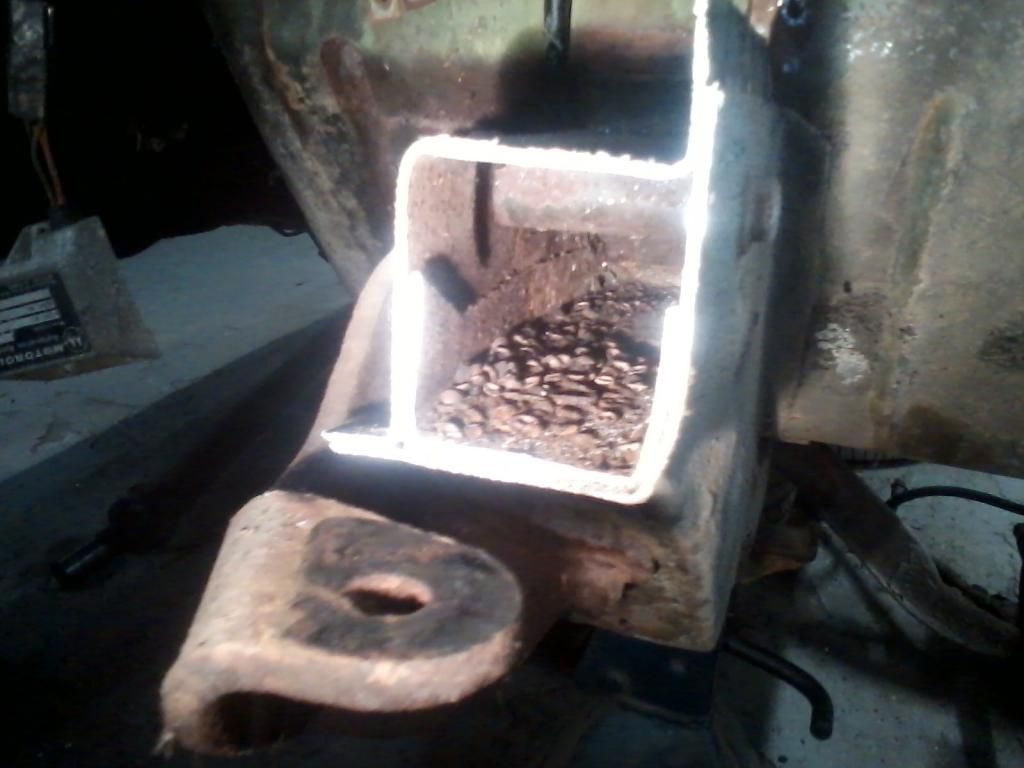 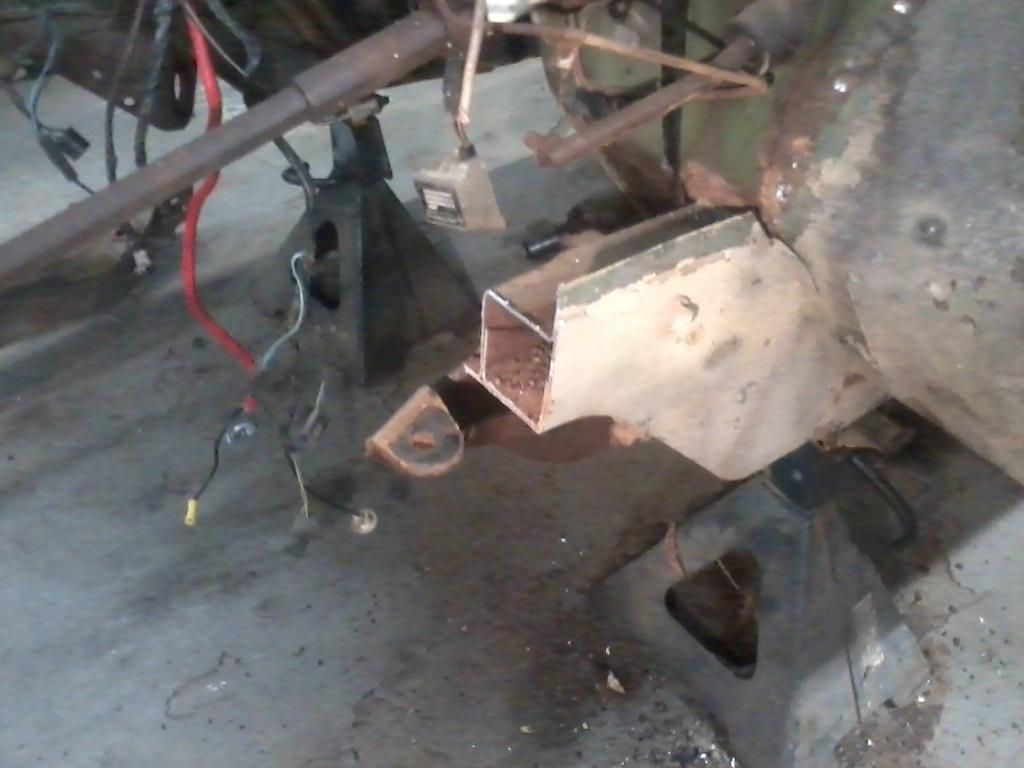 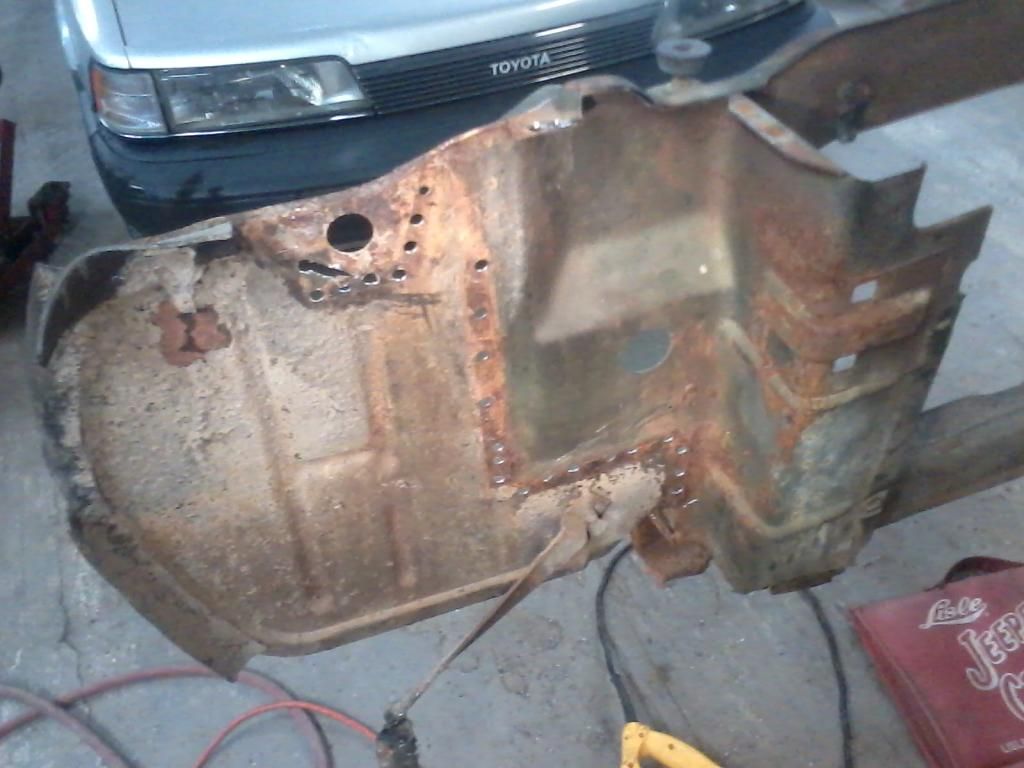 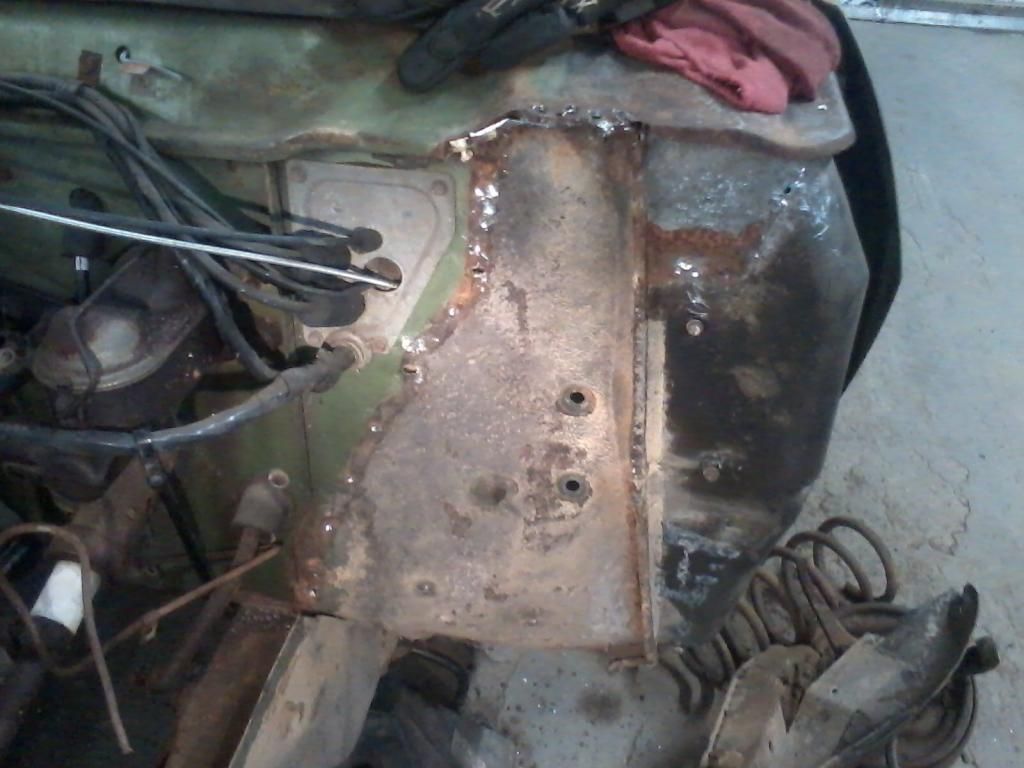 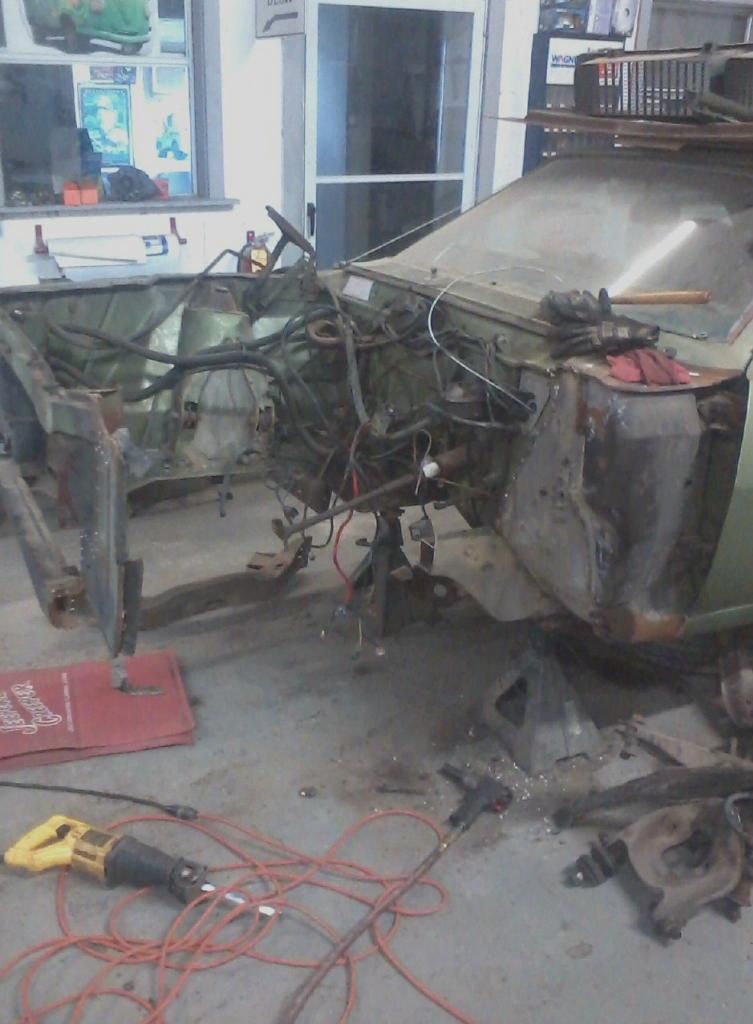 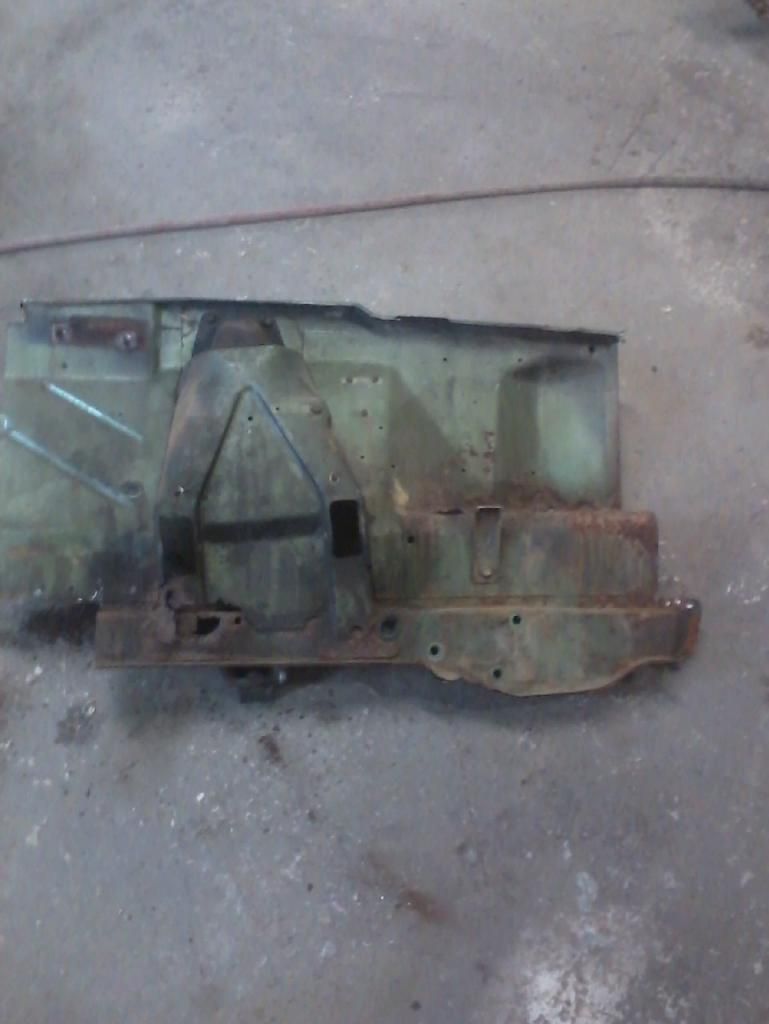 Started on repairing and cleaning up the headlight panel, and firewall, in preparation for the new frame rail/strut tower/inner fender. So far, this job is not turning out to be as hard as I first thought. Edited by 232jav3sp - Aug/09/2014 at 8:32pm |
||
 |
||
shelbycoleman 
AMC Addicted 
Joined: Jun/18/2011 Location: ohio Status: Offline Points: 731 |
 Post Options Post Options
 Thanks(0) Thanks(0)
 Quote Quote  Reply Reply
 Posted: Aug/09/2014 at 9:24pm Posted: Aug/09/2014 at 9:24pm |
|
|
Patrick, it looks like your on the right track! Before you weld any of the solid be sure to hang the front end back on it and make sure you can align it properly. Also google "panel sleeving" you would be better off to make inner sleeves than trying to use a piece of tubing. By the time you get enough heat to burn into the tubing you will blow a hole in the frame material. Just a few things to think about. Shelby
|
||
 |
||
Post Reply 
|
Page <1234 9> |
|
Tweet
|
| Forum Jump | Forum Permissions  You cannot post new topics in this forum You cannot reply to topics in this forum You cannot delete your posts in this forum You cannot edit your posts in this forum You cannot create polls in this forum You cannot vote in polls in this forum |