64 American 440 H project ( pics )
Printed From: TheAMCForum.com
Category: The Lounge Area
Forum Name: Member Projects
Forum Description: Are you doing a restoration or in the middle of a major AMC project? Show and tell us about it (*AMC projects* only Please. Others may be moved)
URL: https://theamcforum.com/forum/forum_posts.asp?TID=7693
Printed Date: Apr/19/2024 at 8:58am
Software Version: Web Wiz Forums 12.03 - http://www.webwizforums.com
Topic: 64 American 440 H project ( pics )
Posted By: 440H
Subject: 64 American 440 H project ( pics )
Date Posted: Dec/08/2008 at 3:28pm
|
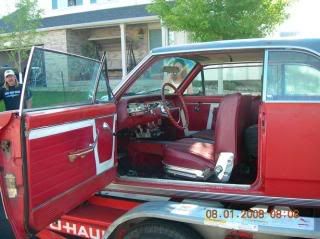
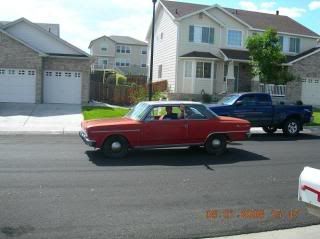
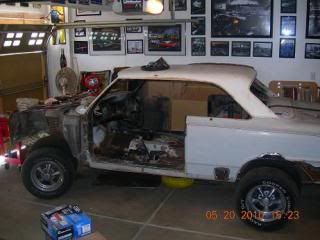
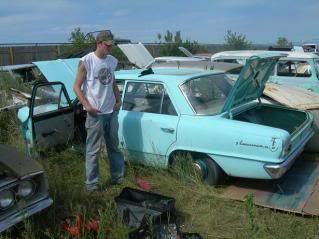
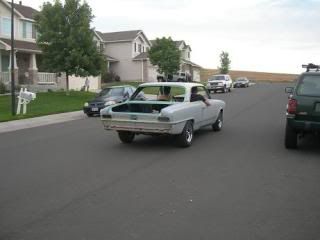
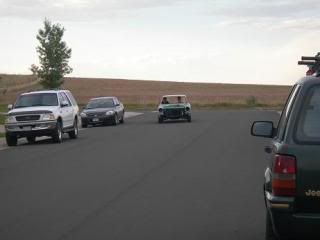
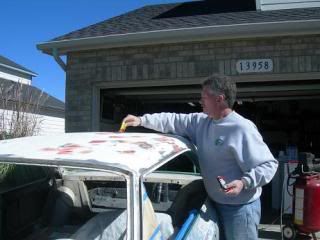
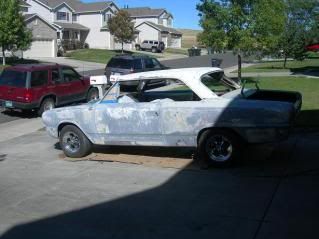
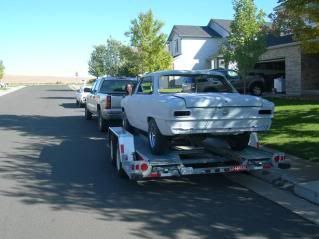
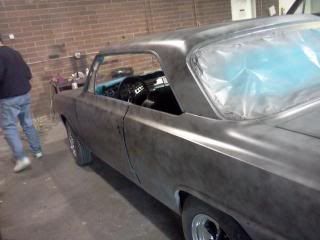
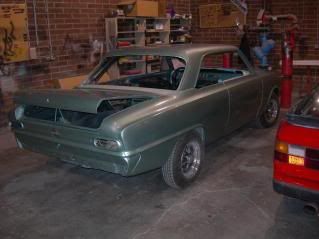
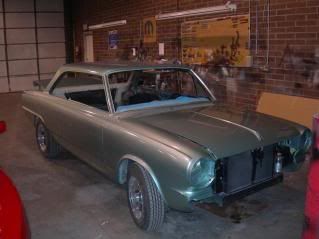
And so it begins,this is the winter project car,and some shots of the parts car I went to MO.
to get. American ramblers are hard to find in Colorado.not even in the salvage yards. look up "The Rambler Ranch " in Colo.
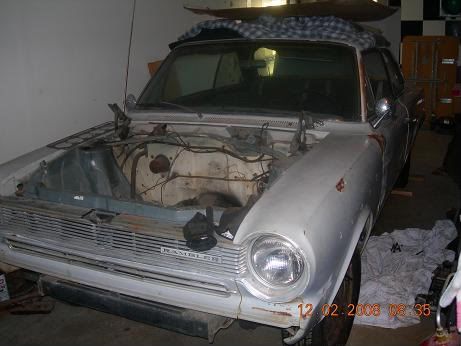 I think the factory color was a tan cream color,old motor out 196.5 blown
head gasket,bent push rods,needed valve job. good low end anyone want it
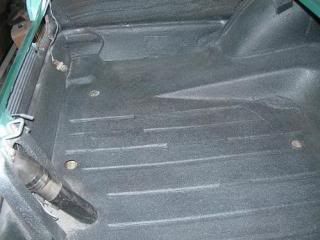
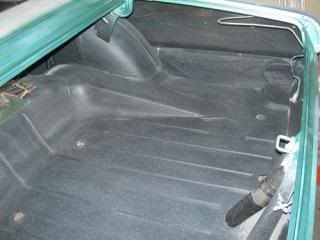
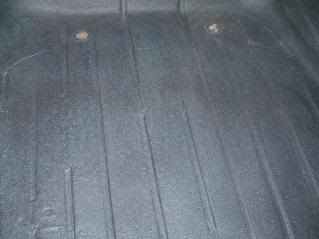
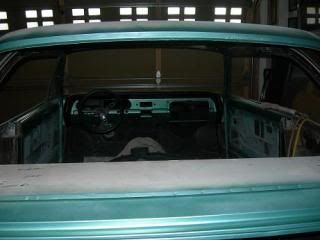
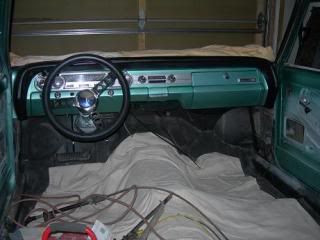
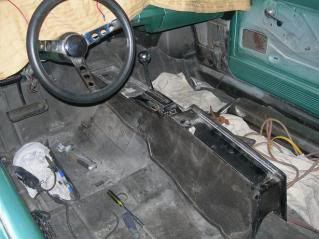
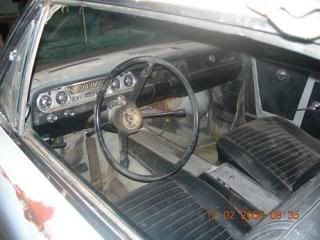 lot of work ahead just in the inside
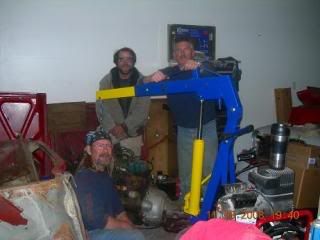
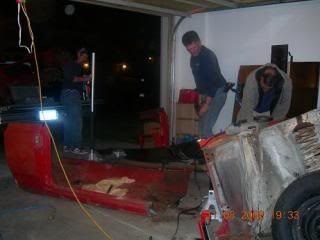
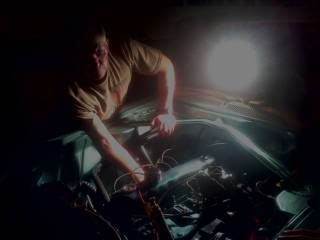
thats me in the back leaning on the new engine hoist
it worked real good..
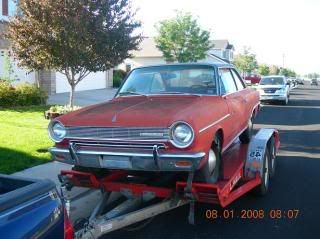
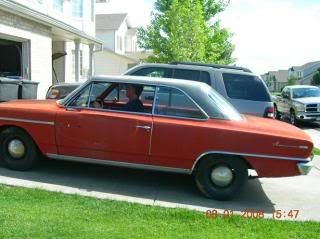
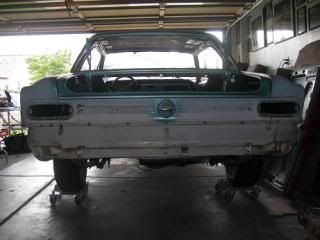
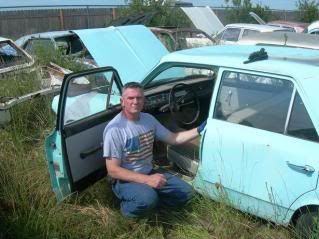
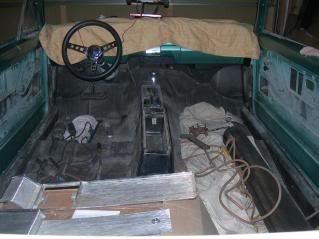
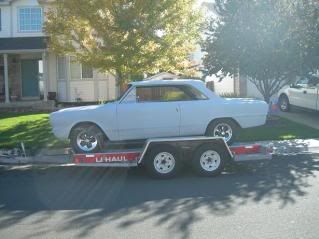
 this is the parts car I went to MO. to get $500.00 with a running 232 ci and auto
lots of good parts,but was realy rusted out.qtrs,floor,trunk,firewall,held together with bondo and primer.
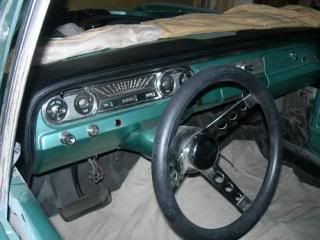
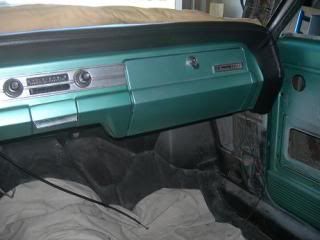
 a look inside
 got it running before pulling into the garage
 into the garage
 cutting up what was left after it was striped of the good stuff
was able to load it in the back of two pickup trucks
and I got $13.50 at the scrap yard. ha ha
 I'll post more pics as I get closer to putting the motor in
been getting some good tip on the motor mount problem
thanks to all. Brandon 440H.. ------------- Brandon |
Replies:
Posted By: raysinvegas
Date Posted: Dec/08/2008 at 4:51pm
|
I sure hope you saved as much as you could from the parts car. ------------- Andy Ray 64 440H 64 440 Convertible 68 Javelin SST 343 69 Javelin SST 343 69 SC/Rambler 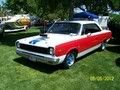
|
Posted By: 440H
Date Posted: Dec/08/2008 at 7:01pm
|
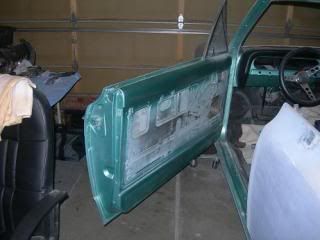
Yep I sure did, doors, fenders, hood, trunk lid, rear end, whole interior, grill, cross members,
wheels, radiator core support etc.. etc.. etc.. 440H.. ------------- Brandon |
Posted By: KermitDRambler
Date Posted: Dec/08/2008 at 8:00pm
|
If you post the door tag info from your car, we can fill in some of the details about the paint and interior.
Matt ------------- 1967 American wagon http://www.mattsoldcars.com" rel="nofollow - http://www.mattsoldcars.com |
Posted By: raysinvegas
Date Posted: Dec/08/2008 at 9:10pm
|
PM sent! ------------- Andy Ray 64 440H 64 440 Convertible 68 Javelin SST 343 69 Javelin SST 343 69 SC/Rambler
|
Posted By: 440H
Date Posted: Dec/09/2008 at 9:05am
|
Hey KermitDRambler, I would but the door tag is missing. the red parts car had the tag and
vin# plate, build sheet, but no title. plus it was rusted out realy bad,uni-frame, qtrs, firewall, front and rear floor, rockers, windshield chanels, and trunk floor. It was pretty much held together with bondo, fiberglass and paint. this is the number under the hood of the grey primer car B757844
Also the motor I pulled out of the red parts car I think is a 232 ci but not sure what year it is the bell housing is a little diferent than the one that came with the 196.5
the 232 motor # is 306E12 any help would be great.. more pics coming soon..Brandon 440H ------------- Brandon |
Posted By: ramblinfsj
Date Posted: Dec/09/2008 at 10:12am
|
Hey Brandon, nice project car. That's actually the first American I've seen with a center console. I like it. That engine out of the parts car could also be a 199 but it won't matter. You got some work to do but from my experience with my American it's not that difficult. Everything you need to put the engine in place of the 196 was on the parts car. So it's just a matter of swapping parts. If you need any advice let me know. ------------- 1982 Jeep J-20 1965 Rambler American 220 1978 Jeep Cherokee w/401 1983 Jeep J-10 1979 Concord DL 2dr |
Posted By: 440H
Date Posted: Dec/09/2008 at 4:18pm
|
Thanks ramblinfsj, unfortunately the parts car did't have motor mounts or a 232 cross member just some welded up chunks of scrap steel and braided steel cable for bolts.
the guy must have really needed to keep it on the road as long as he could.
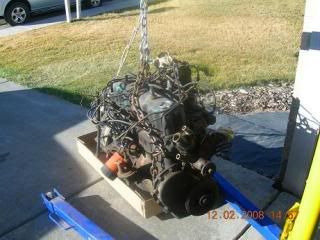
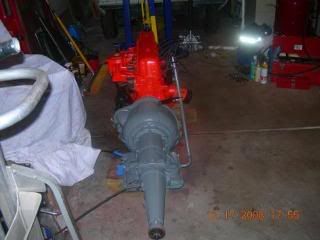
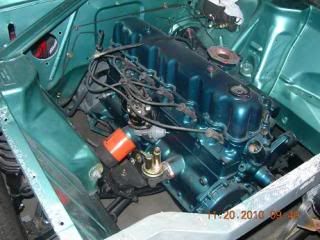
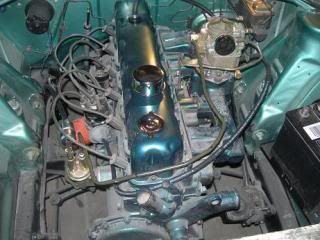
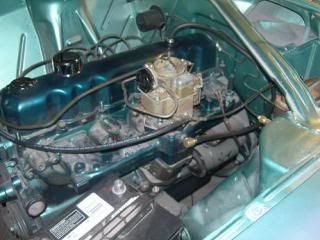
I was able to shoot some more pics of the motor and start the cleaning and painting process, also inspecting parts as I go.
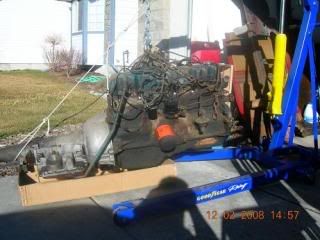 this is the motor and trans needing a bath
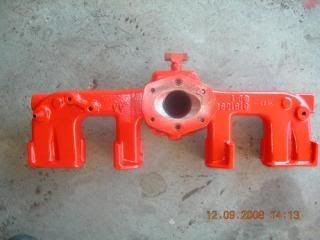
 found a cracked exhaust manifold
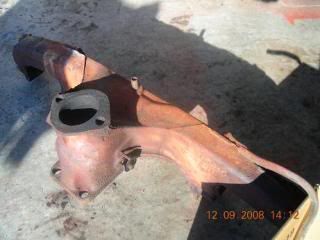 cracked on both sides cracked on both sidesgot a new one ordered. take a look at this intake is this a stock carb plate
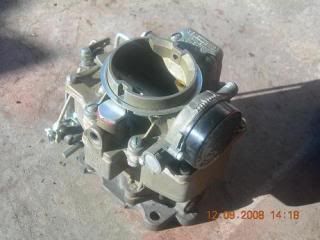
 also picked up a remanufactured carter carb, been setting on a shelf for about 20 years
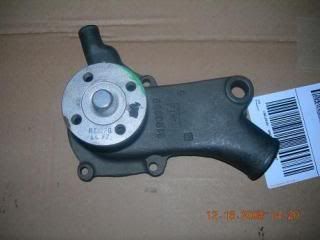
 thats it for now, waiting on a new fuel pump and water pump along with the exhaust manifold Brandon 440H
------------- Brandon |
Posted By: ramblinfsj
Date Posted: Dec/10/2008 at 10:03am
|
Unfortunately you got rid of the crossmember. The stock crossmembers for the 199/232s looked like they had scrap metal welded to them for the motor mounts so it's likely it was the factory crossmember.
With a pressure washer, a few cans of oven cleaner, and some patients that engine will clean up nice. I ordered my factory colored engine paint from Galvins Rambler Parts http://www.ramblerparts.com - www.ramblerparts.com , just FYI. I've never seen an intake with that kind of carb plate on it. Kind of a head scratcher for me. I'm glad to see you are not wasting any time on the restro. Keep going like you are and you'll be done in no time. ------------- 1982 Jeep J-20 1965 Rambler American 220 1978 Jeep Cherokee w/401 1983 Jeep J-10 1979 Concord DL 2dr |
Posted By: 440H
Date Posted: Dec/10/2008 at 10:42am
|
The red parts car I got the motor and tranny out of was a factory 196.5 also. thats why
using it's cross member whould have done me no good. the set up he had was just steel
plates cut with a cutting torch one bolt holding them to the engine block and a steel braided cable wraped around the cross member to hold the engine on a stack of rubber tire tred.
got the exhaust manifold last night and the water pump was the wrong one so it's going back for an exchange, shaft was to long and no mounting hole for the alt. fuel pump is still on it's way..
I'm hoping to get all my parts in , painted and reinstalled before I start my next set of days off. 7 on 7 off. any idea where I can get new exhaust manifold bolts ? someone make a kit by chance ? ------------- Brandon |
Posted By: ramblinfsj
Date Posted: Dec/10/2008 at 10:51am
|
Ok I thought the 232 was the original engine out of the red car. If you get parts like water pumps and simple engine parts like that, tell the parts guy it's for a '75 Jeep CJ-5. It makes getting parts so much easier. The CJ-5 uses the short water pump. ------------- 1982 Jeep J-20 1965 Rambler American 220 1978 Jeep Cherokee w/401 1983 Jeep J-10 1979 Concord DL 2dr |
Posted By: 440H
Date Posted: Dec/10/2008 at 10:57am
|
cool man, thanks. so far it hasn't been to bad. but i'll keep the 75 jeep in mind. ------------- Brandon |
Posted By: raysinvegas
Date Posted: Dec/10/2008 at 2:15pm
|
232 was not available in the American until '65. ------------- Andy Ray 64 440H 64 440 Convertible 68 Javelin SST 343 69 Javelin SST 343 69 SC/Rambler
|
Posted By: ramblinfsj
Date Posted: Dec/10/2008 at 2:39pm
Huh, your right Andy. I was thinking of 65's because that's what I have. ------------- 1982 Jeep J-20 1965 Rambler American 220 1978 Jeep Cherokee w/401 1983 Jeep J-10 1979 Concord DL 2dr |
 raysinvegas wrote:
Posted By: 440H
Date Posted: Dec/13/2008 at 1:10pm
|
Hey guys just an update,not much progress with being back at work and all. ( 12-14 hr shifts) 7 days on 7 days off. but I'm not complaining at least I've got a Job.
I've been cleaning and painting parts in the morning when I get home and gathering new parts and bolts as needed,looking forword to starting my days off Tuesday may just get that motor back in the car.
going to clean and paint the engine bay too. ------------- Brandon |
Posted By: 440H
Date Posted: Dec/16/2008 at 8:52pm
O.K. first day off and checking new parts
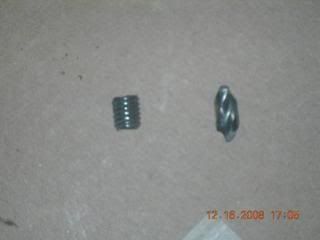
  well time to deal with the broken exhaust manifold bolt , just drill a hole down the center of the bolt than easy out it out right.. not quite 4 hours later it's going to be a helicoil. The first hole ( pilot hole ) went great second hole the bit broke off in the broken bolt
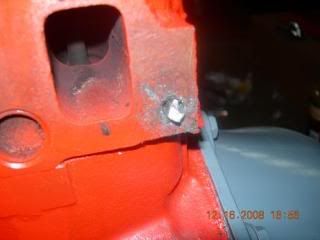 well like they say if it was so easy every one would do it , found the remains of another helicoil down in there what a day maybe I'll get some parts on tomorrow
 ------------- Brandon |
Posted By: ramblinfsj
Date Posted: Dec/17/2008 at 9:35am
|
That new fuel pump looks cool but I like I'd have to take it back and get one for a CJ-5. It's the same one you pulled off. Well, the new pump looks vintage so I might see if it will work. That new exhaust manifold looks great. That sucks having that bolt broke off in the head though. It maybe easier just to drill the hole completely out, retap it, and use a bigger bolt . ------------- 1982 Jeep J-20 1965 Rambler American 220 1978 Jeep Cherokee w/401 1983 Jeep J-10 1979 Concord DL 2dr |
Posted By: 440H
Date Posted: Dec/18/2008 at 9:09am
|
Well I took the old (new) fuel pump back and got another one this one is good just alittle more compact. my block # is 306E12 this broke down as 3 = 1970 06 = June E = 232ci
and 12 = 12th day of June so then I got a list of everything a 232 was in in 1970 and the fuel pump he had on the shelf was for a Javilin
 once that was solved the rest of the day went pretty good, helicoil in, exhaust and intake installed, fuel pump , dizzy in , plugs and wires, all went well
  the rest of my week off I'll be working on garage clean up and rearange things, also told a couple of members I'd check on some parts off the Red parts car for them. then of course the engine bay and motor mount issue.. wish me luck I sure would like to get that motor back in the bay and off the floor this week. Its cold here, and hard to paint, open up the door turn on the fan for vent and the 65 + heat in the garage is lost to about 40 or lower in no time. gota love the winter time.. ------------- Brandon |
Posted By: ramblinfsj
Date Posted: Dec/18/2008 at 10:19am
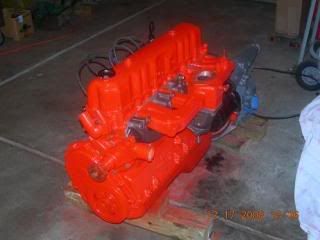
|
Wow Brandon, that motor looks sharp! Nice work. I'm glad to see you got that broken bolt out. I hear you about the winter time, it's keeping me out of the shop (unheated shop). The engine with that long transmission will be fun to get in the engine bay. It's a tight squeeze believe me, I've done it. As soon as I painted my engine, I slipped it in the car and let the transmission sit on the crossmember ( make sure the trans. crossmember is out of the way when you stab the engine and tranny. It will be in the way if it's still on the car) and put wood blocks between the motor mounts and the engine crossmember. Once it's in there, you'll see what you need to do with the motor mounts. I had to put the engine as far back as possible for the fan to clear the radiator. I was going to ask earlier so I'll ask now, how did you take the driveshaft off? Did you undo the big nut or did you just disassemble the u-joint under the car? I like how quickly you're getting things done. Stay at it and you'll be driving it in no time. ------------- 1982 Jeep J-20 1965 Rambler American 220 1978 Jeep Cherokee w/401 1983 Jeep J-10 1979 Concord DL 2dr |
Posted By: 440H
Date Posted: Dec/18/2008 at 12:04pm
|
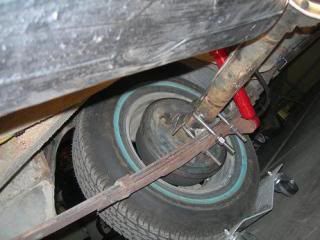
Hey Ramblinfsj, Thanks man I'll keep after it to be sure. lets see, the crossmember is out, and the drive shaft is just hanging there. when we pulled the motor the drive shaft just slips out of the tranny. On the old red parts car we took the big nut off and removed it. made things easier when we pulled the rearend out.
Can't hardy wait to get her moving under her own power. It'll be a while but worth it in the end. after the engine bay is done and the motor is back in, it's going to be brake work time.
it has none,zip,nada. not even an E-brake, so that has to be done before the first test drive. ------------- Brandon |
Posted By: ramblinfsj
Date Posted: Dec/18/2008 at 1:32pm
|
I figured you just left the driveshaft hanging and I'm glad you did. If you have to remove the driveshaft, disassemble the u-joint underneath the car. The big nut requires a boatload of torque, about 250 to 300 ft/lbs, to be at factory spec. If you got the tools to achieve that torque then you're good but most people don't. That's odd that you have no brakes at all. usually it's brakes don't work but park brake does or visa versa. It is as simple a brake system as it gets so it shouldn't be difficult to figure out. The park brake system is diffinitely the simplest one I've ever seen. Have fun and I hope to see more updates. ------------- 1982 Jeep J-20 1965 Rambler American 220 1978 Jeep Cherokee w/401 1983 Jeep J-10 1979 Concord DL 2dr |
Posted By: 440H
Date Posted: Dec/23/2008 at 5:16pm
|
Hey guys,thanks for all the responses to my two for sale adds, it all goes to a good cause
(my project car), back to work today so no work on the car for a week. lets me catch up on some e-mails and pm's also some shipping. also got an early Christmas gift from my wife Cheryl ( who has been very supportive ) a Linclon 3200HD mig welder it was a craigslist find. used on one project. with gas bottle 1/2 tank gas, regulator gas kit and 1 spool .030 wire. we trested it out in his garage and it worked great. so now I can get the motor mounts finished.. ------------- Brandon |
Posted By: ramblinfsj
Date Posted: Dec/24/2008 at 9:39am
|
That's an awesome Christmas present. Maybe Santa can get one of those through the chimney for me. ------------- 1982 Jeep J-20 1965 Rambler American 220 1978 Jeep Cherokee w/401 1983 Jeep J-10 1979 Concord DL 2dr |
Posted By: 440H
Date Posted: Jan/04/2009 at 11:04am
|
Just a quick up date, have been dealing with home and family stuff for a few days,went shopping for some garage supplys, and put some indoor outdoor carpeting down on the garage floor to help fight the cold.
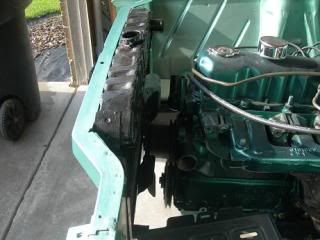
also started getting the grill and engine bay area cleaned up, its going slow so it looks like another week before I can get the motor back in the car.
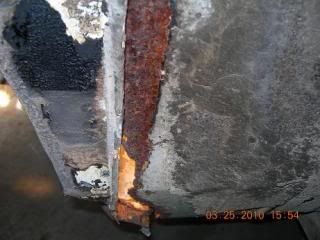
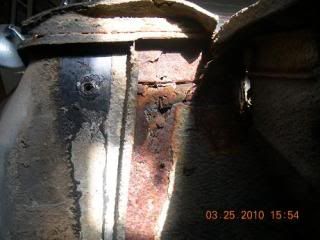
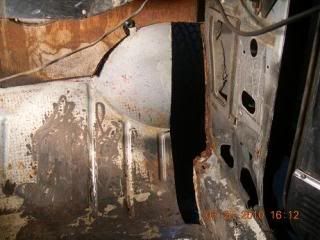
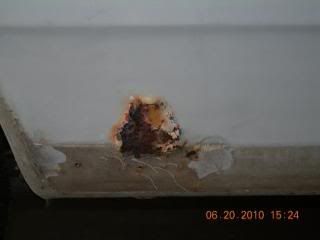
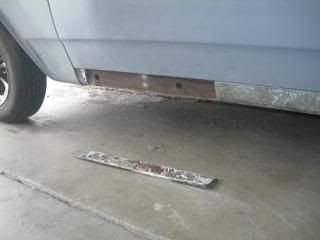
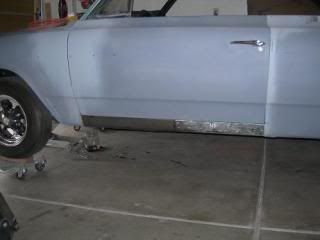
Also found rust through " cancer " on both sides of the firewall above the toe panel.
all down the pinch weld area along the door jam. didn't see this until I got the fenders off.
was hidden pretty well by the fender and bonbo with under coating on top of it.
looks like patch panel time.. ------------- Brandon |
Posted By: harleywopp
Date Posted: May/07/2009 at 12:12pm
|
good luck, let me know what you do about the brakes!!! ------------- Beat it all week! Fix it all weekend! |
Posted By: 440H
Date Posted: May/20/2009 at 1:18pm
|
Don't know if I'll get to it this year... ------------- Brandon |
Posted By: ramblin robert
Date Posted: May/20/2009 at 4:14pm
|
don't do it man. you'll regret it forever. it's not always about the finished project. it's just as much about how you got there. finishing what you started is a noble deed. it's like a relationship. you don't walk away just because you had an argument. take a step back and take a look the great things that you saw in her when you met her. ------------- 1966 Classic 770 1976 VAM Classic (Matador) |
Posted By: 440H
Date Posted: May/21/2009 at 1:00am
|
Spoken like a true gentleman.. who knows guess it could be worse... ------------- Brandon |
Posted By: 440H
Date Posted: Sep/18/2009 at 8:23am
|
Hey guys, been a long time, well I still have it and it looks like it will be a winter project to get it running and driving.. and safe.. then I'll see what happens from there... ------------- Brandon |
Posted By: 440H
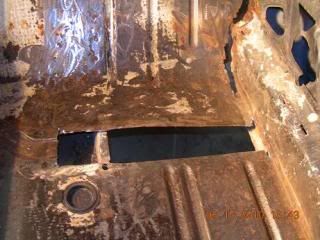
Date Posted: Mar/02/2010 at 2:32pm
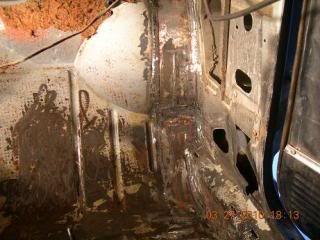
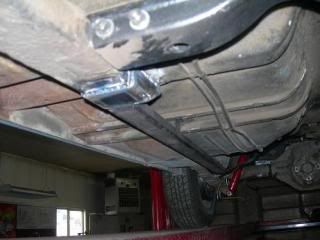
   Just an update finally got to do a little woork on the car again, tore out the inside and found a little rust rot in the passenger floor above the brace and am now able to see how bad the firewall goes into the kick panels and floors also a split in the rear part of the drive shaft hump is this the way it came or did somebody do this ??? Just an update finally got to do a little woork on the car again, tore out the inside and found a little rust rot in the passenger floor above the brace and am now able to see how bad the firewall goes into the kick panels and floors also a split in the rear part of the drive shaft hump is this the way it came or did somebody do this ??? ------------- Brandon |
Posted By: 440H
Date Posted: Mar/12/2010 at 10:06am
|
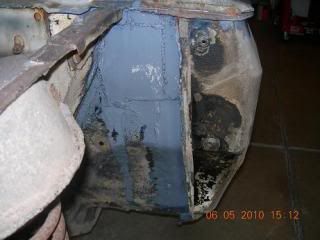
Strange gap in rear trans tunnle fixed, I cut a few slits down th sides so I could move the front up and the rear down a bit, formed the patch , secured it with sheet metal screws, stitched welded it, then removed the screws and filled the holes.. kind of ugly but I'll be coating the whole floor with poor 15
and line x when it's all done so now on to the pass front floor, toe panles, and firewall...
------------- Brandon |
Posted By: ramblinfsj
Date Posted: Mar/12/2010 at 12:43pm
|
Nice work on the tunnel patch. The floor board looks rough but the spot that the rust is in doesn't look like it's going to be to hard to repair. My one bit of advice there is to get a spot weld cutter bit. There will be spot welds in that area to connects the floor sheetmetal to support crossmembers underneath it. The spot weld cutter will ease some of the aggrevation. The worst spot in my floor pan was under the driver seat. A rust hole about the size of a silver dollar. It was an easy fix. I believe water was coming in from the steering column to firewall seal so have a look at yours. The worst rust on my car was in the trunk and for a while I could not figure out where the water was coming in at. One day I had my friend pour water all around the trunk lid while I was inside the trunk. We found the water was pouring in from the taillight housings. I pulled the housings off and the gaskets were rotten. Luckily Galvin's Rambler Parts had new gaskets for me. Put them on and no more leaks. ------------- 1982 Jeep J-20 1965 Rambler American 220 1978 Jeep Cherokee w/401 1983 Jeep J-10 1979 Concord DL 2dr |
Posted By: ramblinfsj
Date Posted: Mar/12/2010 at 12:48pm
|
Oh I almost forgot. When you buy the POR-15, get some of their POR-Patch stuff. It is a thicker version of POR-15 and fills in pinholes very well. POR products are very good. ------------- 1982 Jeep J-20 1965 Rambler American 220 1978 Jeep Cherokee w/401 1983 Jeep J-10 1979 Concord DL 2dr |
Posted By: 440H
Date Posted: Mar/12/2010 at 7:32pm
|
Thanks for the heads up about the spot welds and the por-patch, I'll get some better pics when I start cuting out the rot, spent most of the day today fixing the in-laws washing machine had to fight to stay focused on what I was doing kept wanting to cut or weld something lol.... ------------- Brandon |
Posted By: 440H
Date Posted: Mar/26/2010 at 7:00am
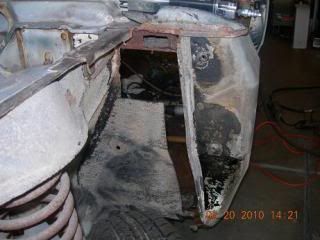
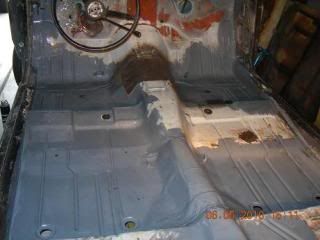
got the floor rot on the passengers side cut out, and new piece welded in
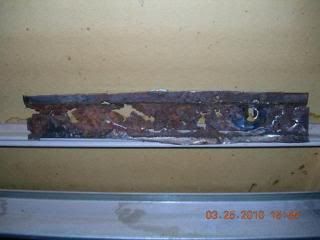  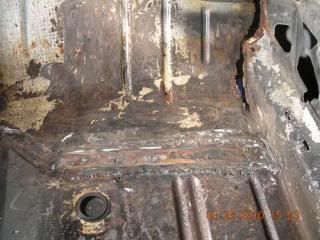 now I'll be working on the toe panel and firewall got some of the rot cut out and need to go fill the gas bottle for the welder today then press on with patches..
   I'll try to post up as I go but this stuff is pretty boring, I'll be glad to get the floors and firewall done so I can move on to the qtr panles..
------------- Brandon |
Posted By: 440H
Date Posted: Mar/27/2010 at 8:30pm
|
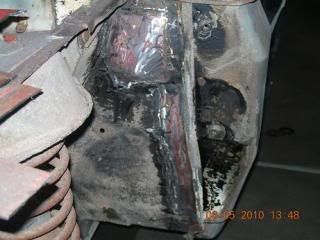
Well I got the upper and lower part of the toe panel patches made then welded them in
I'll be removing the dash next to get to the very top then same drill, cut and patch.
thats why the top is just tacked in, where it is tacked will be cut out also ...
  ------------- Brandon |
Posted By: FuzzFace2
Date Posted: Mar/28/2010 at 11:46am
|
Nice work keep it up.
Dave ---- ------------- TSM = Technical Service Manual 75 Gremlin X v8 for sale 70 Javelin 360/auto drag car 70 Javelin 360/T5 Street car |
Posted By: 440H
Date Posted: Mar/28/2010 at 9:29pm
|
Thanks dave, it's slow going at this point but worth it in the long run..
pulling the windshield out now to get to the dash screws then back to the rust... ------------- Brandon |
Posted By: 440H
Date Posted: Jun/06/2010 at 1:12am
|
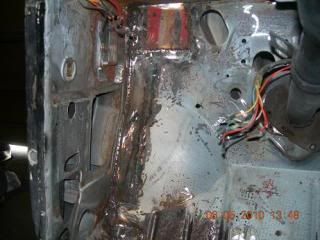
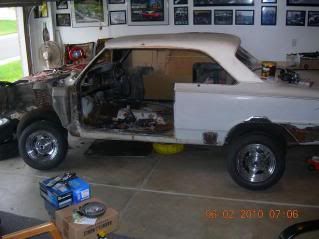
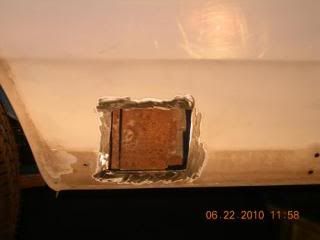
well it's been a while but I was able to spend some time on the car. got the rot removed from the firewall (both sides) floor (both sides) and toe panels you guessed it both sides.. got them patched,
por-15 treated, and seam sealed. then primer sealer spray'ed. next will be rubberized under coating
then on to the qtr panels.
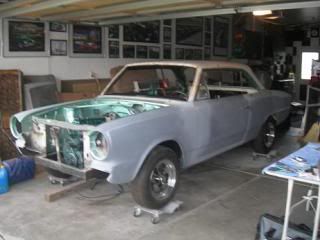
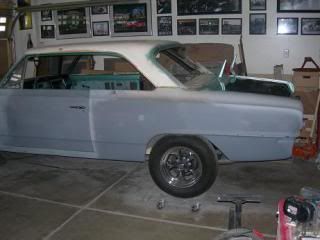
      I sat an ol set of uni-lug Cragars up to it just for fun
 This is the set I'll be using,they are old Ranger wheels but I think they will do for now
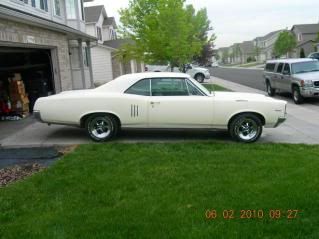
 This is my 1967 Pontiac Lemans that I just picked up a couple weeks ago. I through a set of ol keystone classics on her and took off the chevy ralley sports that were on it. tires were way to wide in the back and rubbed bad all the way home 112 miles. I don't think the classics look to bad..
 ------------- Brandon |
Posted By: 440H
Date Posted: Jun/21/2010 at 7:09pm
|
Well I just finished up for this set of days off before I head back to work.. got my fuel tank back from the shop too..
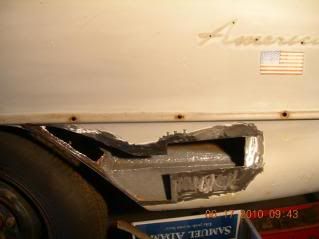
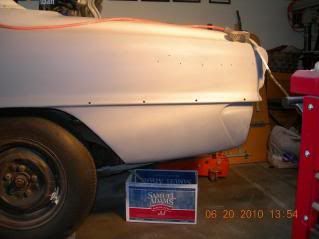
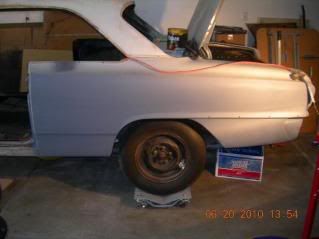
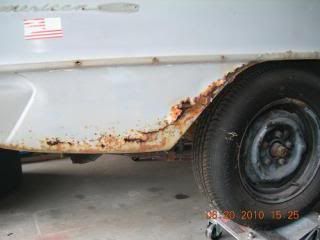
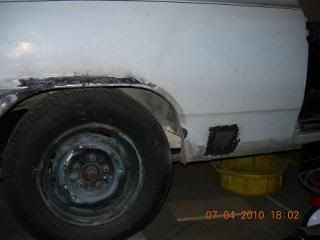
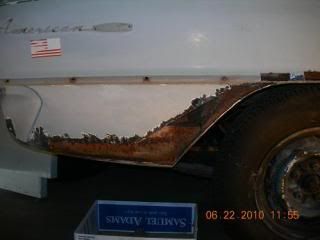
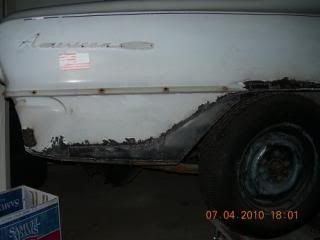
rust/rot cut out of the driver side rear qtr panel and wheel well lip also just in front of the wheel well.. made patches and welded them in, finished off with just a little bodywork so it wouldn't look so rough
spun the car around and will start on the passengers side next set of dats off...
         ------------- Brandon |
Posted By: 440H
Date Posted: Jul/19/2010 at 10:51pm
|
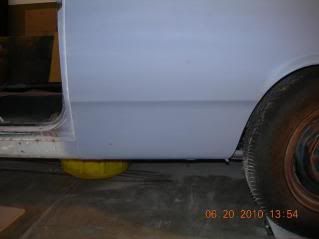
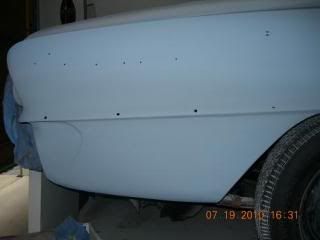
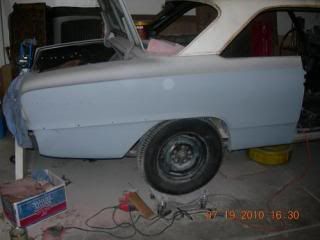
got busy on the passenger side during this set of days off. was held up a little due to blood poisoning..
a piece of weld wire was stuck to one of the welds and ended up in my finger, couple days later I had some pain in my arm pit and then noticed the red streaks running up my arm from the finger.. saw the Doc got some meds and was back at it in a couple days.. that was a first for me.. any way this is how it turned out
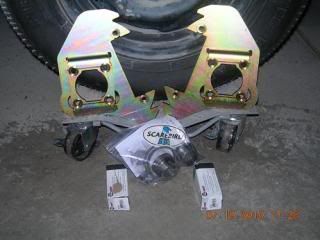
      and for next week I'll be starting on the Scarebird disc brake conversion
 ------------- Brandon |
Posted By: raysinvegas
Date Posted: Jul/19/2010 at 11:48pm
|
Man, you do some NICE work! ------------- Andy Ray 64 440H 64 440 Convertible 68 Javelin SST 343 69 Javelin SST 343 69 SC/Rambler
|
Posted By: farna
Date Posted: Jul/20/2010 at 3:01pm
|
Yes, you're coming along very nicely! Some of that floor work could have been cleaned, treated for rust, then fiberglassed over, but you've got a wire welder and know how to use it! I'm going to 'glass the floor in my J-10 when I get back to that, and will use some 'glass in my trailer project, but will be doing a lot of welding on the outside to change the wheel opening contour. Just like your outer patches... a little welding, a little grinding, a little bondo and a little primer -- looks good as new -- or in my case like it was made that way... hopefully!
------------- Frank Swygert |
Posted By: 440H
Date Posted: Jul/22/2010 at 8:24am
|
Thanks guys, but I would still call it rough.. still a long ways to go before paint..
would still like to see some good examples for the 440H badging on the qtr panels and roof sail panels
if anybody has some pics that would be great.. Raysinvegas hint hint.. also think your trailer project
Farna is very cool, cain't wait to see how it comes together...
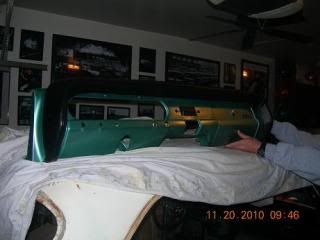
This is the color of paint I bought from the Restoration Shop it's Frost lt green Met
I'm thinking it will look prety good with a black interior..
 ------------- Brandon |
Posted By: farna
Date Posted: Jul/22/2010 at 8:43am
|
I like the color too. All the cars are rough before they're ready! Let us know if you have any problems with the Scarebird kit. you might need to space the spindles out a bit. I used 1/2" grade 8 nuts slipped over longer grade 8 bolts to space mine out (not a Scarebird kit, but so I could use the same deep offset wheels on front as I have in back because of the Jag rear axle). Seven years running, not a single problem or indication of any I inspect at least once a year because I had to weld up new steering arms for a rack and pinion steering -- I always inspect my welds yearly, want to find any cracks or bends BEFORE they cause a problem! Found a crack in an arm once, caused by too much grinding for clearance, but fixed it before anything broke. Took three years/15-20K miles to crack, so not bad! I just posted some more trailer pics -- placed the trunk section temporarily on the trailer frame, now for more work! ------------- Frank Swygert |
Posted By: 440H
Date Posted: Aug/04/2010 at 12:36pm
|
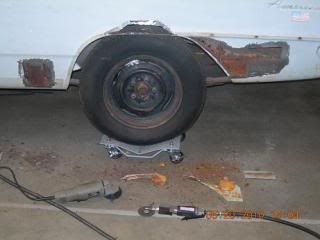
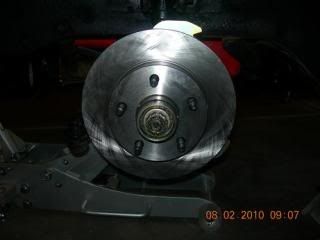
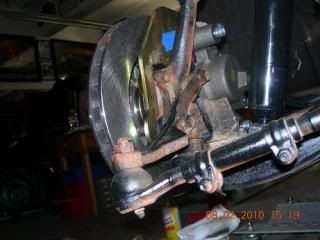
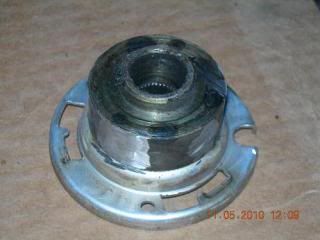
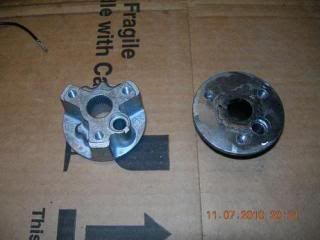
Well I got the kit on, it took a full day but I wasn't rushing either.. took my time and went slow.. only problem I have is the nuts on the backing plate rub a little on the backside of the rotor. also one wheel that came off would't go back on. center hub was to small. must have been changed out at one time by the PO.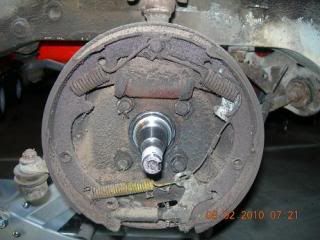 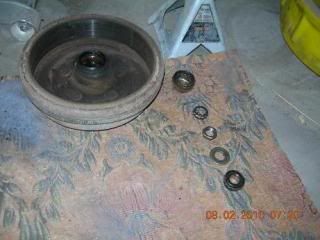 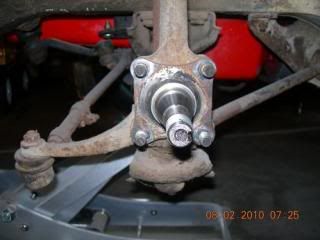 Had to clean it up a bit no powder coating just wire wheel and some shaker paint
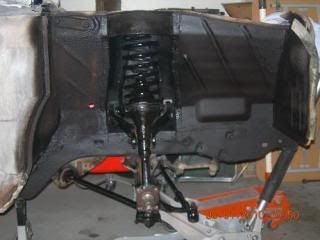 half of what comes in the kit. bracket,spindle adapter,stock wheel centering ring,banjo bolt,
and cotter pin, the rest I bought at O'riellys right off the shelf
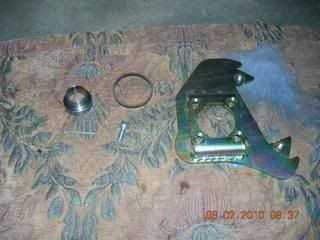 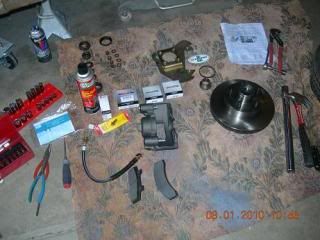 The shiney ring around the outside of the hub (below the berring seal) is what is rubbing on the backing plate nuts if it were machined in about another 1/16th - 1/8th inch there would be no problem I'll deal with it when I replace the ball joints and tie rod ends. for now I just wanted to make sure it would work
  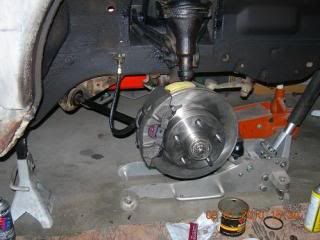 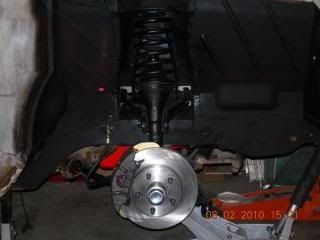    Next up is new master cylinder and hard lines.. then the rear
------------- Brandon |
Posted By: farna
Date Posted: Aug/04/2010 at 1:34pm
|
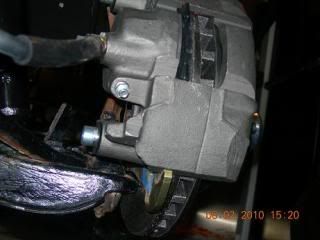
When going to disc brakes the bolts have to be put on with the heads out, nuts in back to prevent interference with the rotor. That's how AMC did it too. Most people put them on the way they came off with the drum brakes -- nuts out -- and have an interference problem. Looks like that's what you did? It's one of the little things missing in the instructions...
------------- Frank Swygert |
Posted By: 440H
Date Posted: Aug/04/2010 at 1:43pm
|
Thanks Farna I bet your dead on now that I think about it I'll reverse them when i get back to work on it.. ------------- Brandon |
Posted By: lugo likes ramblers
Date Posted: Aug/23/2010 at 12:33am
|
does the scarebird kit say in the instructions what to buy from the auto parts store? how much did it cost to do the whole conversion. im thinking of doing the same thing to my 65 440h Chris ------------- 65 rambler american 2door hardtop! |
Posted By: farna
Date Posted: Aug/23/2010 at 10:33am
|
Yes, there is a complete list with part numbers and original application with the kit. You'll end up with $500-600 on the whole swap including the Scarebird kit price. Shop around a bit! If there is a pull-a-part in the local area where you can walk around and check on parts condition before buying you can come out for under $400, but I'd get new rubber lines regardless. Can't look at them and judge condition very well!
------------- Frank Swygert |
Posted By: lugo likes ramblers
Date Posted: Aug/23/2010 at 2:30pm
|
Does it just use off the shelf AMC parts? Like the rotors and calipers off a concord. Or is it some other thing completely like a brake kit from a chevy or something? ------------- 65 rambler american 2door hardtop! |
Posted By: 67RogueX-Code
Date Posted: Aug/23/2010 at 2:47pm
|
Here's the list that Scarbird supplies: Part Application NAPA Wagner Raybestos Rotor 1995-97 2WDRanger w/2 wheel ABS (48)86672 QD125469 66559(RGS) Caliper, LH 1990 Celebrity front 442-2066 QM25006 RC4233 Caliper, RH 1990 Celebrity front 442-2067 QM25007 RC4234 Hoses 12” long 1979-90 Caprice front 36846 F106887 BH36846 Hoses 15” long 1979 Oil Seal 1995-7 2WDRanger front 19223 BCA #9150S Banjo Bolt 1990 Celebrity front 82703 DORMAN Part # 13940 Inner Bearing 1995-97 2WDRanger w/2 wheel ABS BR5 BCA A5 Outer Bearing 1969 Javelin BR2 BCA A2
------------- Bob Wilcox 67RogueX-Code |
Posted By: harleywopp
Date Posted: Aug/23/2010 at 6:00pm
|
This should help. Took me forever to find these!!! If you go to http://www.scarebirdclassic.com - www.scarebirdclassic.com you can by the kit and you have to get this stuff on your own.
1964-74 Javelin, Rebel SST AMX w/ ½” thick spindle base Front Disc brake conversion instructions
Part Application NAPA Wagner Raybestos Rotor 1995-97 2WDRanger w/2 wheel ABS (48)86672 BD125469 66559(RGS) Caliper, LH 1990 Celebrity front 442-2066 TQM25006 RC4233 Caliper, RH 1990 Celebrity front 442-2067 TQM25007 RC4234 Hoses 12” long 1979-90 Caprice front 36846 F106887 BH36846 Hoses 15” long 1979 Seville front 36845 F98912 BH36845 Oil Seal 1964-73 Mustang 19221 BCA #6875 Banjo Bolt 1990 Celebrity front 82703 DORMAN Part # 13940 Inner Bearing 1995-97 2WDRanger w/2 wheel ABS BR5 BCA A5 Outer Bearing 1969 Javelin BR2 BCA A2
Scarebird Classic Brakes LLC 19 November 2008 OR YOU CAN DO THISSSSSSSSS!!!!!!!!! THIS GUY SELLS EVERYTHING NEEDED!!!!!!!!
http://www.youtube.com/watch?v=qqup7zjDeJA&feature=youtube_gdata - http://www.youtube.com/watch?v=qqup7zjDeJA&feature=youtube_gdata ------------- Beat it all week! Fix it all weekend! |
Posted By: lugo likes ramblers
Date Posted: Aug/23/2010 at 9:57pm
wow thanks guys! that just made life and my decision so much easier! again thanks!  ------------- 65 rambler american 2door hardtop! |
Posted By: 440H
Date Posted: Aug/28/2010 at 1:04pm
|
Hey Lugo, The kit I got from Scarebird ( Last Month ) $199.00 with shipping
Rotor 1995-97 2WDRanger w/2 wheel ABS (48)86672 BD125469 66559(RGS)
Caliper, LH 1990 Celebrity front 442-2066 TQM25006 RC4233
Caliper, RH 1990 Celebrity front 442-2067 TQM25007 RC4234
Hoses 15” long 1979 Seville front 36845 F98912 BH36845
Oil Seal 1995 - 97 2wd Ranger front
Banjo Bolt 1990 Celebrity front 82703 DORMAN Part # 13940
Inner Bearing 1995-97 2WDRanger w/2 wheel ABS BR5 BCA A5
Outer Bearing 1969 Javelin BR2 BCA A2
Master Brake Cyl for front disk and drum rear 1969 Javelin A1 10-1384
Disk Brake Pads 1 set for 1990 Chevy Celebrity
including brake cleaner,grease,and $20.00 worth of core charges the total for parts at
O'Reilly's was $269.80 all right off the shelf. the only thing they had to order was the master cylinder, if I remember right, I had it by noon the same day Total cost $468.80..
hope that helps.. ------------- Brandon |
Posted By: 440H
Date Posted: Nov/22/2010 at 3:38am
|
Hey guys, time for a little update.. had alot going on for a while so I could only get to the car now and then, but I did get a few more things done...
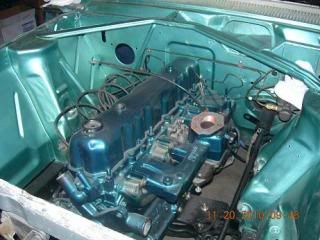
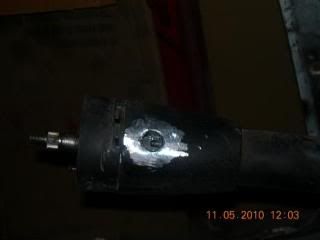
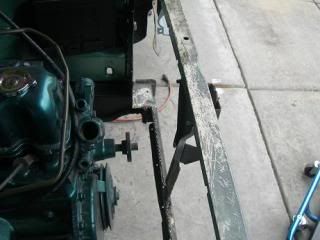
repainted the motor and got it back in with my new fashioned motor mounts
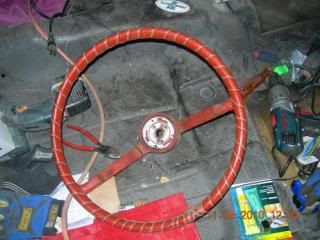
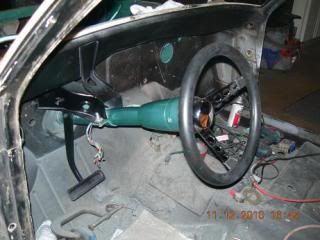
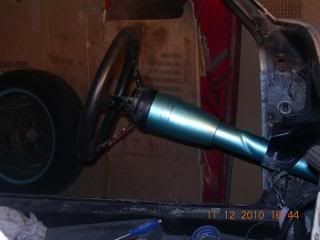
  also got the Grant wheel adapter made for my 64, Grant didn't make one that would fit this steering shaft, so I made one out of and old busted up wheel I had out of the parts car,also removed the shifter and gear indicator then filled the holes did some grinding, sanding, prime and paint..
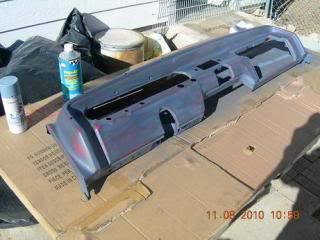
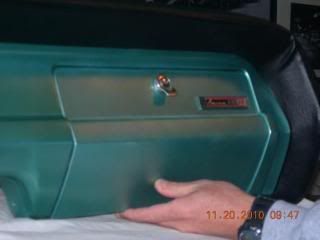
      Got the dash pad dyed black and got the dash painted
   finishing up rear brakes now, then on to the trunk and fuel tank install.... ------------- Brandon |
Posted By: 440H
Date Posted: Jul/17/2011 at 8:28pm
|
Hey guys, it's been a while but I'm still plugging away at it slow but steady
got the trunk finished cut and patched,pour-15'd, bed lined then green flake splatter painted
   gas tank and dash are back in
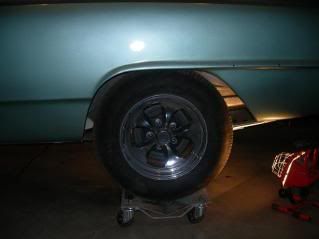
  new keystone classic wheels 14x6 285/70-14 front 295/70-14 rear
  door jambs and trunk jamb are painted
 began plumbing the engine, vac advance,fuel line,heat choke tube,pcv line, Thanks go out to Build and Ramblinfjs for there help and pictures
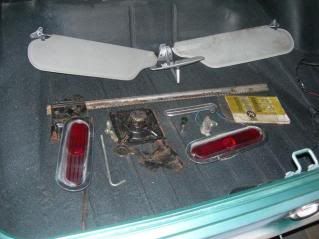
  also went to the savage yard this weekend with my son in-law Kevin and picked up a good back bumper,set of tail lights,lic plate light and hsgn,a nice set of visors and rear view,owners manual,and the complete jack assembly..
   I'll be trying to get the motor running pretty soon,and a few other small things then it's paint and wireing time. (painless 18 cir system) ------------- Brandon |
Posted By: Uncle Bud
Date Posted: Jul/18/2011 at 12:17pm
|
Car looks good, trunk looks good, every thing looks good. ------------- Buddy 1964 American 440H "Tortue Grande Vitesse" |
Posted By: idrambler
Date Posted: Jul/18/2011 at 12:44pm
|
X2 on looking good.....
------------- Jim....AMCRC Treasure Valley AMC Club, Pres 69 AMX 401/727 74 GremlinX 401/727race only 73 Matador 2dr HT 360/727 |
Posted By: 440H
Date Posted: Jul/18/2011 at 2:22pm
|
Thanks Uncle Bud and idrambler, I do what I can when I can. It's no show car but should be a nice driver when finished. I see it as just keeping another American out on the road.. 440H ------------- Brandon |
Posted By: nossliw
Date Posted: Jul/18/2011 at 11:05pm
| Brandon... are you part of Rock Mountain AMC? Do they have a forum by chance? |
Posted By: 440H
Date Posted: Jul/19/2011 at 12:27am
|
Hey nossliw, no I'm not, and last time I checked the web site they had was closed down
about 6 months ago. I would be intrested if they were up and running.. ------------- Brandon |
Posted By: Uncle Bud
Date Posted: Jul/19/2011 at 6:11pm
|
I do what I can when I can. It's no show car but should be a nice driver when finished. I see it as just keeping another American out on the road.. 440H[/QUOTE]
Brandon, We think alike. ------------- Buddy 1964 American 440H "Tortue Grande Vitesse" |
Posted By: 440H
Date Posted: Aug/01/2011 at 4:29am
This set of days off with the help of my son in - law Kevin, I cut the core support to make room for the rebuilt radiator and fan, after cutting, I boxed the lower support and welded in a piece of flat stock steel to get back the strength, all in all it came out fine and I moved on to the dash .. installed a new heater core then put the dash back together..
      ------------- Brandon |
Posted By: DocCreer
Date Posted: Aug/01/2011 at 4:53am
|
cool car..and nice engine....i love the way you guys are getting it done..have you decided what type of muffler and radio your gona use? ------------- 61 American 82 eagle limited |
Posted By: farna
Date Posted: Aug/01/2011 at 6:31am
|
Why did you need to cut the core support? Did you just cut the lower support, not the upper one? Looks like you moved the lower support out. Is the radiator you're using taller than the original? Maybe I missed something...
------------- Frank Swygert |
Posted By: 440H
Date Posted: Aug/01/2011 at 2:35pm
|
Hi Frank, I don't know if the radiator was stock for this car or not but with the 232
being so long the fan would hit the radiator at the bottom and also the hose outlet at the bottom. so by removing about 1-2" off the bottom of the support and relocating the brackets to the rear most part of the radiator it drops enough to clear the hood and the fan while still using the factory mount holes.
As far as the muffler it will just be a stock type that fits nice, and the stereo will be simple two rear package tray mount old school 6x9's and a nice glove box mounted or console mounted deck with I pad plug.. ------------- Brandon |
Posted By: farna
Date Posted: Aug/01/2011 at 4:52pm
|
Okay, I didn't catch that it was originally a 196 car. I know the radiator has to be moved forward, didn't realize the bottom supports wouldn't work as is like the top one does. On the 65 I don't think the bottom support has to be modified, yours being a 64 it was never intended to get the 232 from the factory. I just took a look at the 65 parts car I have in back -- the lower support is straight across, but moved to the very ends of the "frame" rails. I see from the photos yours was in a bit originally. I guess the only one I've physically helped with a 232 swap was a 65 then! ------------- Frank Swygert |
Posted By: 440H
Date Posted: Aug/11/2011 at 12:56am
|
It's alive.. motor ran last 2.5 years ago, car has not had a running motor in it in about 20 years.. my son in-law and I put in a make shift ignition in the engine compartment and fuel in the tank, after a couple bugs got worked out (timming) we put a little fuel down the carb and hit it again, fired right up, adjusted the carb and timming checked for leaks ( none found ) then just listened to it run for about 15-20 mins, it was about 9:30
at night with no muffler,some paint burning off the exhaust smoking up the garage,so we shut her down and closed up shop for the night. tomorow I'll start in on the shifter set up and see if we can't get the wheels to go round.. many thanks to all who have helped and inspired... IT'S ALIVE !!!!!!
 ------------- Brandon |
Posted By: raysinvegas
Date Posted: Aug/11/2011 at 1:04am
|
That's a great feeling isn't it? ------------- Andy Ray 64 440H 64 440 Convertible 68 Javelin SST 343 69 Javelin SST 343 69 SC/Rambler
|
Posted By: 440H
Date Posted: Aug/12/2011 at 10:10am
|
yep it sure is, funny how 15 mins of a motor running, along with the smells and sounds can make so much time and work all worth while.. ------------- Brandon |
Posted By: Uncle Bud
Date Posted: Aug/14/2011 at 3:45pm
|
Good for you. ------------- Buddy 1964 American 440H "Tortue Grande Vitesse" |
Posted By: xracer390
Date Posted: Aug/15/2011 at 9:58am
------------- There are those who call me Wagonslayer |
Posted By: 440H
Date Posted: Aug/18/2011 at 8:33am
|
xracer390 the parts cars qtrs were bondo and glass, I patched and made my own using
the roof for material off the old parts car..
In the meantime I've been mocking up the shifter and cable assy into the console
 had to make the console lower or the shifter assy higher I went with shifter higher welded in a base plate bracket to the floor and mounted the shifter to it..
 it's a used B & M ratchet shifter from E-bay I still need to make my own tranny to cable
bracket then adjust as needed, but so far it looks like it will work.. ------------- Brandon |
Posted By: 440H
Date Posted: Aug/25/2011 at 1:03am
|
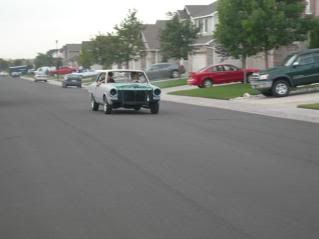
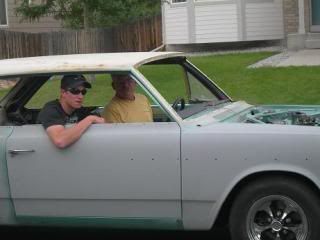
We took it out for it's maiden voyage today and I can't tell ya how great it felt going down the street and back, no windshield or any glass for that matter, smelling the paint burning off the engine,and a little spilled oil,feeling the brakes work for the first time..
it was pretty cool.. even during the second pass when I got to feeling more confident and sped up to about 30-35 and it all came crashing down, it was still pretty cool..
looks like the rest of the build and paint will be on hold for a while until I figure out what happened.. it belched about a quart of tranny fluid out the tranny dip stick and made a real mess on the hot motor and me and my son in-law Kevin " no windshield " I think I have the kickdown cable hooked up wrong, pulling to soon trying to shift up and down at the same time. don't realy know never had this happen before.. but it still drove !!
    ------------- Brandon |
Posted By: farna
Date Posted: Aug/25/2011 at 8:52am
|
The "kick-down" cable isn't a kick-down cable... not just anyway. It's a TV (throttle valve) cable. The TSM instructions for adjusting it are to adjust to a "loose pin fit" then lengthen two turns. The cable should push IN as the throttle is opened (pedal pressed down). Check the cable for free movement. You should be able to hold the end between TWO FINGERS and easily push it in and pull it out. If not, the cable is sticking inside. Pull the cable and soak in a pan of trans fluid (preferably thinned with paint thinner or acetone, no more than 50/50, can be a bit less thinner). Let it soak overnight and it should be pretty free by morning. At that point hang it so it can drip a few hours, then check for free movement again. Once it's free you're good to go. Might take another soaking. If it's really bad it will free up but the debris inside will just clog it up again. Hard to find good replacements! If the plastic/rubber coating comes off peel it all the way off. You can get some thin vinyl tubing and put over it, but might be better to leave the wire-wrapped sheath exposed. Just spray it with some type of penetrating oil (WD-40) once or twice a year. The oil will penetrate between the wire wraps and keep it free, can't do that with the plastic coating. The cable adjustment shouldn't cause the problem you had. More than likely the trans was either over filled or there was an air bubble trapped inside and it "burped". If it was shifting good and not slipping that's most likely the case. ------------- Frank Swygert |
Posted By: billd
Date Posted: Aug/25/2011 at 8:59am
|
Probably got the name because that's the only impact people can feel or "see" that it has. The rest is "hidden" (until it stops working!) Or maybe because it's being compared to the kickdown switch of other transmissions, or linkage of transmissions that use a "modulator" for throttle pressure control and linkage for kickdown. Who the heck knows! But if you come here and ask about a TVC or TV cable, guess what you'll get...  -------------  http://theamcpages.com" rel="nofollow - http://theamcpages.com http://antique-engines.com" rel="nofollow - http://antique-engines.com |
Posted By: Uncle Bud
Date Posted: Aug/25/2011 at 11:16am
|
Brandon, I hope it is an easy fix. ------------- Buddy 1964 American 440H "Tortue Grande Vitesse" |
Posted By: 440H
Date Posted: Aug/26/2011 at 6:52am
|
Hi guys, well the rookie mistakes have been fixed and advice has been taken..
Thanks Farna and others for your help or kind words..
being more familure with 60's GM products when I saw a cable running down to the tranny I hooked it up to pull with increasing throttle insted of pushing, replaced 2.5 qts
tranny fluid and then tightened up the distributer hold down bolt after getting the timming reset for test run.. it was loose and had let the dizzy move " hence the bad shaking after first pass"
I'll take it out again today and report back what happens. I'm not familure with this style carb either and even with it have being rebuilt it was off a shelf in MO it's now a mile above sea level here in Colorado,I think it may be running a little rough due to the heat tube controled choke I'll check on it more after I'm sure all else is working o.k.. ------------- Brandon |
Posted By: SEdmonds
Date Posted: Aug/26/2011 at 9:46am
| Congrats on the first drive. Glass is vastly overrated. |
Posted By: farna
Date Posted: Aug/28/2011 at 5:44pm
|
That's a Carter WCD two barrel. IIRC it should adjust like a Carter WCFB, basically it's half of one (1965 Corvette is the only listing in my 71 Motor's manual). It has metering rods. The rods are under the little cover on top. To adjust the rods back off the idle stop screw so that the butterflies are fully closed. Remove the cover. Press down on(but don't force!) the link that holds the two metering rods until the rods bottom out. Loosen the screw on the arm that lifts the metering rods and rotate that arm until the "finger" on the arm contacts the link holding the rods. Tighten the screw while holding the rods down and the finger is touching the link. Now, since you are high altitude, you probably need to run a bit richer than lower altitudes. IIRC higher altitude carbs had bigger jets, or am I backwards (had smaller jets)??? Richness can be increased by letting the rods come up just a little (not bottomed out) before tightening the lifting arm. The rods are stepped and go into a jet. As it pulls up and out of the jet the hole is less blocked, therefore richer. You may need to find a high altitude jet and/or metering rods. ------------- Frank Swygert |
Posted By: sixbangr
Date Posted: Aug/28/2011 at 6:04pm
|
higher up you go the less fuel you need, less air= less fuel. You also need to raise the timing about 1 degree per thousand feet.
------------- past owner of 19 Ramblers/AMC's US NAVY '66-'70 |
Posted By: farna
Date Posted: Aug/28/2011 at 6:14pm
|
Duh!! So you need SMALLER jets or larger metering rods. And reset timing as sixbangr says.
------------- Frank Swygert |
Posted By: pacerman
Date Posted: Aug/28/2011 at 6:38pm
|
And I think the metering rods from any similar Carter carb will fit a WCD. So you can use the rods out of an Edlebrock/Carter AFB tuning kit. Joe ------------- Happiness is making something out of nothing. |
Posted By: 440H
Date Posted: Sep/06/2011 at 10:19am
|
Thanks guys for the tips, you got it right less air = less fuel and we are 5000 ft so I guess thats 5 degrees advanced to start.. not to sure about this carb.. I like elec choke
and air/ fuel screws that can be adjusted in and out..
When I was a kid in high school (78-81) an old retired racer lived next door named Terry.. forgot his last name but he drove the first four engine pontiac at the salt flats back in his day. 50's - early 60's. any way he told me the best any engine will ever run is the spot where it makes the most Vaccume.. I have found this to be true on most engines I have ever tuned.. set timing with the light to get it close,than watch the vaccume guage and go from there up or down, once your at peak vaccume move on to the carb and repete.. I am aware there is much more that can be done, degree wheels,cams,spacers, dyno etc.. I'm just talking daily driver, but I would gess that this simple rule holds true for most engines... ------------- Brandon |
Posted By: 440H
Date Posted: Oct/13/2011 at 2:18pm
|
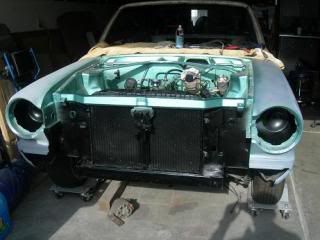
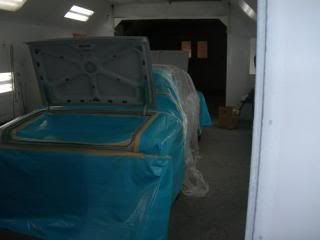
just a quick update as it heads off to paint.. I got all the rest of the cutting and welding
finished up and all the bodywork I could do. now it's off to MAACO in the city I work for Northglenn. The owner is a real nice guy (Dave) who likes the old stuff and agreed to help out by finishing off the bodywork and shooting my paint in there booth.. I lost my window of time and place to shoot it myself.. anyway I'll get it back in a few days and see how it went . and I maybe adding a little something extra to this little American...
      ------------- Brandon |
Posted By: 440H
Date Posted: Oct/29/2011 at 7:35am
|
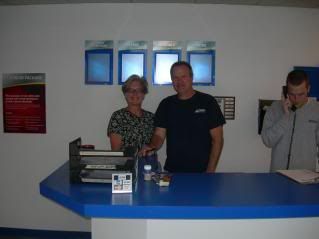
The owners of our local MAACO did a great job Dave and Joy Haggard, they seem to like the old stuff and were very nice folks to work with and now to know..
the communtication was good and when there was a little problem Dave was all over it.
Remember I did most of the body work the best I could, and bought my own paint..
I ended up with 7.5 hours of body work,a 2k prime and seal, block sand,paint and new top for right at $1400.00 I'm very pleased with the results and think I will work with them again with other projects...
Dave and Joy the owners
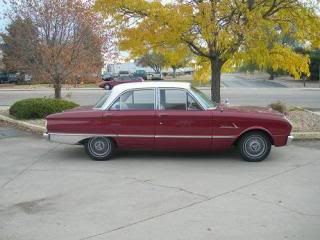
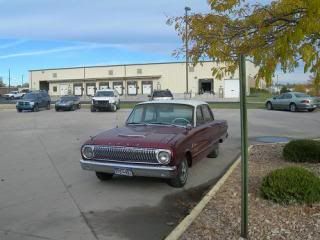
 Joy's very nice and clean Ford Falcon
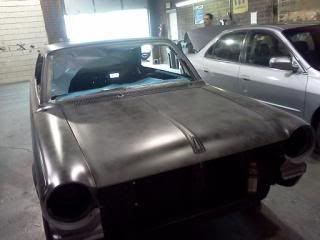
  guide coat is on
  all the folks at our local MAACO in Northglenn Colo were real cool about customers dropping by to get a peak at progress, and also listening to you and what you wanted
Hood and Trunk taped up for jamb work
 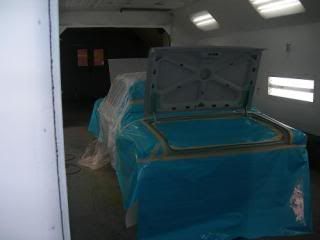 Just out of the booth,real glad I went with the wet loook hardener from the Restoration Shop where I got the paint Green Frost and reducer all in one kit, the guys at MAACO said it went on real good, laid down well, and the metalic stayed suspended well for a one stage paint..
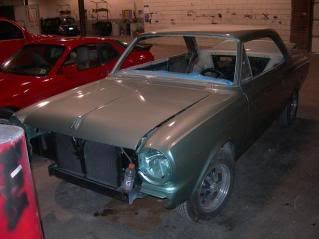   It looks way different out in the sun light,it was pretty dark in that part of the shop waiting on the guy to put the vinyl top on.
Top was installed, I got it home, and it's under a new car cover for now until next days off, then I'll put up more pics with the top on.. and start the ressembly.. ------------- Brandon |
Posted By: farna
Date Posted: Oct/29/2011 at 9:57am
|
You might get some criticism for using Maaco, but I've used the cheap painters with good results myself. You hit the key -- do as much of the body and prep work as you can yourself. The initial sanding at least. That's where most of the labor and cost is. I've done everything but spray a couple cars then sent them to the cheap shop for paint. Maaco uses a good mid-grade PPG paint, and I think they will mix factory colors too, so you're generally okay using their paint. But if you want something special or just want to make sure of the quality, check with the shop before buying your own -- they may only want to spray certain types or brands (not sure about Maaco, talking in general... there was a "Peach" auto painting in GA that was a cheap chain similar to Maaco that I've used). Those guys spray several cars a day every day -- I'm sure even someone who's only been there spraying a week can do as good or better than I can! Great job so far, the car is looking really good! ------------- Frank Swygert |
Posted By: DocCreer
Date Posted: Oct/29/2011 at 10:40am
|
Cool..this car is nearing completion..nice color..and good choice on the 232! ------------- 61 American 82 eagle limited |
Posted By: 440H
Date Posted: Oct/30/2011 at 7:09am
|
Thanks Doc, and yes Frank bodywork and prep make all the difference a paint job is only as good as whats under the paint job. and paint won't hide missed spots... I should have spent another week on mine but wanted it done before snow flies....
Hey thanks for the coudoes…
Had a little time this morning before I head off to work so as promised a few more pictures in the daylight.. remember the top is cut a little long and will be covered on all the edges by trim… 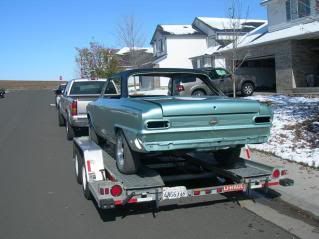 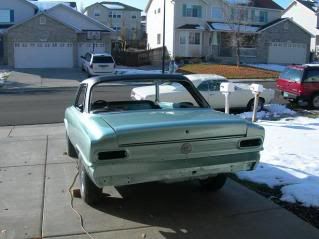 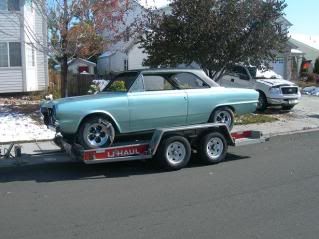  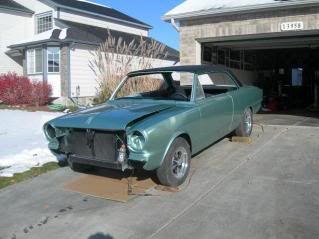 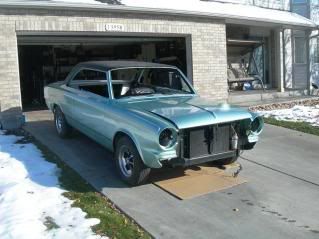 thats it for now .. I have to get after that rear main seal, can't stand leaks or drips ------------- Brandon |
Posted By: raysinvegas
Date Posted: Oct/30/2011 at 8:16am
|
Looks gorgeous! ------------- Andy Ray 64 440H 64 440 Convertible 68 Javelin SST 343 69 Javelin SST 343 69 SC/Rambler
|
Posted By: farna
Date Posted: Oct/30/2011 at 9:17am
|
Has a 196, right? That has a rope seal in the rear and may be impossible to repair without a slight drip when hot. Galvin's sells a "Best" brand rope seal that really is the best from everyone who has used them, but it's just very difficult to replace a rope seal and have no drip at all, even with the engine out of the car. No neoprene replacement for the old 196.
------------- Frank Swygert |
Posted By: raysinvegas
Date Posted: Oct/30/2011 at 9:36am
|
There ARE rubber seals available. Oil leaks are NOT a given with the 196. Just like oil burning is NOT a given with the 196. ------------- Andy Ray 64 440H 64 440 Convertible 68 Javelin SST 343 69 Javelin SST 343 69 SC/Rambler
|
Posted By: pacerman
Date Posted: Oct/30/2011 at 10:14am
------------- Happiness is making something out of nothing. |
Posted By: farna
Date Posted: Oct/30/2011 at 1:05pm
|
No kidding. I looked for one, even at many other makes that might be adapted, and never found one that would work. If someone makes one now please let us know who!! That's a rubber (neoprene)rear main seal. The 196 uses more oil than newer model engines, like many of the older (40s and 50s mainly) engines. A quart every 1500 miles is normal for older carbed engines like the 196 (add one quart between changes). Driving it like a modern car (which would be a bit harder than it was designed to run) will lead to burning as much as a quart every 1000 miles -- but that's driving it pretty hard at sustained high speeds (55-65 on the interstate 4-6+ hours). Driving around town at a more leisurely rate reduces oil consumption to the point it's not very noticeable, as little as a quart (or slightly over) ever 3000 miles, which is the normal change interval for an older carbed engine. ------------- Frank Swygert |
Posted By: Uncle Bud
Date Posted: Oct/30/2011 at 2:05pm
|
Looking good. ------------- Buddy 1964 American 440H "Tortue Grande Vitesse" |
Posted By: 440H
Date Posted: Nov/02/2011 at 8:26am
|
Hey guys, my American has a transplant 232 in it remember ??? no 196... thanks Uncle Bud , thanks Raysinvegas, means alot comming from you guys... you have great cars and Franks wagon and others have all been inspirational.. ------------- Brandon |
Posted By: Wildfire
Date Posted: Feb/26/2012 at 6:37pm
| Great color. Looks like she's coming along nicely. Keep at it. |
Posted By: 440H
Date Posted: Nov/27/2012 at 3:45pm
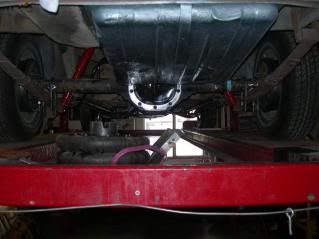
hi guys, wow its been awhile had some motor problems and was out with a bad back for awhile but finaly getting some more work done. got the motor delt with and now having a 8.8 3.73 1990 ford Ranger limited slip rearend installed buy a friend at a good fab shop. also installed sub frame connectors from control freak. once I get it back I should be able to make a little faster progress...
   ------------- Brandon |
Posted By: 440H
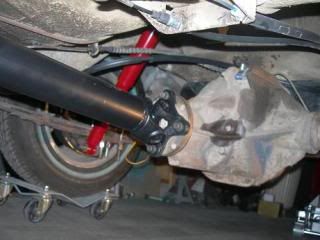
Date Posted: Dec/04/2012 at 1:05pm
back home safe and sound now the shop did a great job putting the 90 Ranger rear in the Rambler reused the Rambler perches custom made drive shaft with ranger rear flange
   ------------- Brandon |