
|
|
|
Your donations help keep this valuable resource free and growing. Thank you.
|
My 73 Gremlin build project |
Post Reply 
|
Page <1234 8> |
| Author | |
73 Gremlin 
AMC Apprentice 
Joined: Apr/05/2014 Location: Arizona Status: Offline Points: 65 |
 Post Options Post Options
") Thanks(0) Thanks(0)
 Quote Reply Quote Reply
 Posted: Apr/06/2014 at 9:48pm Posted: Apr/06/2014 at 9:48pm |
|
Got the picture posted
|
|
 |
|
|
pit crew
Supporter of TheAMCForum 

Joined: Jul/08/2007 Location: delete Status: Offline Points: 5341 |
Post Options
Thanks(0)
Quote Reply
Posted: Apr/06/2014 at 10:06pm |
|
|
 73 Hornet - 401EFI - THM400 - Twin Grip 20 |
|
|
|
|
73 Gremlin
AMC Apprentice
Joined: Apr/05/2014 Location: Arizona Status: Offline Points: 65 |
Post Options
Thanks(0)
Quote Reply
Posted: Apr/07/2014 at 10:34am |
|
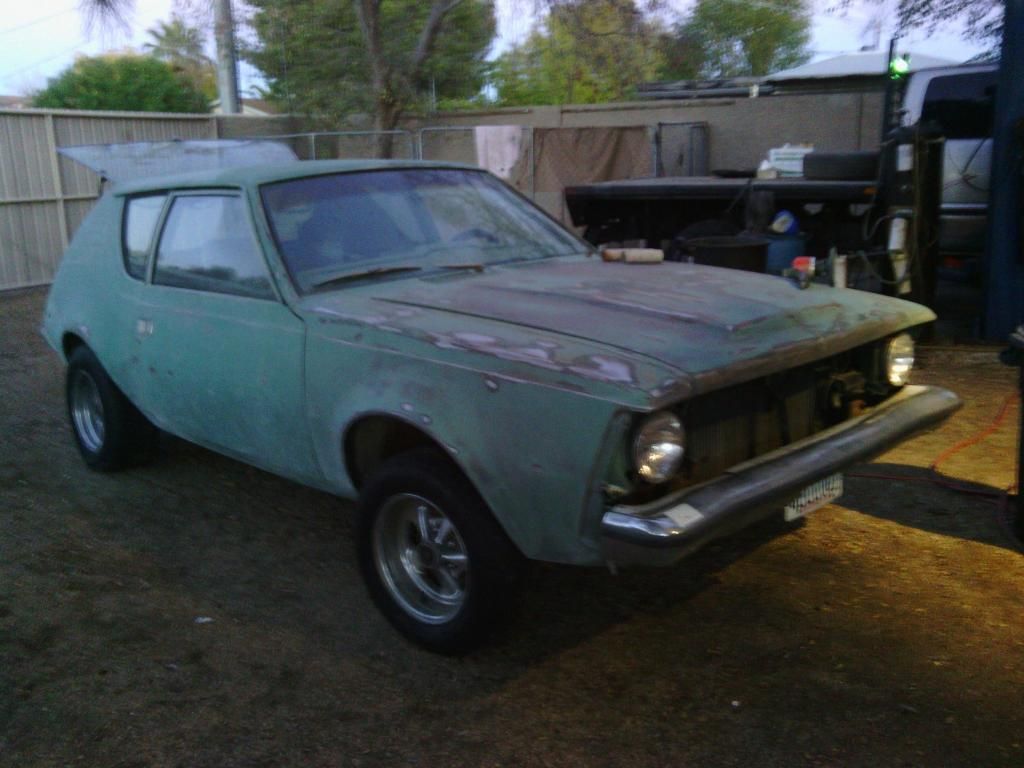
When I got the car back to town the first thing I did was take it on the trailer to the tire shop to reseat the tire beads so the they would at least hold air. I had to replace only one tire to make it a roller. The tires must have been fairly new when the car broke down because the tread was still deep, but 10 years of sitting in the desert sun flat... After unloading it it went right onto the lift for powerwashing the bottom and rust inspection. None found other than I mentioned on the floor. I then hit it with the DA and started the body work.
http://s780.photobucket.com/user/tsar65/media/Gremlin/IMG_20131223_173850.jpg.html -
|
|
|
|
|
73 Gremlin
AMC Apprentice
Joined: Apr/05/2014 Location: Arizona Status: Offline Points: 65 |
Post Options
Thanks(0)
Quote Reply
Posted: Apr/07/2014 at 10:26pm |
|
http://s780.photobucket.com/user/tsar65/media/Gremlin/IMG_20131227_151306.jpg.html -
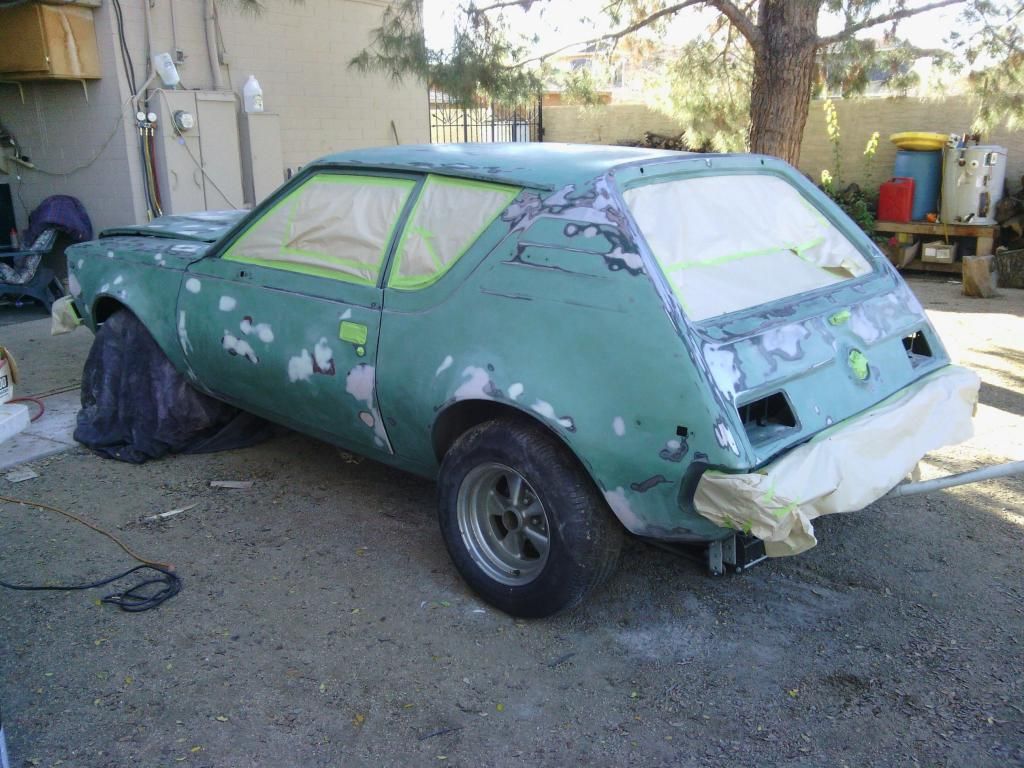 Here I have it sanded down and dings filled, taped and ready for first coat of DTM primer
|
|
|
|
|
73 Gremlin
AMC Apprentice
Joined: Apr/05/2014 Location: Arizona Status: Offline Points: 65 |
Post Options
Thanks(0)
Quote Reply
Posted: Apr/07/2014 at 10:28pm |
|
http://s780.photobucket.com/user/tsar65/media/Gremlin/IMG_20131227_151229.jpg.html -
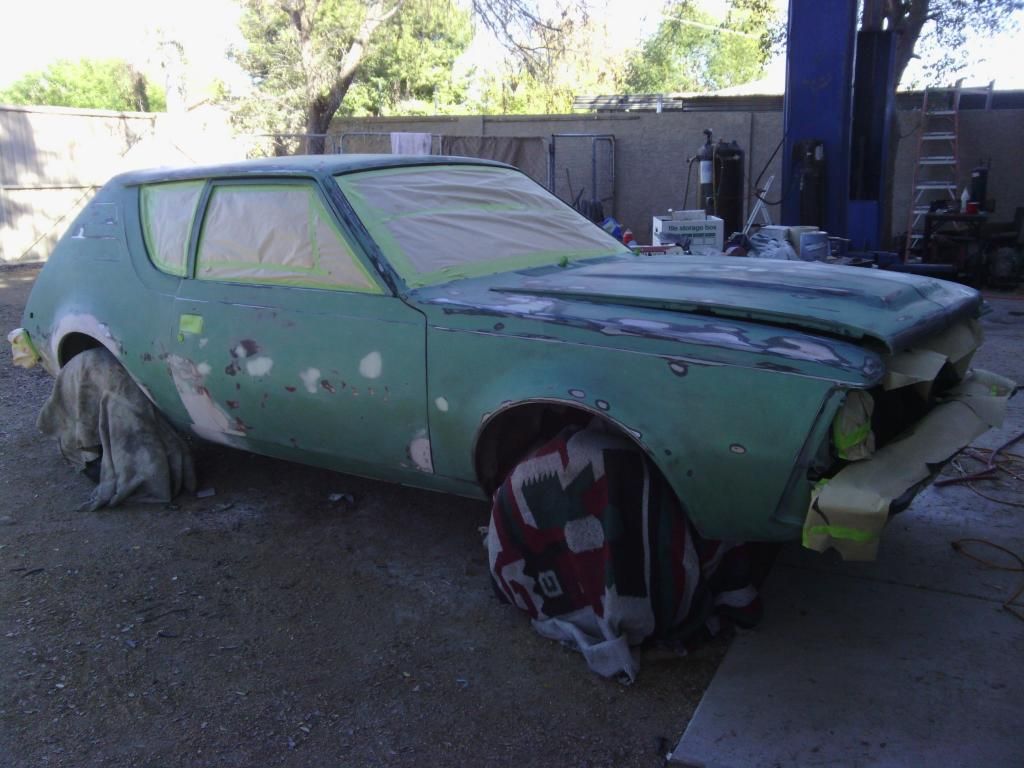 Passenger side ready for primer.
|
|
|
|
|
73 Gremlin
AMC Apprentice
Joined: Apr/05/2014 Location: Arizona Status: Offline Points: 65 |
Post Options
Thanks(0)
Quote Reply
Posted: Apr/08/2014 at 11:02am |
|
http://s780.photobucket.com/user/tsar65/media/Gremlin/IMG_20131231_172033_970.jpg.html -
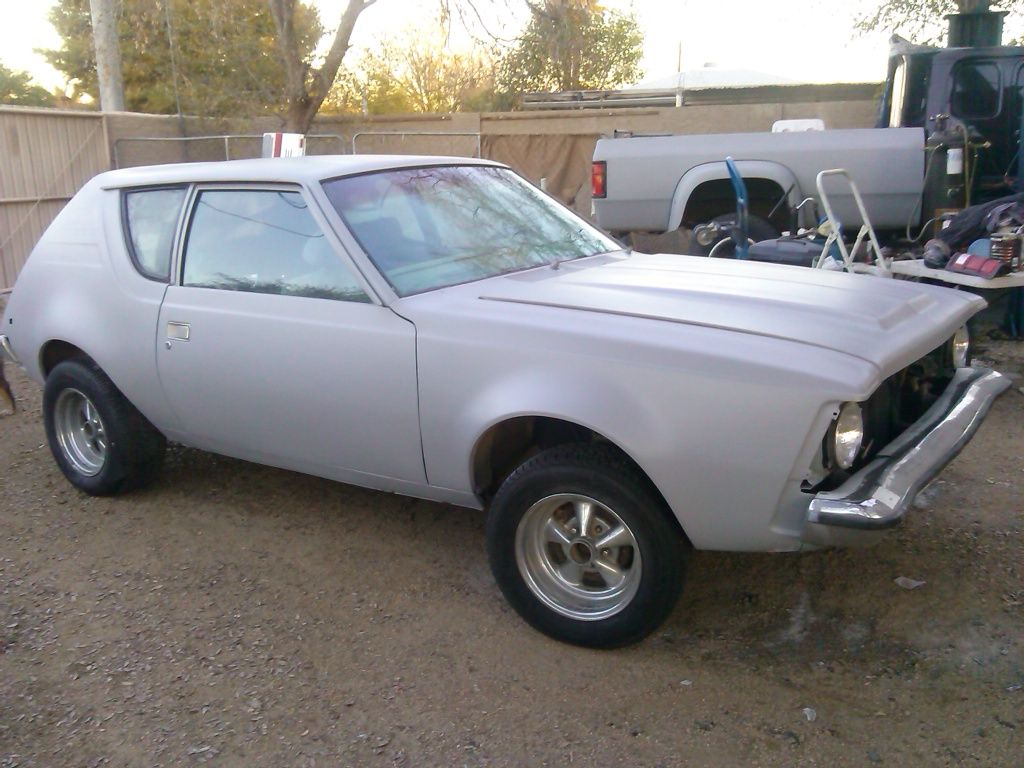
Several coats of Primer here. I started with a base coat of DTM and then switched to a regular surfacing primer on top of that. No reason to keep laying down DTM primer when the less expensive surfacing primer integrates with it. Note I still have the ancient tires still on the car.
|
|
|
|
|
RSX 401
AMC Addicted 

Joined: Oct/21/2010 Location: Southeast Texas Status: Offline Points: 689 |
Post Options
Thanks(0)
Quote Reply
Posted: Apr/08/2014 at 6:10pm |
|
Good progress. Do you have center caps for the Cragars?
|
|
|
I'll follow these lines a little ways more,
Until I can find what I'm looking for. With the pedal to the metal, I'm gaining my speed. Riding down low in my AMC..... |
|
|
|
|
73 Gremlin
AMC Apprentice
Joined: Apr/05/2014 Location: Arizona Status: Offline Points: 65 |
Post Options
Thanks(0)
Quote Reply
Posted: Apr/09/2014 at 12:23am |
|
http://s780.photobucket.com/user/tsar65/media/Gremlinikonapril2014025.jpg. -
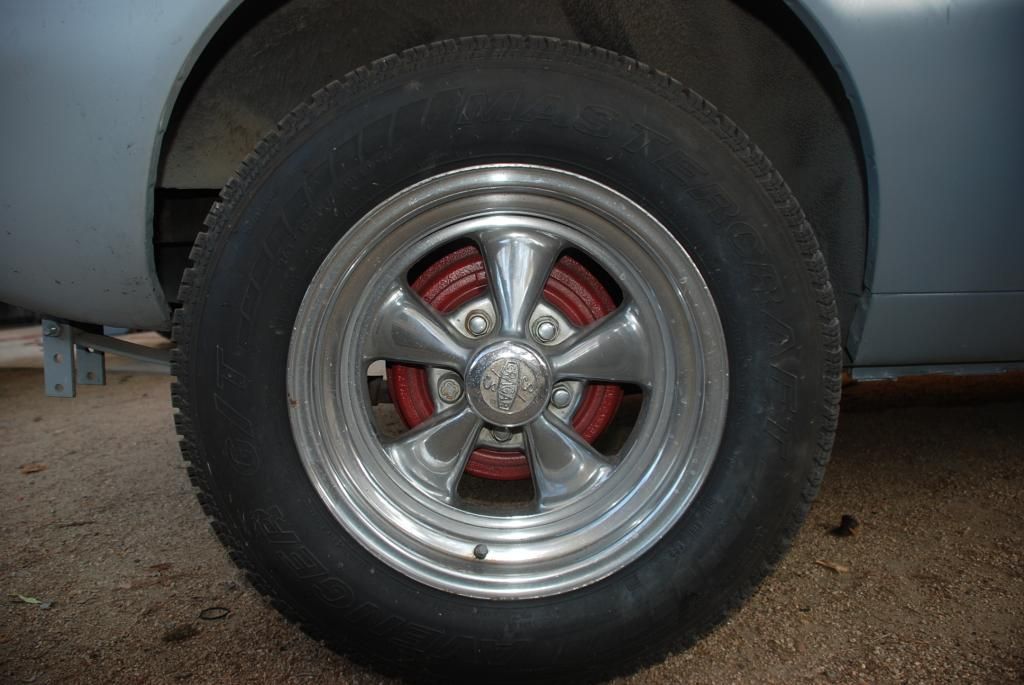
Anywhere else but the SoCal desert and these Cragars would have been nothing but rust after sitting outside for 10+ years. The chrome finish is a little dull but ok for a driver. I got 4 used Cragar center caps off Ebay for about $7.50 each delivered. I also ordered some new tires off Ebay as 235/60/14's are hard to find in stock. $196 for the pair delivered from Miami. Note some of the new rubber is already stuck to the qp.
|
|
|
|
|
73 Gremlin
AMC Apprentice
Joined: Apr/05/2014 Location: Arizona Status: Offline Points: 65 |
Post Options
Thanks(0)
Quote Reply
Posted: Apr/09/2014 at 12:53pm |
|
http://s780.photobucket.com/user/tsar65/media/Gremlin/IMG_20140127_163451_099.jpg.html -
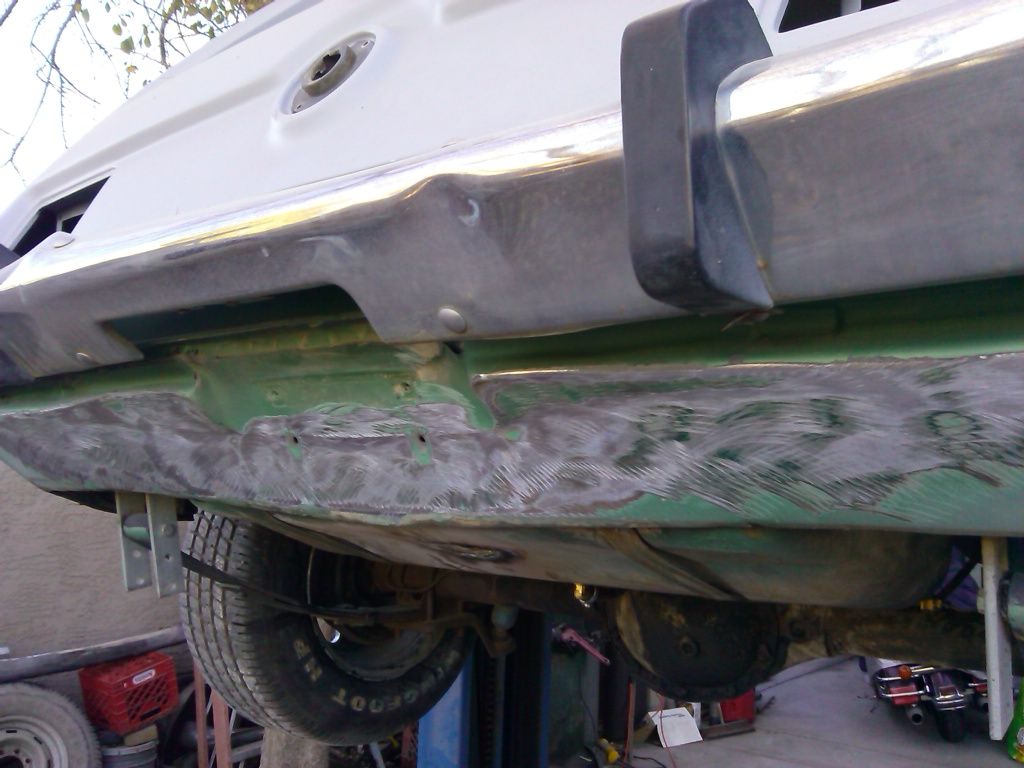 Naturally the rear valance was bashed in after 41 years, part of which was spent under the ownership of a teenager. Here I had the choice of drilling/cutting the 68+ spot welds ( I counted) that hold it on and straightening it off the car, (best) or using the stud welder and a puller. After evaluating the hours involved in getting it off, straightened and welded back on the stud welder won.
Here I have sanded off the layers of paint with a 36 grit disc to get down to the bare metal required by the stud welder. If you look closely at the fuel tank you can see where I braze welded a hole. The former owner had put a big glob of JB Weld for fuel tanks over it. While it held ok it was unsightly. While I had the tank off cleaning it I welded the crack closed and welded in a 3/8 brass elbow in the front tank sump. Thats out of the way when the V8 motor goes in to run at least a 3/8 fuel line. If you run a performance engine you MUST run a bigger fuel line from the tank cause a 5/16 line aint a gonna cut it.
Naturally the rear valance was bashed in after 41 years, part of which was spent under the ownership of a teenager. Here I had the choice of drilling/cutting the 68+ spot welds ( I counted) that hold it on and straightening it off the car, (best) or using the stud welder and a puller. After evaluating the hours involved in getting it off, straightened and welded back on the stud welder won.
Here I have sanded off the layers of paint with a 36 grit disc to get down to the bare metal required by the stud welder. If you look closely at the fuel tank you can see where I braze welded a hole. The former owner had put a big glob of JB Weld for fuel tanks over it. While it held ok it was unsightly. While I had the tank off cleaning it I welded the crack closed and welded in a 3/8 brass elbow in the front tank sump. Thats out of the way when the V8 motor goes in to run at least a 3/8 fuel line. If you run a performance engine you MUST run a bigger fuel line from the tank cause a 5/16 line aint a gonna cut it.
I pulled the tank again and used the strap mount holes to gain access the back of the panel. I used the torch to help make the metal move as this panel is thick material.
|
|
|
|
|
AMCEagleNut88
AMC Fan 

Joined: Aug/26/2013 Location: Centreville, MI Status: Offline Points: 3 |
Post Options
Thanks(0)
Quote Reply
Posted: Apr/09/2014 at 2:09pm |
|
Lookin good! I'm tellin ya, Canary Yellow would look badass! Lol...
|
|
|
|
|
Post Reply
|
Page <1234 8> |
 Tweet
Tweet
|
| Forum Jump | Forum Permissions You cannot post new topics in this forum You cannot reply to topics in this forum You cannot delete your posts in this forum You cannot edit your posts in this forum You cannot create polls in this forum You cannot vote in polls in this forum |


 Click for TheAMCForum Rules

 Topic Options
 73 Gremlin wrote: