
|
|
|
Your donations help keep this valuable resource free and growing. Thank you.
|
Restoration of Hanna (Charity AMX) |
Post Reply 
|
Page <12345 24> |
| Author | |
Alliups 
AMC Addicted 

Joined: Mar/25/2008 Location: S.B. county Ca. Status: Offline Points: 1409 |
 Post Options Post Options
") Thanks(0) Thanks(0)
 Quote Reply Quote Reply
 Posted: Oct/01/2008 at 2:53pm Posted: Oct/01/2008 at 2:53pm |
|
I'm not aimed at warmongering either, though your question irritated me, no doubt. Guess I'm in the camp of knowing the hazards, taking the precautions, and accepting the known risk. Haven't used the Eastwood kit if it's a purpose designed solvent. However, I tried Eastwood's or Por's Metal Prep, that worked great with a rag. I also took a large dull screwdriver to help peel the undercoating off after wiping with the metal prep. Easy.
Steve |
|
 |
|
|
Ohio AMX
AMC Addicted

Charter Member Joined: Jun/29/2007 Location: NE Ohio Status: Offline Points: 4935 |
Post Options
Thanks(0)
Quote Reply
Posted: Oct/01/2008 at 4:03pm |
|
I tried the Eastwood stuff and it works about as well as Windex. My preferred method is to soften it with a heat gun, then remove easilly with a plastic or wooden scraper.
|
|
|
1940 Hupmobile Skylark
1968 Javelin future Pro Street 1969 AMX 290/auto (first car) 1997 Dodge SS/T 5.9L AMO# 983 |
|
|
|
|
ZX401
AMC Nut

Joined: Jul/01/2007 Location: United States Status: Offline Points: 117 |
Post Options
Thanks(0)
Quote Reply
Posted: Oct/01/2008 at 6:18pm |
|
This is exactly why I don't post anymore. You try to share knowledge and experience with others and there is always someone who either says you are wrong, incorrect, dangerous, lacking in intelligence, etc. Why bother. I think the post is great and want to thank Tom for taking the time to post it. The way I see it, Tom gave a car to the hobby for charity, it travelled for years, with more parts being misplaced for lack of a better word, was never even near completion, and now Tom has chosen to fix it himself. Now he is willing to share his experience with us. That to me is one heck of a guy! |
|
|
Make mine big and bad --- green!
|
|
|
|
|
Alliups
AMC Addicted
Joined: Mar/25/2008 Location: S.B. county Ca. Status: Offline Points: 1409 |
Post Options
Thanks(0)
Quote Reply
Posted: Oct/01/2008 at 8:59pm |
|
I don't always see eye to eye with others, including Tom, but so what? Is everything always perfect and peachy with your best buddies? The main gig is this is a definite instance where i not only see eye to eye but applaud what Tom is doing in this segment. I also don't think that the fellow that thought there was another way to do the stripping meant anything other than a concern about what someone not experienced might take away from Tom's methods and maybe experienced as well- the way I see it doesn't seem as though there's much chance of lighting up the wheelwell or yourself if you give the solvent time to evaporate. ok, fair enough. Practically- any way you slice it, undercoating is a semi- hardened petroleum based coating. In that form, it is basically gonna require heat, to change its state, or a solvent with ingredients that will break down the tar from the solvents in the undercoating. Soap ain't gonna do it and neither are totally inert cleaners.
Steve |
|
|
|
|
tbenvie
AMC Addicted
Joined: Jul/02/2007 Location: United States Status: Offline Points: 1014 |
Post Options
Thanks(0)
Quote Reply
Posted: Oct/05/2008 at 8:52pm |
|
Another workday and Hanna is coming along quite nicely. Today it was time to fit the panels before work is done on them. Now you might think this is a waste of time, but there are a few reasons to do this. Number one, it is an old car with some panels off of other cars. Who knows what shape the other car was in that these panels came from. Plus, we already know a quarter panel has been replaced on this car-will the gaps be correct? Plus, the hinges were very worn and are now rebuilt. Are they bent or damaged? This process should only take a few hours if everything fits right, more if work has to be done to them.
First, a door will be hung. this is pretty easy-just move the hinges in a position they would be in if the door was shut, lift up the door, and install the bolts. Remember, the striker should be removed as it will try to "center" the door to it's location, which may or may not be correct. There is a plate on the inside of the door with threaded holes where the bolts are installed. You could not just install the bolts on just a door as the metal is too thin and would rip. This plate clamps the door between it and the hinge. It also has a little play in it to allow for adjustments. You may have to use a small tool to align the plate with the holes to get the bolts started. I install two upper bolts and two lower bolts (actually, there is only two lower bolts on 69 and 70 doors). Tighten them up and look at the door gaps. Here is what I had: First, the rear of the door is too high: 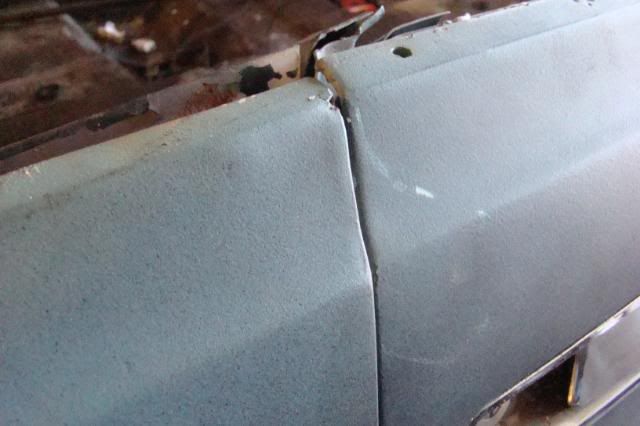
Before you adjust this, you have to look at the front of the door. this will tell you if the whole door is high, or just the back. So here is the front: 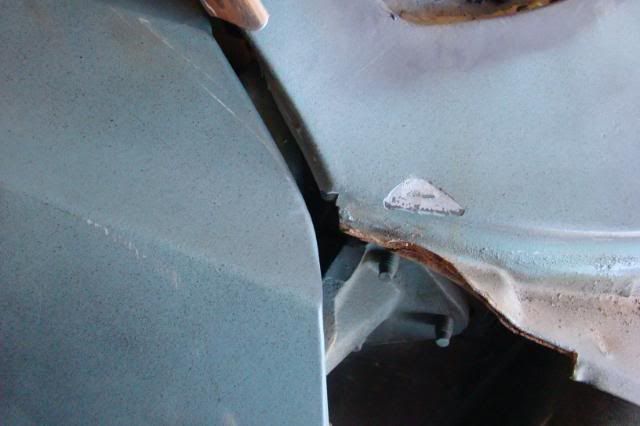
And the bottom: 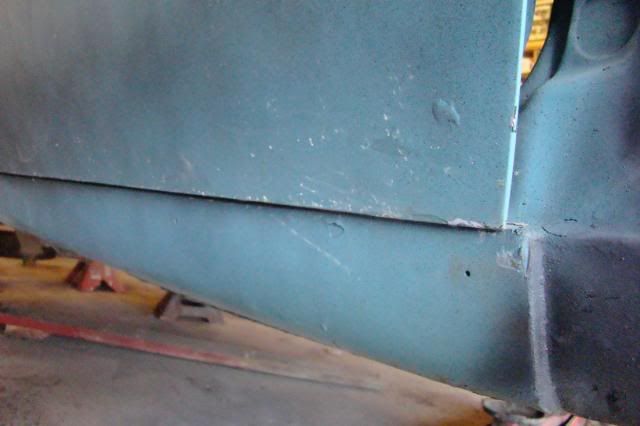
You can see the back is too high, the front is too low, and there is no gap at the bottom at the rocker panel. So the front of the door has to come up, the back of the door has to go down. This will require two adjustments at the hinges. With the fender off, this is easy. Here are the hinges (and I was concerned when I saw the "bubble"-it was just stuff in the primer, no rust): Upper: 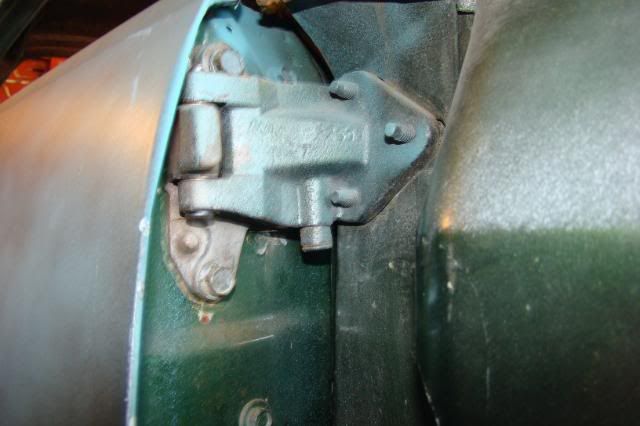
Lower: 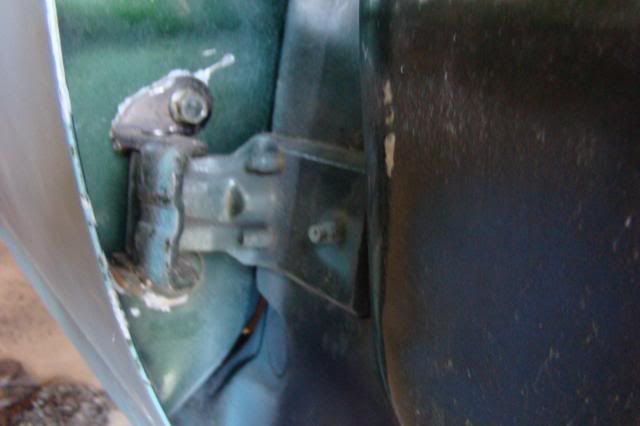
First, the whole door has to come up to give me a line at the rocker panel. To accomplish this, all 4 hinge bolts have to be loosened at the door and the door raised. I lift it enough to get a good gap at the very front of the door at the rocker. However, lifting the whole door will raise the back even more. Once lifted, I check the gap at the front and tighten the bolts. 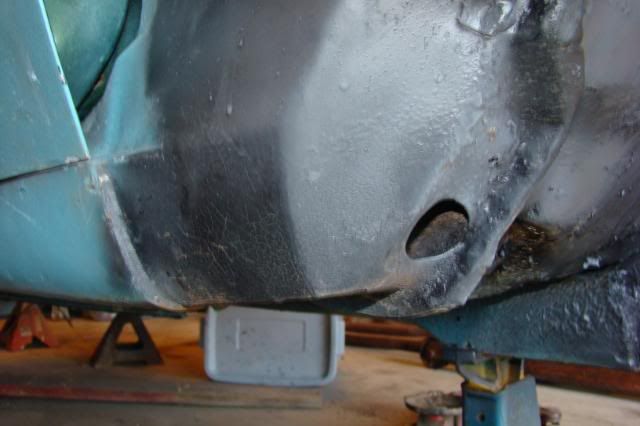
Now the rear of the door has to be lowered. This is accomplished by loosening the bolts on the bottom hinge where it attaches to the car body (NOT the door). You only loosen the bolts enough to move the door, so only a half turn may do it. Check the top of the door and body lines. The rear of the door now is up almost a half inch, so I let it drop some and check the gaps. (I put blue tape on the line for the pictures). 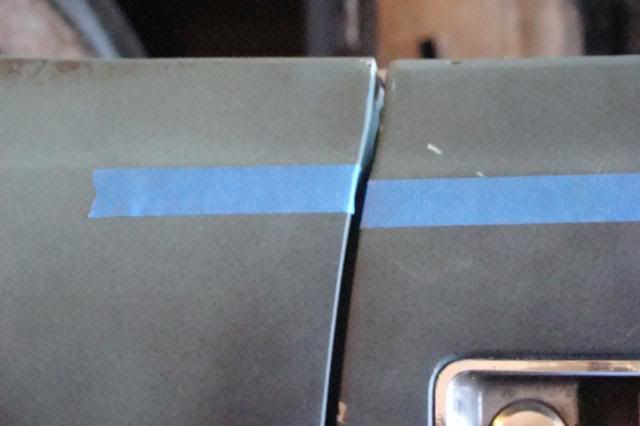
Too much! Just loosen the bolts again and trial and error. Here it is lined up: 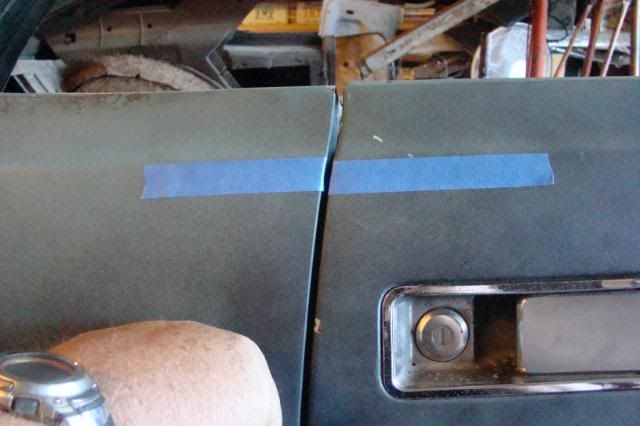
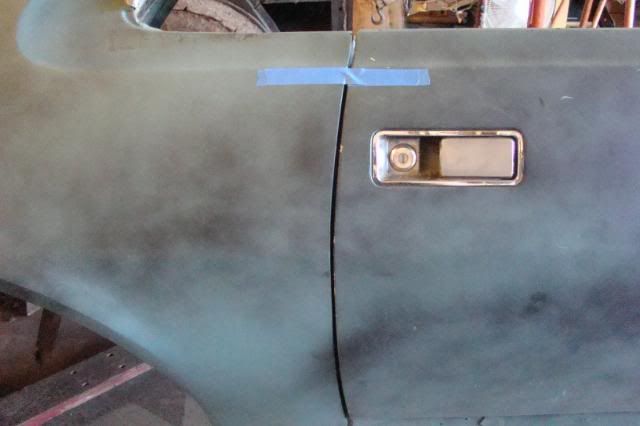

Now check the gaps along the rocker panel: 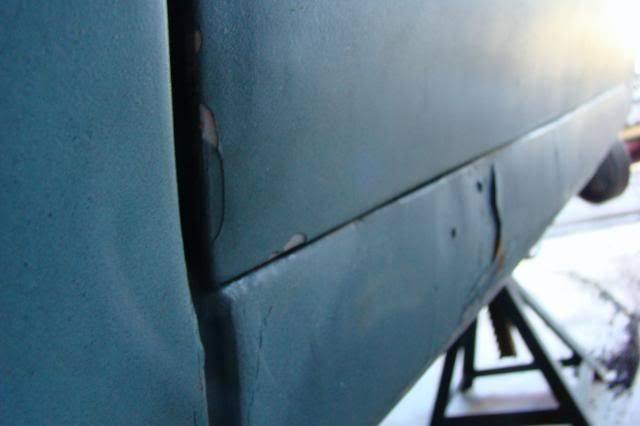
The different colors and light make it seem off, but the gap along the quarter is a nice even line. Next we check the gap along the quarter panel. Too tight, the door has to move forward. Too wide, the door has to move back. This is done by loosening the top and bottom hinges and moving them both in the same direction, then tightening them up. Okay, we have a problem: 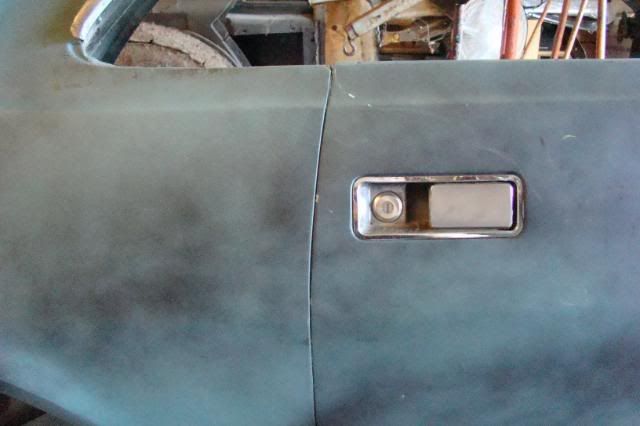
The gap between the door and the quarter at both the top and bottom third of the door is perfect. However, the middle third is too tight. Unfortunately, there is no adjustment for this. This is a result of how the quarter was hung when it was replaced. The door cannot be shaved as it would detach the door skin from the frame. Maybe some hammer/dolly work on the quarter will help. So lesson learned-if you are going to hang a panel, adjacent panels must also be aligned correctly. Just the bad hinges on the door would effect the quarter. Right now, I'm thinking of just leaving the gap as is. It is not so tight as it will chip the paint, and the dark color of the paint will help a little. Last adjustment is the in-out movement of the door. Again, check the gaps at the quarter and near the windshield post. You can see it needs to be moved:
You will have to decide which hinge to loosen to close the gap. In this case, it is the top hinge-loosen it and move the door in. Now it's done:
Again, the pictures do not show the gaps as good as they are. Okay, small confession: I've done a ton of these doors and actually checked multiple adjustments at the same time. I just thought it would be easier if I broke it down one at a time for you. With a little practice it is easy to do. |
|
|
Thomas M. Benvie
|
|
|
|
|
tbenvie
AMC Addicted
Joined: Jul/02/2007 Location: United States Status: Offline Points: 1014 |
Post Options
Thanks(0)
Quote Reply
Posted: Oct/05/2008 at 9:24pm |
|
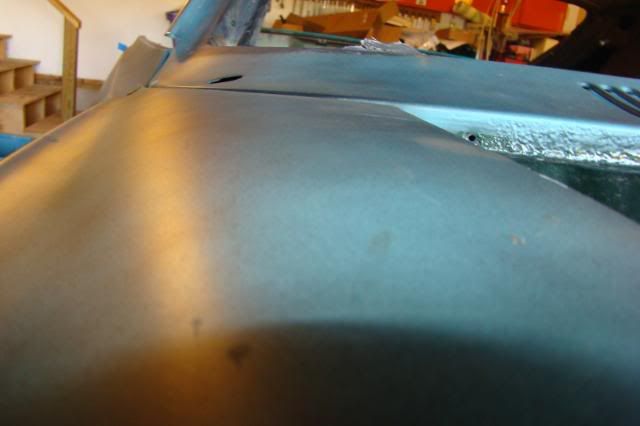
Now the fender needs adjustment. I already posted a "teaser" on how to close up the gap at the cowl, but there were more problems with the right fender: there was a shim under the rear of the fender when we disassembled the car. AMCs did not use shims, so there seems to be a problem. Look at the height between the cowl and the fender top:

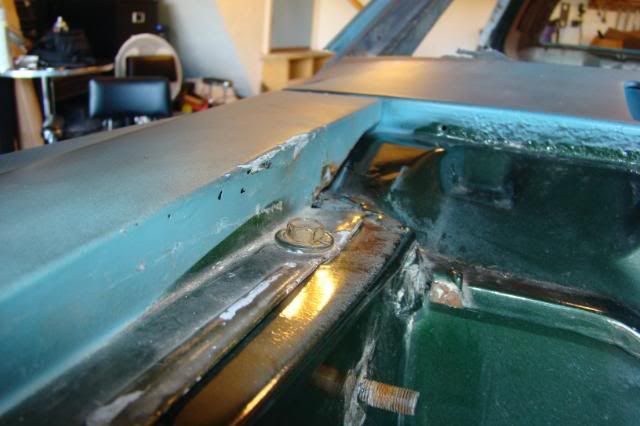
Somehow, the inner part of the fender has dropped down. Hopefully, there is a problem with the fender. if not, there is a problem with the unibody-not a good thing. A quick examination shows the problem-the area around the bolt holes is bent: 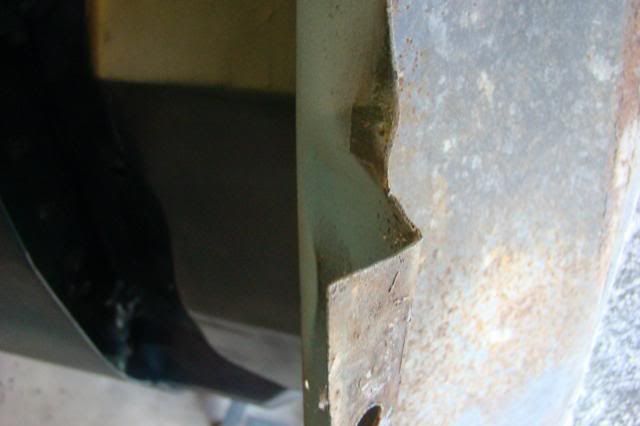
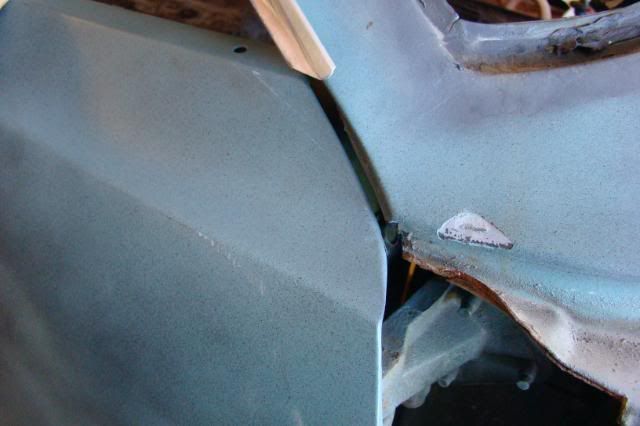
The "V" shape bend in the metal shows this has been dropped, or something landed on it. A little hammer and dolly work and it is fixed in no time. Before hanging the fender make sure these two hole are cleaned out. The top hole can be vacuumed out from inside the car: 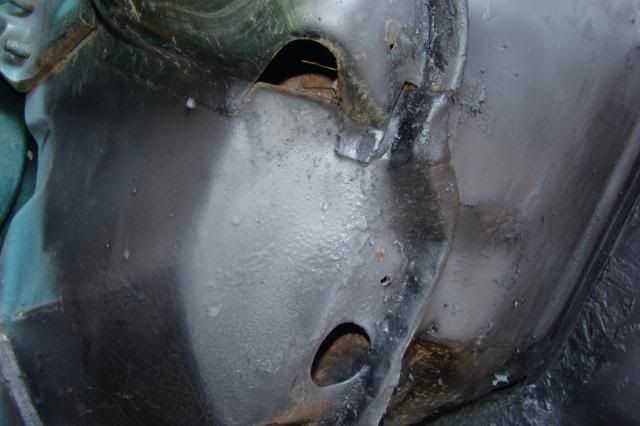

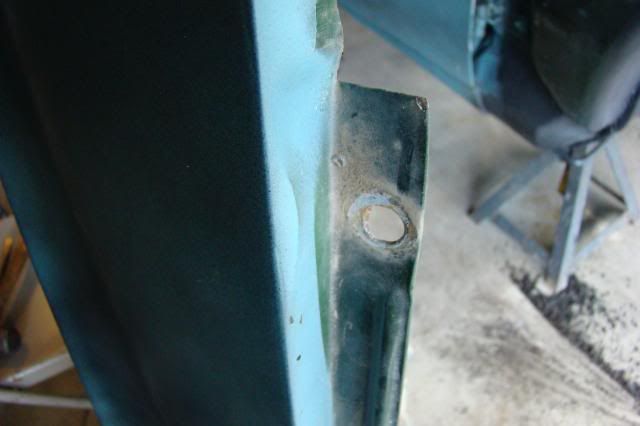
That big square hole in the back leads right to the hole. A ton of debris is often found here coming from the vent holes in the cowl. In New England, this is often an area very prone to rust. Once cleaned out, you can test fit the fender. The fender will fit in between the door and car body at an angle, then once in place move the rest of the fender in place (and the right side here will be easier as the hinge windstop and spring are missing). The fender uses special wide thread bolts. Install the top two rear bolts on the fender but do not tighten them all the way-just enough to move the fender. Next, install the innerbolt that everyone leaves out. I tape the bolt AND the socket together on the extension. This is to keep the bolt from falling in, as well as the socket. The access hole is the circle shown on the inner panel: 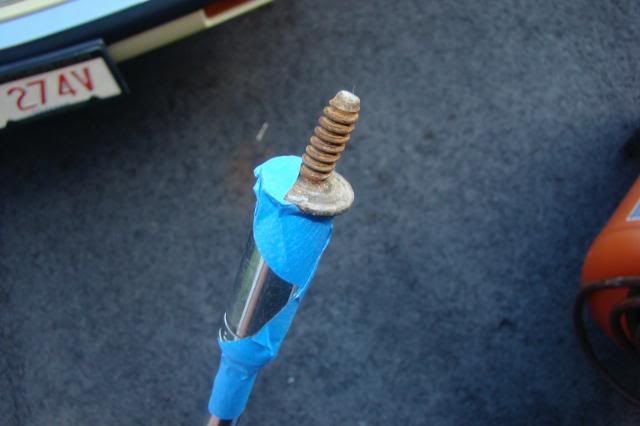
Here is the bolt entering the fender-I turn the extension without the ratchet to get it started. 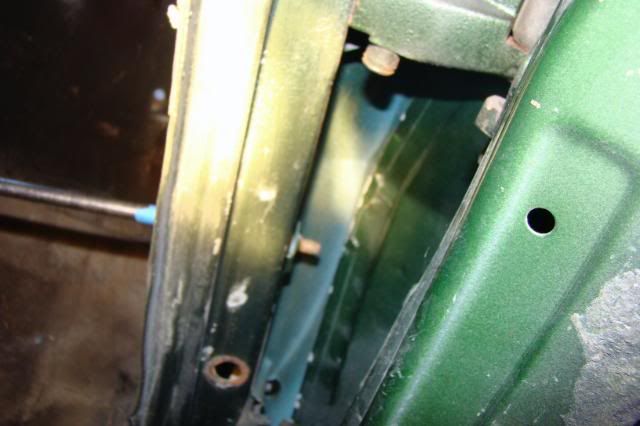
This bolt adjusts the fender height. Line up the body lines on the door with the lines on the fender and tighten the bolt. 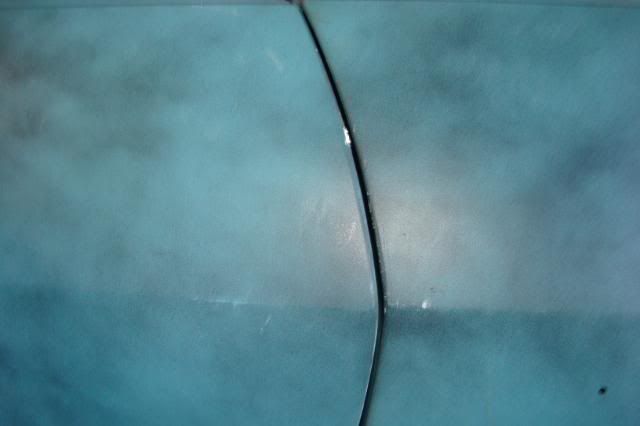
Tighten the top bolts and check the gap and fender/cowl alignment-both gap and height. 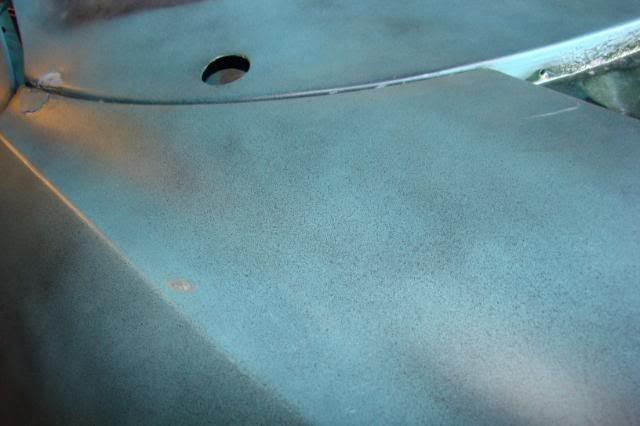
Lastly, install align, and tighten the bottom bolt (also usually rusted out in this area, but not on Hanna!) 
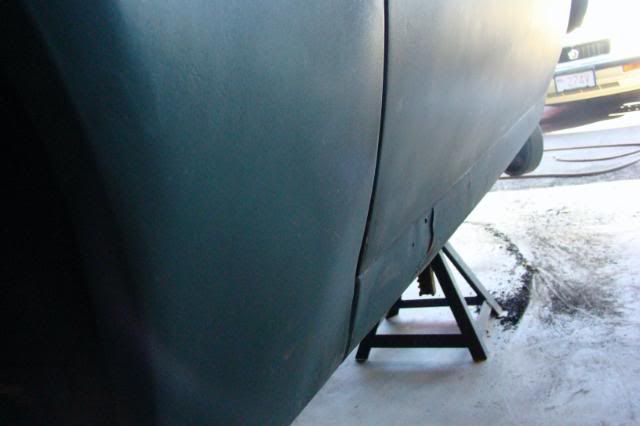
Okay, another problem. the bottom of the fender is bent out, causing the gap to be too large. I am surmising the fender was pulled off the car without breaking the brazed area (this is brazed because of the irregular shape. The fender follows the rocker panel, then bends outward to follow the door). This is going to require some body work at another time as it is too late today. So here is a side view of the passenger side of the car: 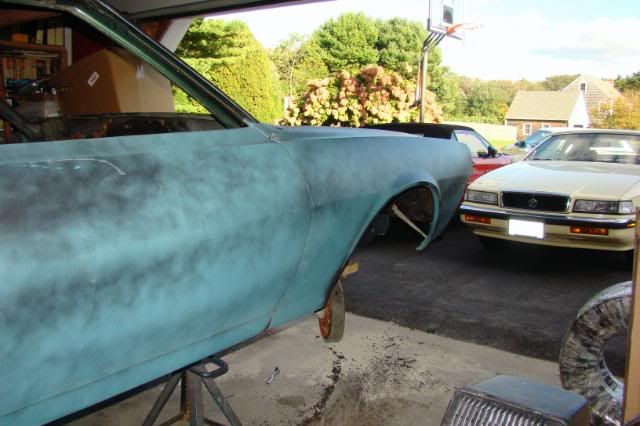
|
|
|
Thomas M. Benvie
|
|
|
|
|
tbenvie
AMC Addicted
Joined: Jul/02/2007 Location: United States Status: Offline Points: 1014 |
Post Options
Thanks(0)
Quote Reply
Posted: Oct/06/2008 at 6:08pm |
|
Just talked to a friend of mine who owns Distinctive Auto Body in Whitman, MA. He has agreed to paint the car for us in his brand new shop and help with any bodywork. He also has Montague-Brown donating the paint and materials, and may have a chrome shop to do some trim and taillights. plus use of his ramp truck to deliver the car wherever we need locally.
|
|
|
Thomas M. Benvie
|
|
|
|
|
prostreetamx
AMC Addicted

Joined: Jul/15/2007 Location: Las Vegas, NV Status: Offline Points: 1532 |
Post Options
Thanks(0)
Quote Reply
Posted: Oct/08/2008 at 6:21pm |
|
AMC body panel fit wasn't that great in the 60's and 70's and these cars need a lot of work to fit the panels properly. It's even worse if you swap parts around. I realize that most guys just keep adjusting the existing parts until they fit as good as possible, but on my 72 I had to reshape parts for that almost perfect body gap. One quarter panel was crooked from the factory and I ended up spliting it and welding in a filler. This work must be done in metal since body filler will just chip off if bumped. I know Tom is an experienced bodyman based on his many posts and this car will probably come out with better panel fit than most, but I am just to picky to live with close enough factory panel fits. My car will be painted this Sunday and I have made repeated trips to the shop to fix small defects that my painter has pointed out. It turns out he is even more picky than me.
|
|
|
Richard Payne
Las Vegas,NV 72 5.7 Hemi Javelin 77 Prostreet 401/727 AMX, 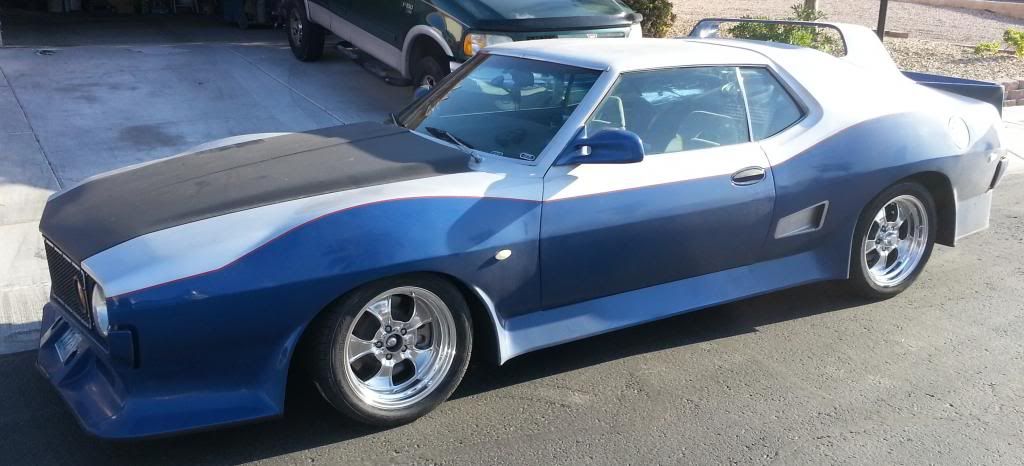 [/URL] [/URL]
|
|
|
|
|
farna
Supporter of TheAMCForum 
Moderator Lost Dealership Project Joined: Jul/08/2007 Location: South Carolina Status: Offline Points: 19676 |
Post Options
Thanks(0)
Quote Reply
Posted: Oct/08/2008 at 11:01pm |
|
Richard, I find your post just slightly amusing. Does the term "over restored" ever come to mind? "Restored" should be back to the way something was originally. As you said, panels weren't perfect for ANYONE back in the 60s and 70s (and earlier, of course)... well, save for maybe Rolls Royce, and possibly other stratospheric models. At the same time I can understand wanting the best fit reasonably possible. I did say reasonably... I'm not sure splitting a quarter panel and welding in a filler is "reasonable", but if it was noticeably crooked I can certainly understand repairing it -- probably should have been done before it left the factory. Of course a competing show car has to be as perfect as possible, not "just" restored....
 |
|
|
Frank Swygert
|
|
|
|
|
prostreetamx
AMC Addicted
Joined: Jul/15/2007 Location: Las Vegas, NV Status: Offline Points: 1532 |
Post Options
Thanks(0)
Quote Reply
Posted: Oct/09/2008 at 7:47am |
|
I don't think anyone will accuse me of restoring my Hemi Javelin. It has so many custom touches that restoration went out the window 3 years ago. I get a laugh out of the stories where a guy claims to have restored a car and you can clearly see the modifications such as blowers, different hoods or other very noticable changes. To me a restoration is to bring it back to it's as built by the factory, dealer, or in some cases modified by the original owner for racing or some other special purpose. Cars with a history in thier modified condition should be considered restored if brought back to that original form. It wouldn't make any sense to take a famous race car back to showroom stock. I personally don't restore cars I modify them. Tom is pretty much restoring Hanna and has a different goal for the car than I would have with the same car. Tom has the info and the skills to bring a car back to showroom condition, but showroom condition with wavy body gaps just wouldn't work for me. Even the factory did some small tweeks on the assembly line but when you swap parts these tweeks don't fit the other car body the same. I would just sugest that since this car is starting to develop a history and following that a few tweeks to the body lines would not kill the original goal. I would think that the potential publicity that this car would bring to the AMC hobby that a few hammer blows and tweeks wouldn't hurt.
|
|
|
Richard Payne
Las Vegas,NV 72 5.7 Hemi Javelin 77 Prostreet 401/727 AMX, [/URL]
|
|
|
|
|
Post Reply
|
Page <12345 24> |
 Tweet
Tweet
|
| Forum Jump | Forum Permissions You cannot post new topics in this forum You cannot reply to topics in this forum You cannot delete your posts in this forum You cannot edit your posts in this forum You cannot create polls in this forum You cannot vote in polls in this forum |


")


 Click for TheAMCForum Rules
 Topic Options