
|
|
|
Your donations help keep this valuable resource free and growing. Thank you.
|
Restoration of Hanna (Charity AMX) |
Post Reply 
|
Page <1234 24> |
| Author | |
tbenvie 
AMC Addicted 
Joined: Jul/02/2007 Location: United States Status: Offline Points: 1014 |
 Post Options Post Options
") Thanks(0) Thanks(0)
 Quote Reply Quote Reply
 Posted: Sep/27/2008 at 10:26pm Posted: Sep/27/2008 at 10:26pm |
|
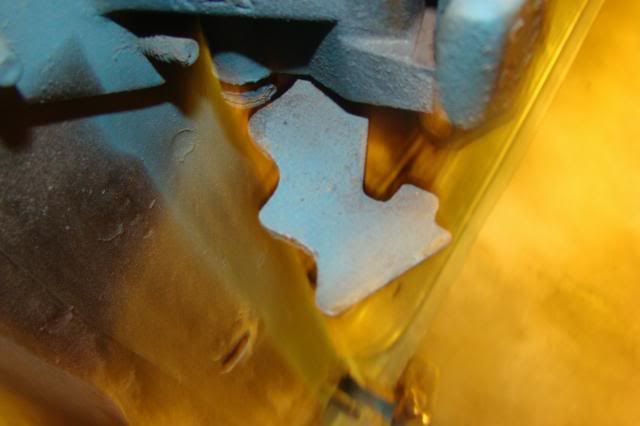
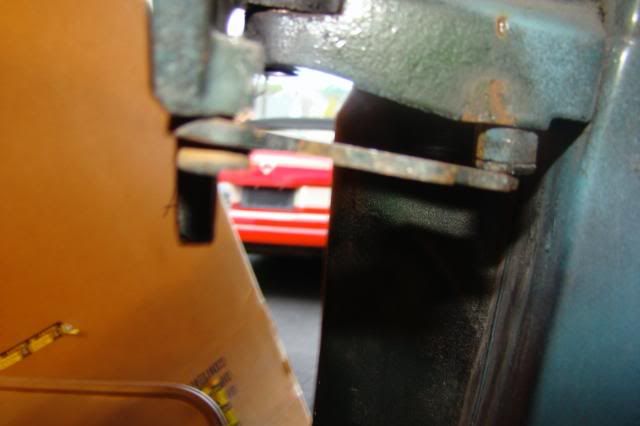
Here is the left upper spring with the windstop. This hinge pin is stuck in there, so will have to do some drilling to get it out. But you can see the stop, the nipple, and I am holding a spring where it will go when completed.

Now it’s time to replace the bushings. The pins available from the vendors are a little longer than stock. I use a pneumatic cut-off tool to trim them, then chamfer the edges on a benchgrinder. Here is the result-note also the new bushings (pins and bushings from Joe Roberts): 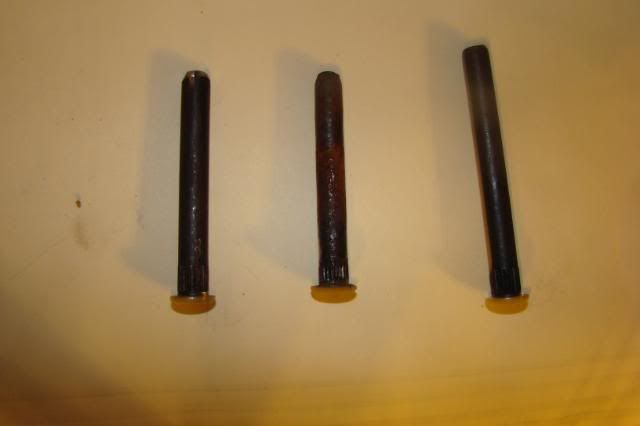
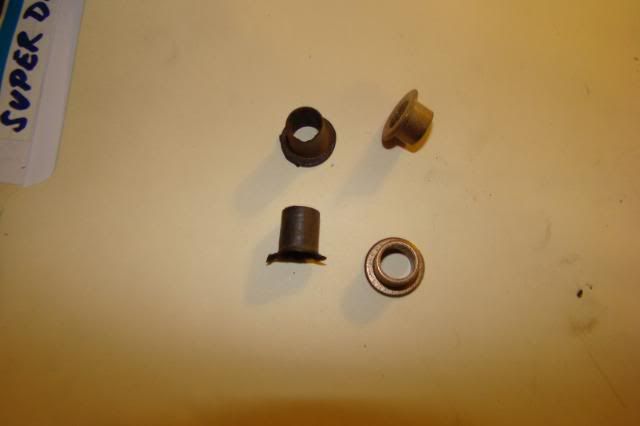
To replace the bushings I clean out the hole a little with a drill bit-don’t have to go to deep as the bushings aren’t that long. I next install the bushings by putting a bolt through them and TAPPING them in with a hammer. If you hit it too hard they will crack, or get damaged. The bolt head spreads the force equally and the shaft of the bolt holds the bushings from collapsing. 
A few easy taps, and it fits right in 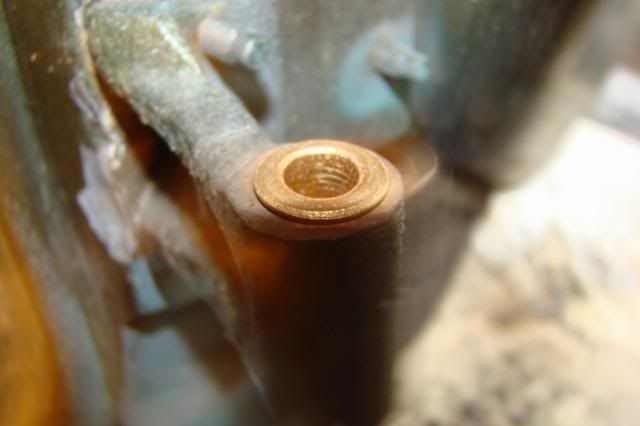
Before you assemble the hinge, make sure you clean up the bushing residue from the hinge. It usually just chips off with a scraper. 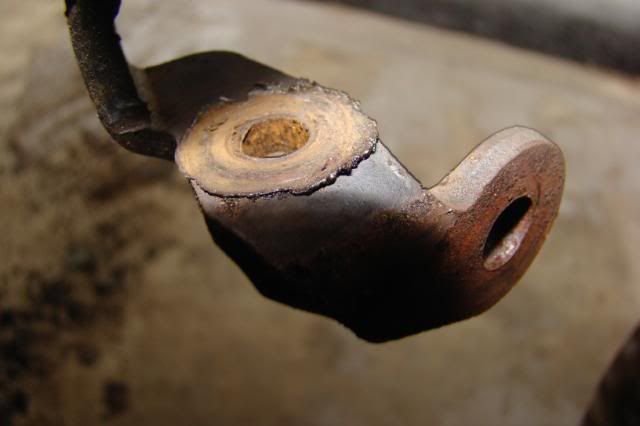
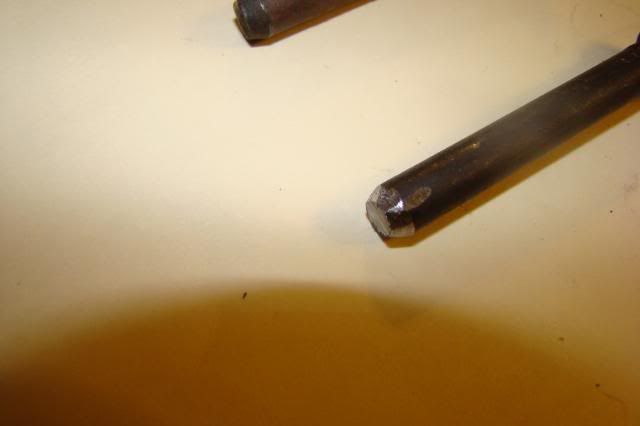
Next, use a drift and hit the pin in place. 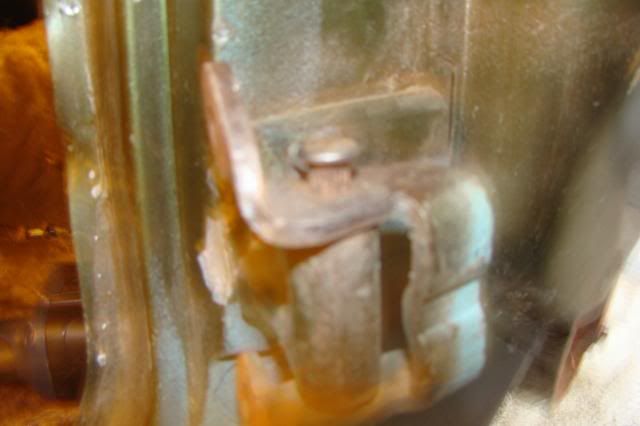
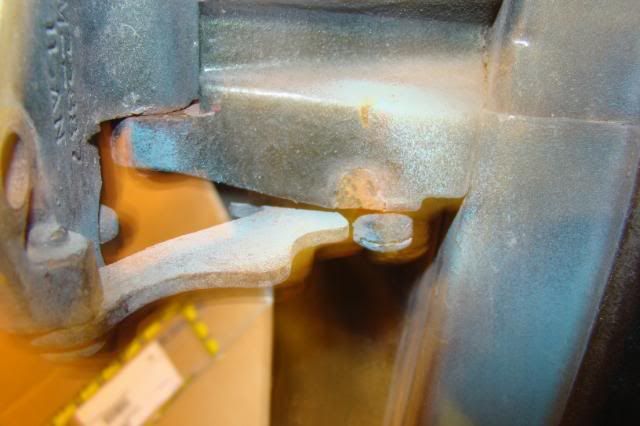
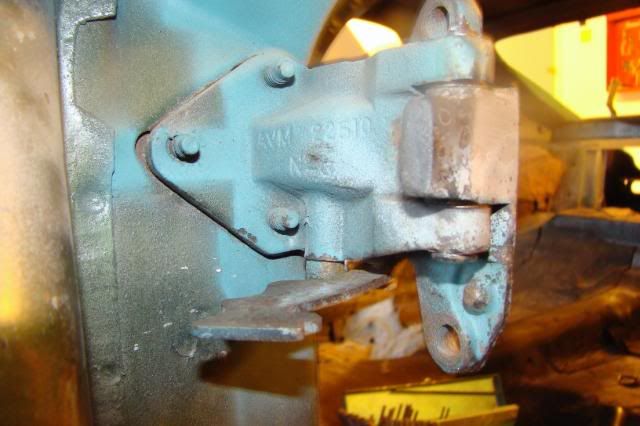
This is the right bottom hinge. Note the hinge is designed so it will hit itself, thus keeping the door from opening too far. 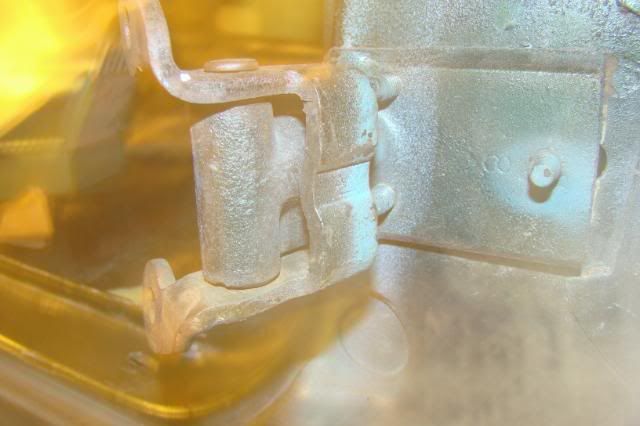
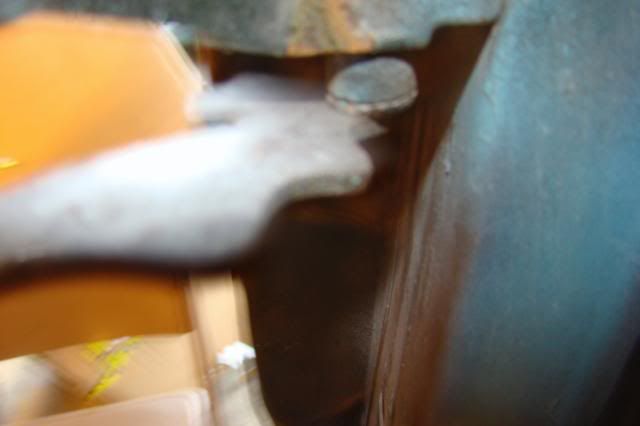
One down, four to go. As shown, the pin for the windstop was welded in place. 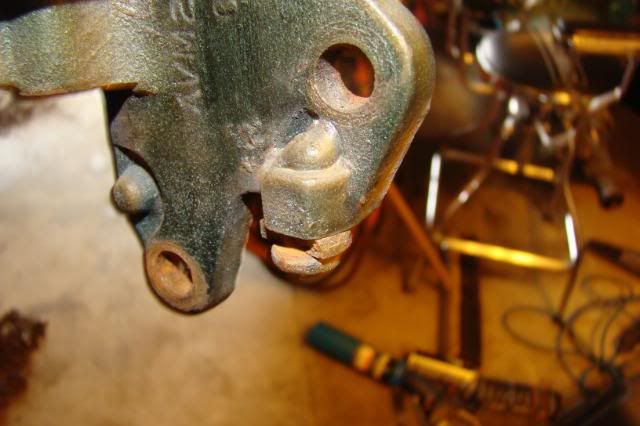
I decided to use the cut-off tool to remove the weld and clean up the area. After I ground it down you would see a faint outline of the pin against the hinge. I center-punched the pin and drilled down about a quarter of an inch. 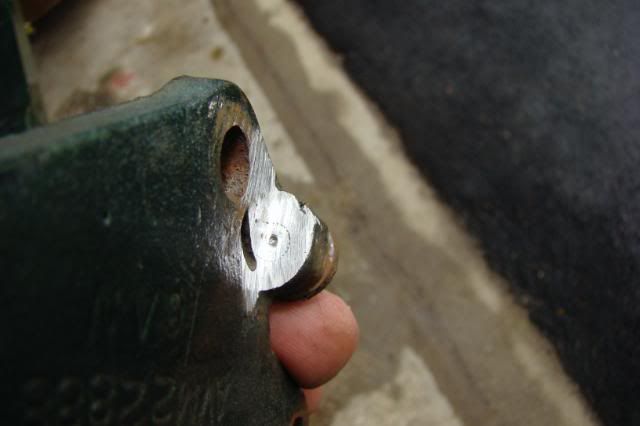
Then it was just a matter of using a straight punch to knock the pin and the small broken part of the windstop off the hinge. Here are the three parts-hinge, pin, small section of windstop: 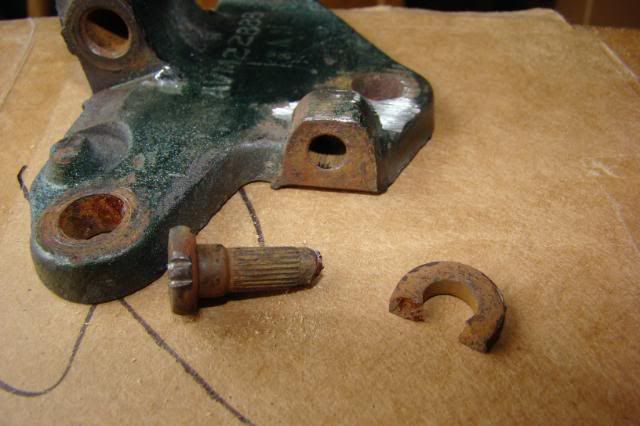
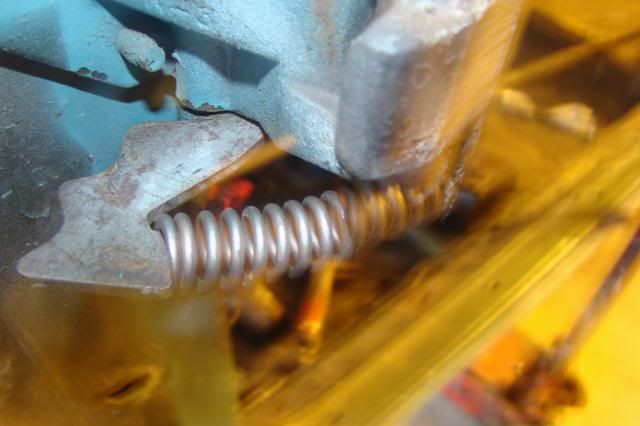
I used a 5/16 drill bit to clean up the hinge hole for the pin, inserted the bronze bushings, and assembled the hinge. Last item is to install the spring on the windstop. This is real easy. just tap the pin holding the windstop a little, just enough for the windstop to drop below the stop on the hinge. 
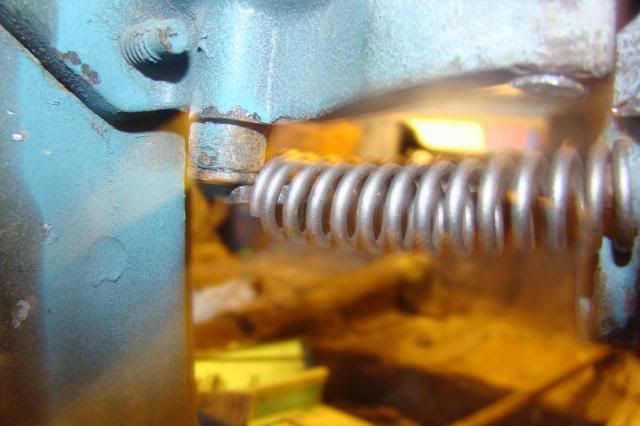
Put the spring on the windstop, and you'll only need a little pressure to put the other end of the spring on the nipple. Then just lightly tap the windstop over the stop, and seat the pin. real quick and easy! 
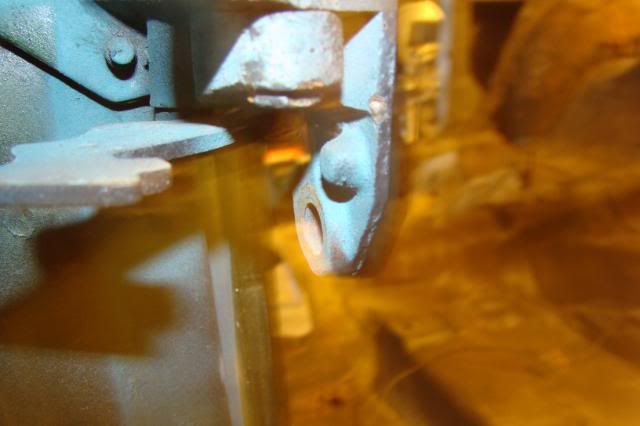
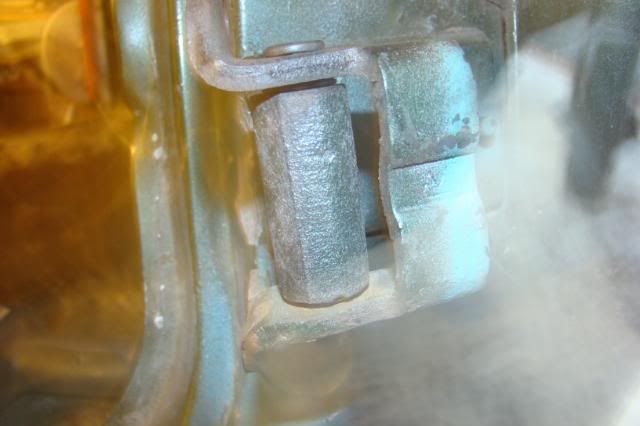
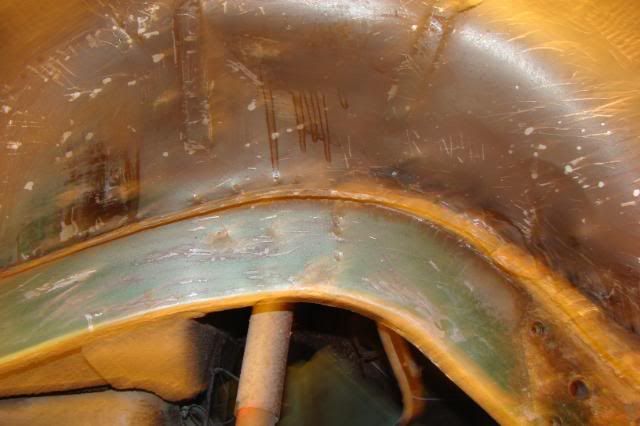
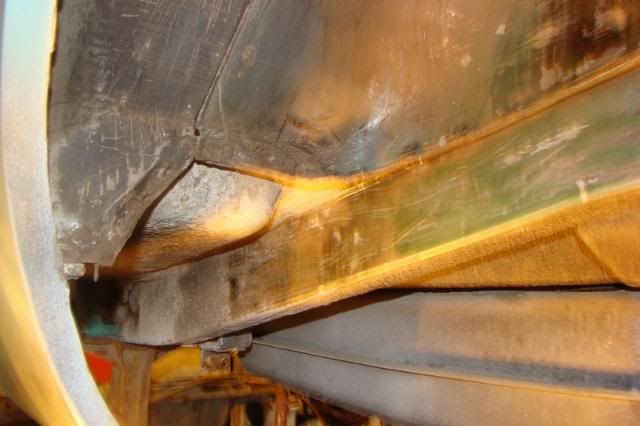
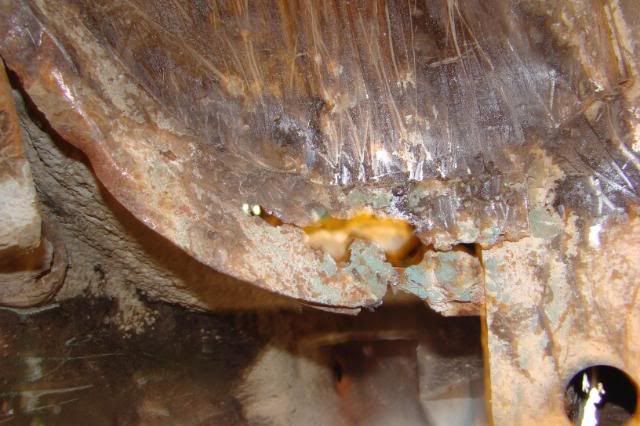
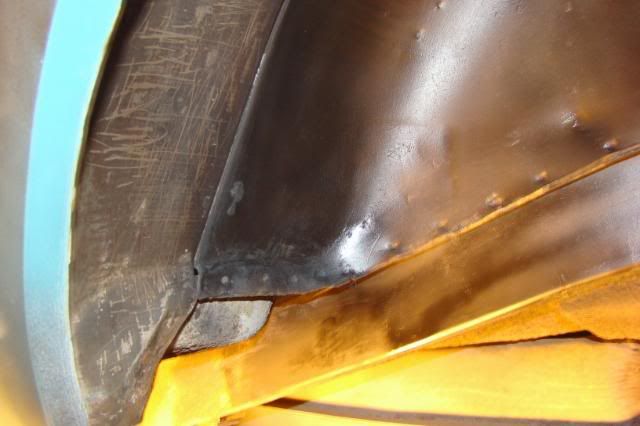
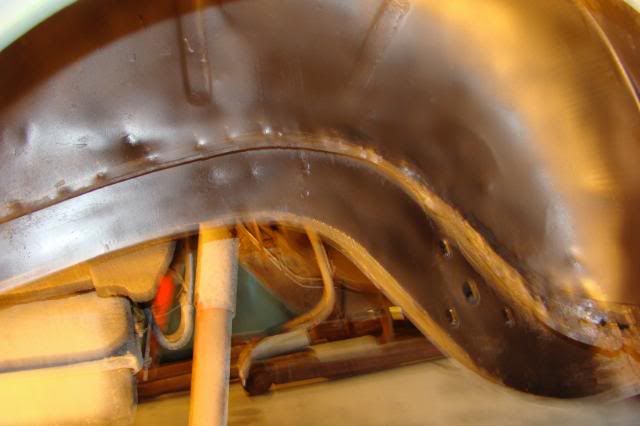
If you look at the top hinge you will see it also hits against itself to prevent the door from opening too far. Before assembly I blasted the hinges with a hand-held sandblaster to clean them up a little. Now just ready for paint! The undercoating was removed from the rear wheelwell today. You can see the torquelink bracket on the car, and you can also see it has undercoating, meaning the car was undercoated after installation of the bracket. Here are some pics with the undercoating: 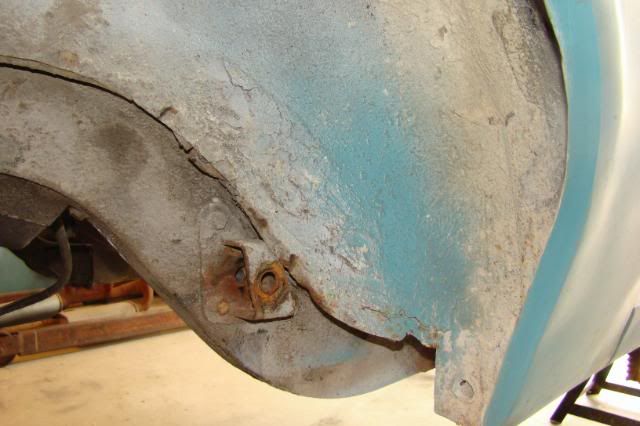

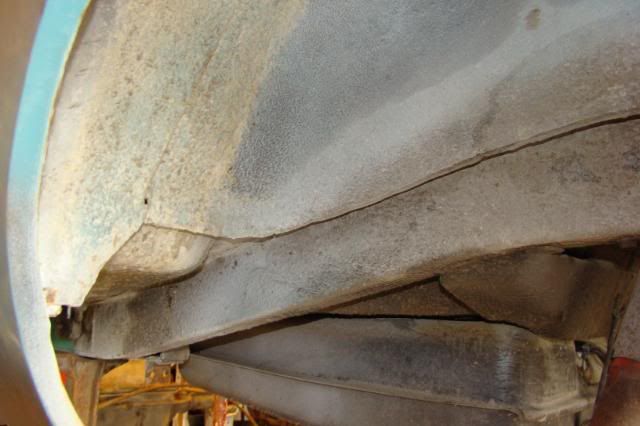
I use a propane torch to heat the undercoating-it does not have to be real hot. Then a flexible metal putty knife with a wooden handle (to dissipate the heat) scrape the coating off. A tar like residue is left behind. I use a #0 steelwool and starting fluid to clean it up. You must be careful with the starting fluid and only use it in small areas-and away from flame and halogen lights-but it loosens up the tar so the steelwool cleans it off, and best of all-it evaporates so fast it does not leave a liquid mess. 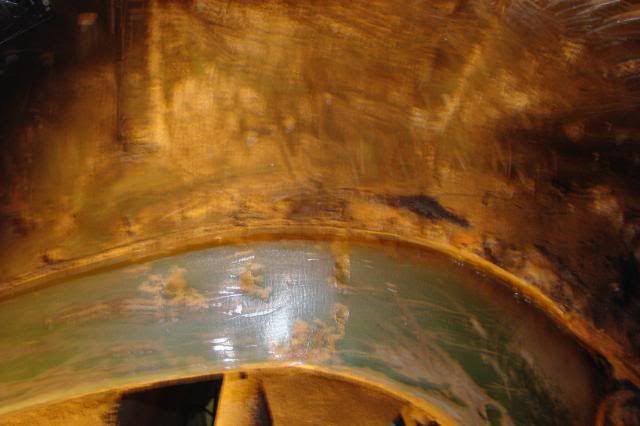
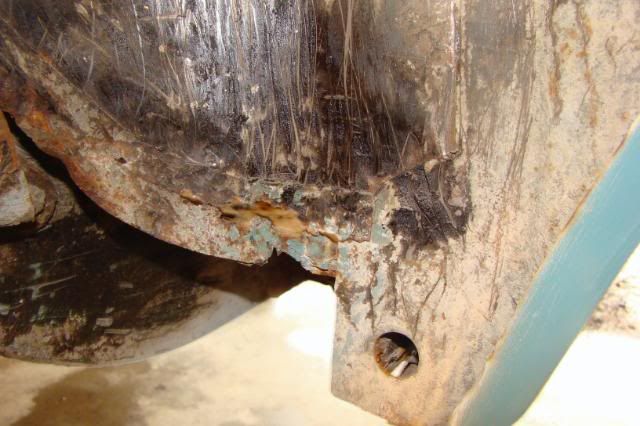
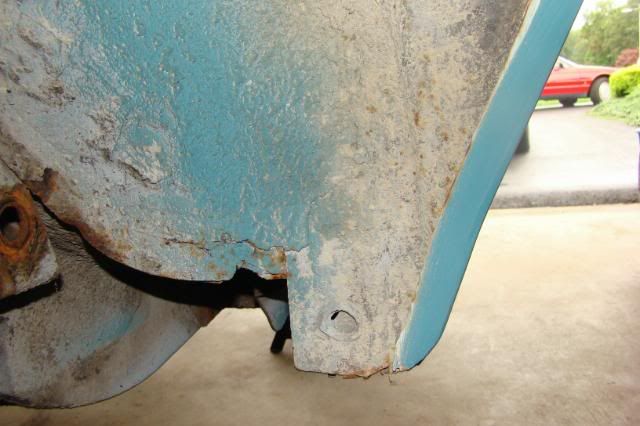
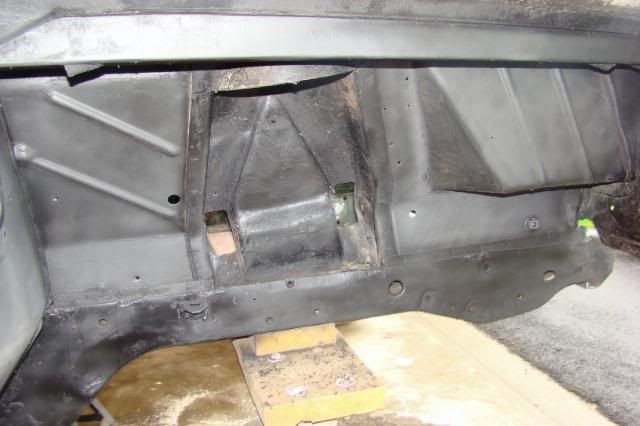
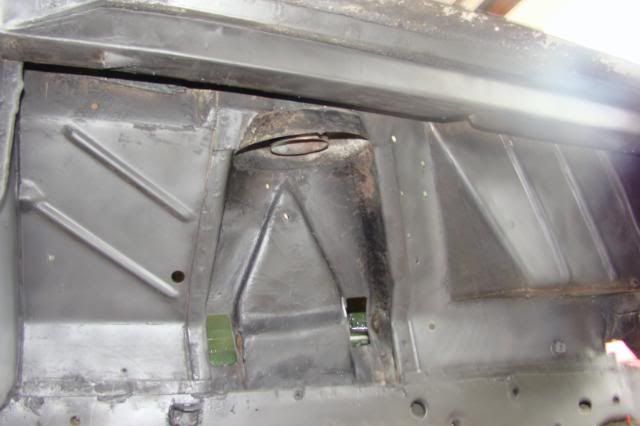
The bad news is I did find some rust through in the wheelwell, where the wheelwell panels attach to the floor pans and has heavy seamsealer around the joint. The good news is this is a very simple repair-just cut out the rust and replace the piece, a part that is easily made at home. (I often thought this was a strange piece, almost like they had the car finished and said “Uh oh, there is a gap”, then this piece of sheetmetal is installed.
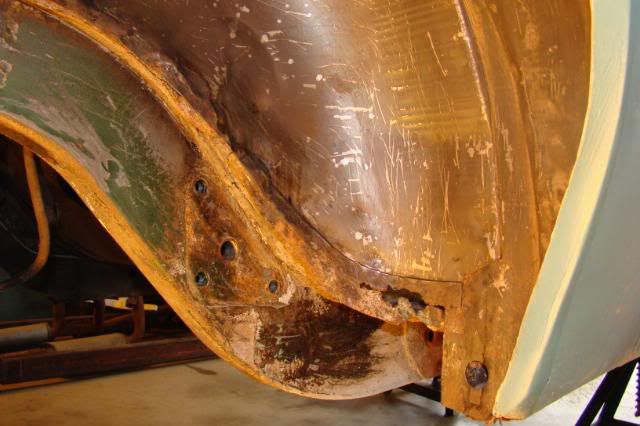
Lastly, I put a light coat of primer on the panels so it will show any areas that were missed-hard to see with all the paint scratches from scraping. Here is some pics of the front and rear: 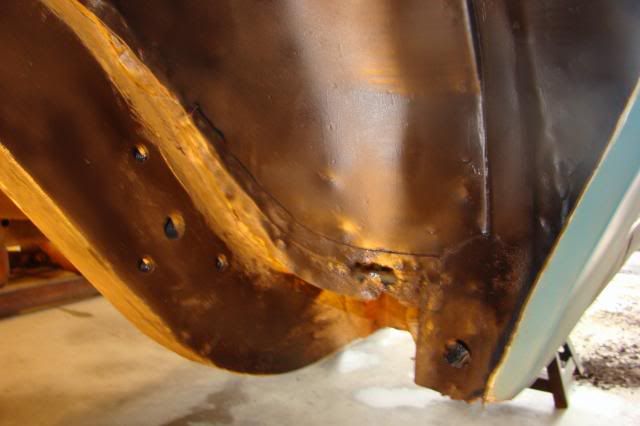

Edited by tbenvie - Oct/04/2008 at 3:35pm |
|
|
Thomas M. Benvie
|
|
 |
|
|
tbenvie
AMC Addicted
Joined: Jul/02/2007 Location: United States Status: Offline Points: 1014 |
Post Options
Thanks(0)
Quote Reply
Posted: Sep/27/2008 at 10:45pm |
|
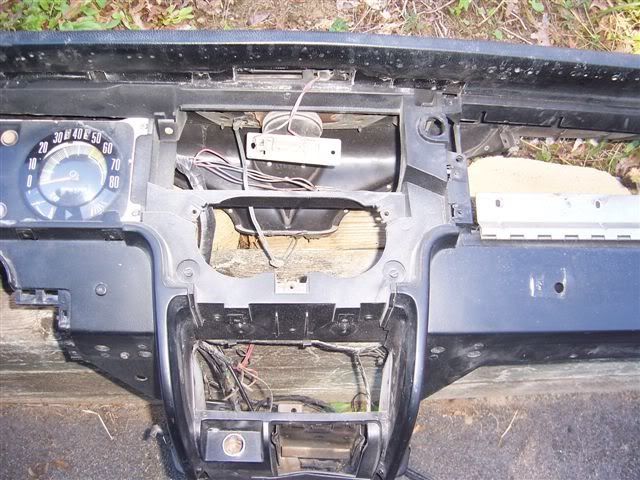
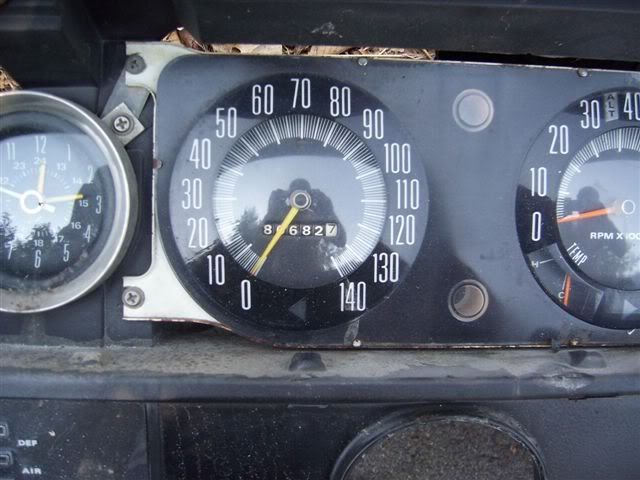
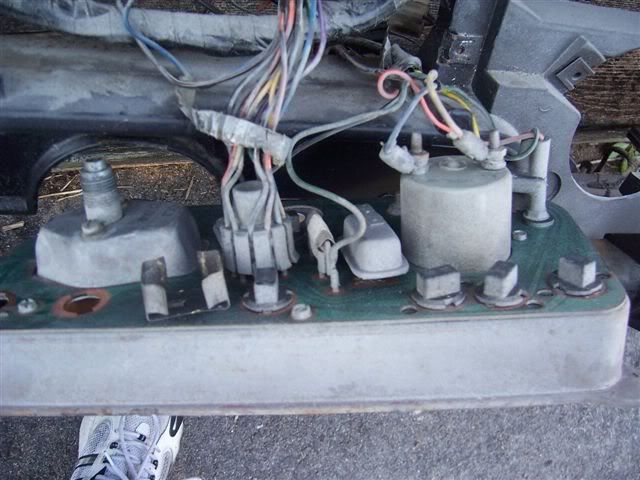
Rick was working on the dash this week.
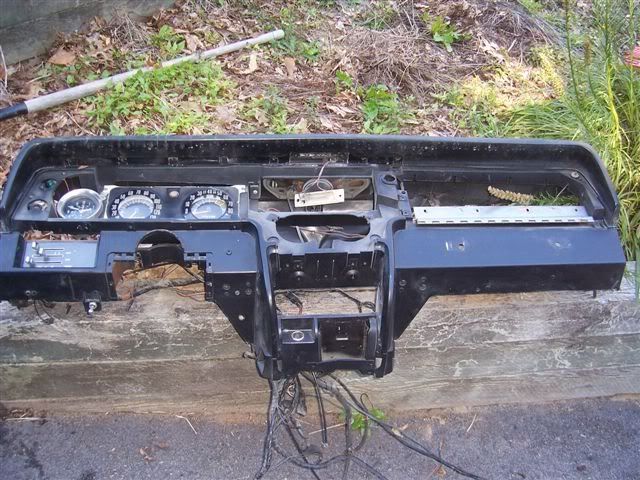
Unfortunately, the dash was severely damaged somehow while at the bodyshop. A section of the speaker area was broken as well as some major cracks on the passenger side. 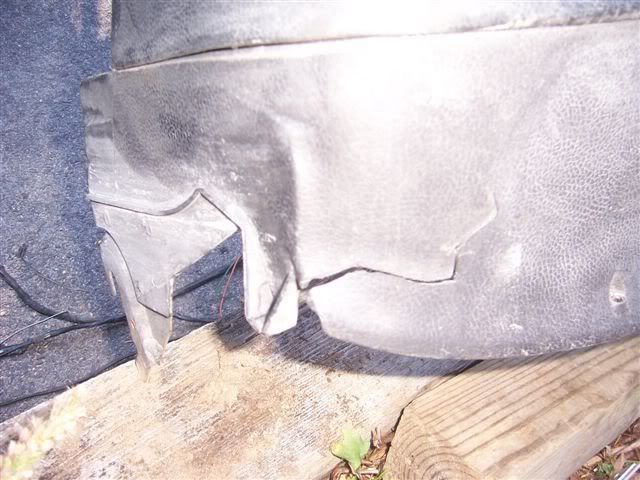
This is really a shame as this was one of the few 70 dashes that did not have that “standard equipment” crack at the grab handle below the glovebox. 
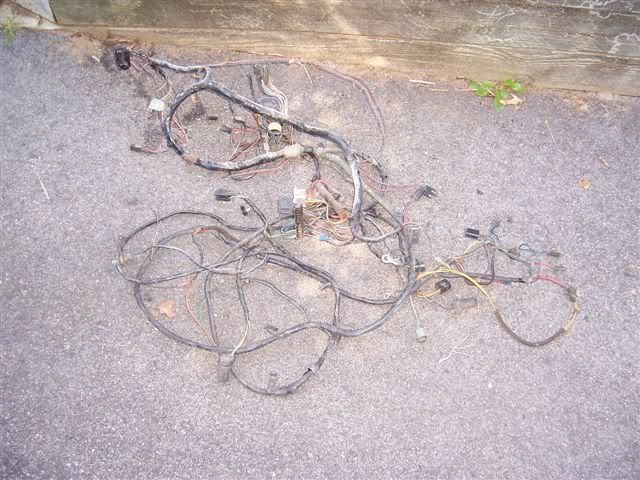
A lesson learned-the windshield was out of the car at the bodyshop and the dash was not covered. There was an unbelievable amount of shop dust (bondo dust, paint overspray, etc.) that it would have been horrific if a new interior was installed without cleaning this out. Rick has generously donated a near mint dash (has that crack) and is taking this one apart to retape the wiring harness, and clean up all the components. The parts are also on there way to Mark Shuford of A-Mark Productions. Will post more pics as they come. 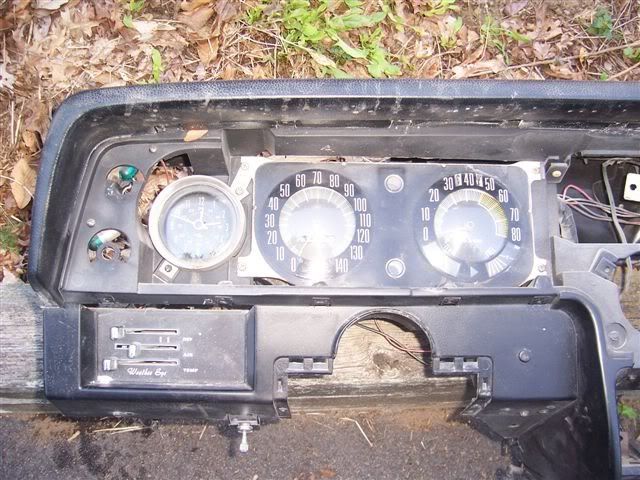
|
|
|
Thomas M. Benvie
|
|
|
|
|
71SC360
AMC Addicted
Charter Member Joined: Jun/29/2007 Location: East Tennessee Status: Offline Points: 5477 |
Post Options
Thanks(0)
Quote Reply
Posted: Sep/28/2008 at 6:03am |
|
Tom, Thanx for the great reports (and pix) of the restoration process. This is what the project needed, someone dedicated enough to keep the project alive. Not only is your information a huge help to a lot of guys restoring their cars, it is also showing that with a lot of dedication, a restoration doesn't have to take two or more years. Keep up the great work and great reports.
PS can you update the parts needed list. Looks like I am buying the 70 AMX that I told you about at the show in E. Bridgewater. Sorry, I am keeping the NOS parts with the car but there is an entire 70 AMX (and 69 Javelin) worth of extra parts that come with the car so there's bound to be other parts that you can use..... Edited by 71SC360 - Sep/28/2008 at 6:04am |
|
|
|
|
1970390amx
AMC Addicted

Joined: Jul/11/2008 Location: colorado Status: Offline Points: 3314 |
Post Options
Thanks(0)
Quote Reply
Posted: Sep/28/2008 at 8:52pm |
|
i cant believe you would recomend using a propane torch and stating fluid all at the same time, hope your life insurance is paid up. there has got to be a safer way.
|
|
|
|
|
tbenvie
AMC Addicted
Joined: Jul/02/2007 Location: United States Status: Offline Points: 1014 |
Post Options
Thanks(0)
Quote Reply
Posted: Sep/28/2008 at 9:26pm |
|
Definitely NOT at the same time. I stated I used the torch to remove the heavy undercoating. AFTER that was removed, I used the starter fluid to remove the tar residue-torch wasn't even assembled, car outside and ventilated, no lights on. Carb cleaner, paint thinner, etc. is all flammable and unsafe if not used correctly. But then again, the cut-off tool will remove a finger in an instant or blind you, my brother once knocked a tooth out when a wrench slipped, etc. Please be careful when working around cars and equipment, and try to get a variety of quality tools to get the job done right.
|
|
|
Thomas M. Benvie
|
|
|
|
|
farna
Supporter of TheAMCForum 
Moderator Lost Dealership Project Joined: Jul/08/2007 Location: South Carolina Status: Offline Points: 19676 |
Post Options
Thanks(0)
Quote Reply
Posted: Sep/30/2008 at 8:12am |
|
I thought Tom's description of using the torch and starting fluid were clear enough, and he pointed out the hazards. I must admit, though, that I read 1970390amx's post first, so maybe I read it a little more carefully, or was specifically looking for a mention of safety... I may not have paid as much attention to the details had I not had some notice that there may be something "wrong".
Joe is right, it needed a new dedicated crew to get it moving again, and finished. That's not to say that some of the crews that worked on it before weren't dedicated -- a lot of work was done to the car (mostly mechanical) by them. Getting someone hyped up about body work on what is essentially "someone else's car" was difficult, especially since the body really needed a complete going over. After seeing some of the photos Tom has posted recently, it's not as bad as some thought, it just needs lots of smaller repairs all over, which can be overwhelming. Not so many hobbyist have the skills and knowledge to do top notch body work on their own, and the pros don't have much time to dedicate to a non-paying project. Tom has the skill and knowledge -- as well as some of the others working with him. As an auto body instructor Tom also has the skill to guide help if/when needed as well! |
|
|
Frank Swygert
|
|
|
|
|
tbenvie
AMC Addicted
Joined: Jul/02/2007 Location: United States Status: Offline Points: 1014 |
Post Options
Thanks(0)
Quote Reply
Posted: Oct/01/2008 at 5:25am |
|
Just a quick update: ACC has agreed to send us a complete carpet set with mats, and it is on the way. I have used these before and have been very satisfied with the results.
Here is their info: Auto Custom Carpets, Inc. More to come....
|
|
|
Thomas M. Benvie
|
|
|
|
|
Alliups
AMC Addicted

Joined: Mar/25/2008 Location: S.B. county Ca. Status: Offline Points: 1409 |
Post Options
Thanks(0)
Quote Reply
Posted: Oct/01/2008 at 10:42am |
Yes, there are safer ways like not doing it at all. When someone gives invaluable information on how these extremely uncommon cars were built, and better yet- how to fix them to new or better than new- some of their practices, with or without the implied tasks spelled out, are their practices- many ways to skin a cat. He didn't "recommend" his method, he said: " I use..." That means that's how he does it, because it's pretty clear that's what his method has evolved into after removing undercoating for thirty years. The warnings and separation of materials and tasks was also spelled out. Steve Edited by Alliups - Oct/01/2008 at 10:55am |
|
|
|
|
1970390amx
AMC Addicted
Joined: Jul/11/2008 Location: colorado Status: Offline Points: 3314 |
Post Options
Thanks(0)
Quote Reply
Posted: Oct/01/2008 at 2:01pm |
|
i am not interested in causing a war, but I still think it is a bad idea to use starting fluid as a solvent. You are right he did state this was his way of doing things. although I do not know Tom he gives every indication of being a very intelligent person. In the past many smart people have been killed or severely hurt doing things the same old way, this is what brings change to unsafe practices. On another post someone stated they used gas as a cleaning solvent, this was pointed out as unsafe also. one example was of a woman using it to clean stains on her carpet. The static electricity built up rubbing the carpet stain set her on fire. Seems to me rubbing starting fluid with a rag while stuck under a fender is just looking for trouble. You don't know me but I am also experianced in auto repair and restoration also. I hold nine different ASE automotive certifications. Like I said in my first post there has to be a better way. Eastwood sells a undercoating remover kit, has any ony used it? Just my thoughts.
|
|
|
|
|
71SC360
AMC Addicted
Charter Member Joined: Jun/29/2007 Location: East Tennessee Status: Offline Points: 5477 |
Post Options
Thanks(0)
Quote Reply
Posted: Oct/01/2008 at 2:48pm |
I bet it also uses a flamable solvent in the kit. Sorry but I can't think of anything that's not either caustic or flamable that will remove factory undercoating. What it comes down to is, either you carefully use a method such as Toms or you don't remove the undercoating........
I am sorry there is one other way, use Toms method and don't be carefull.....  Edited by 71SC360 - Oct/01/2008 at 2:49pm |
|
|
|
|
Post Reply
|
Page <1234 24> |
 Tweet
Tweet
|
| Forum Jump | Forum Permissions You cannot post new topics in this forum You cannot reply to topics in this forum You cannot delete your posts in this forum You cannot edit your posts in this forum You cannot create polls in this forum You cannot vote in polls in this forum |


")


 Click for TheAMCForum Rules
 Topic Options
 1970390amx wrote: