
|
|
|
Your donations help keep this valuable resource free and growing. Thank you.
|
69 SC Journey |
Post Reply 
|
Page <1 8182838485 95> |
| Author | |
DoughertyAMX 
Supporter of TheAMCForum 

Joined: Sep/20/2016 Location: Washington, Ind Status: Offline Points: 519 |
 Post Options Post Options
") Thanks(0) Thanks(0)
 Quote Reply Quote Reply
 Posted: Apr/22/2018 at 6:59am Posted: Apr/22/2018 at 6:59am |
|
Kevin,
Amazing work. Your attention to detail is impressive. You have more patience than I do! I really like what you've done with the front end chassis parts. Nice work. I'm just starting on my front end parts, feel free to take a trip to Indiana and help me out! Doug
|
|
 |
|
|
ScrambledEgg
AMC Nut 

Joined: Nov/24/2007 Location: Upstate NY Status: Offline Points: 348 |
Post Options
Thanks(0)
Quote Reply
Posted: Apr/22/2018 at 10:07am |
|
Hi Kevin,
the area you photo'ed where the wire is rubbing - where exactly is that area? I cannot determine it from your photo. Is that area behind the driver side kick panel? I want to check my car / wire to see if my car has the same issue. Thanks in advance. Mark
|
|
|
ScrambledEgg
|
|
|
|
|
kcsamc
AMC Addicted

Joined: Sep/03/2011 Location: Denver, PA Status: Offline Points: 1974 |
Post Options
Thanks(1)
Quote Reply
Posted: Apr/22/2018 at 11:22am |
|
Mark. Yes that is behind the kickpanel and behind the little metal plate. Bolts in picture are lower hinge bolts. Can also rub in rear where it comes out of rocker at wheel hump too.
|
|
|
|
|
Have2SC's
AMC Addicted

Joined: Nov/30/2011 Location: Norwalk, OH Status: Offline Points: 1257 |
Post Options
Thanks(0)
Quote Reply
Posted: Apr/22/2018 at 12:19pm |
|
Kevin, you are doing amazing work on this car!! You may have thought about this but with all that new paint you may have too carefully remove some of it in order for good ground contact especially at the fuse panel. Had some issues with paint and ground on my BBG AMX. Would hate to see you have any issues for something so simple. Good Luck Lee
|
|
|
1971 SC360 Hornet 4 speed 1970 Javelin 390 4 speed "Base Model" 1967 Rambler 220 X code 343 4 speed
|
|
|
|
|
kcsamc
AMC Addicted
Joined: Sep/03/2011 Location: Denver, PA Status: Offline Points: 1974 |
Post Options
Thanks(0)
Quote Reply
Posted: Apr/22/2018 at 10:00pm |
|
Lee - i have worried about this in fact. Hadn't thought about the fuse panel so much, but wire grounds with screws and things like the bumper brackets which I powder coated.
Could get interesting on electrical testing....
|
|
|
|
|
kcsamc
AMC Addicted
Joined: Sep/03/2011 Location: Denver, PA Status: Offline Points: 1974 |
Post Options
Thanks(0)
Quote Reply
Posted: Apr/29/2018 at 10:19pm |
|
Progress this week in a couple directions. The correct part numbered starter went to the local shop for a full rebuild and I got it back at the end of the week to prep for final detailing:
 I continued the process of pushing the engine bay harness out the firewall and running across the aprons and firewall in addition to a few other small pieces added along the way. I would have had the brake booster assembly in if I hadn't made a mistake during brake booster assembly  Recovery from that still on-going and hopefully will be added to the completed checklist later this week. This was fun except for those nasty little foam grommets on the hose and heater cable - what a pain they are to get through the firewall holes! Recovery from that still on-going and hopefully will be added to the completed checklist later this week. This was fun except for those nasty little foam grommets on the hose and heater cable - what a pain they are to get through the firewall holes!  Late in the week here I started pushing to get my lower control arms ready to send out for re-riveting. I had wrestled with the old ball joints about a week or so back, but I need to get the bushings out and prep the bare metal for re-assembly and detailing. you may remember that I was searching for one last NOS lower control arm - but was never able to score it. Had to enact plan B. I had NORS Moog Ball joints (which by the way I believe are the factory supplied ball joint - the numbers stamped into the bottom of the factory and Moog replacement parts are identical and they look 100% the same); A couple weeks ago I started the search for a service house to do the riveting in on my prepped control arms. I will discuss this further once all is done and both I and the source are happy with the results - but the journey on this build may yield one more service to the hobby from an unexpected portion of the general automobile hobby. One bushing wasn't too bad, still centered and intact. The other side was totally wasted, extruded off center and rubbing on the control arm. I knocked out the pressed end caps to see this:  Then I was reminded one more time how much this car was beat on after the control arms came out of the blast cabinet on first pass (didn't show up until blasting!)  I had been hoping to go under epoxy primer before dinner Saturday evening but all bets were off as I had to stop, grind out the crack, weld, and then flush grind this one. Never quite done with the welder on a project! Back on it today, and I had the random grouping of pieces in the booth for priming and detailing - back on track and hoping to make some good progress this week!  |
|
|
|
|
billd
Moderator Group 
Forum Administrator Joined: Jun/27/2007 Location: Iowa Status: Offline Points: 30894 |
Post Options
Thanks(0)
Quote Reply
Posted: Apr/29/2018 at 10:49pm |
|
And you know the starters went to AMC from Ford painted with a cheap thin coat of black paint.....
The whole starter would have been black but because the starter wasn't prepped or cleaned, the paint often didn't stay put on some of the parts. The band, movable pole shoe cover, for example, were rather dirty or oily from the stamping process when assembled to the starter. |
|
|
|
|
kcsamc
AMC Addicted
Joined: Sep/03/2011 Location: Denver, PA Status: Offline Points: 1974 |
Post Options
Thanks(0)
Quote Reply
Posted: Apr/30/2018 at 6:01am |
|
Bill was the aluminum nose all bare on these? I masked off the aluminum front after a quick discussion with Ian but maybe you can elaborate. I know the face that protrudes into bellhousing is bare.
|
|
|
|
|
billd
Moderator Group
Forum Administrator Joined: Jun/27/2007 Location: Iowa Status: Offline Points: 30894 |
Post Options
Thanks(0)
Quote Reply
Posted: Apr/30/2018 at 12:33pm |
|
Kevin - I used to think certain parts were bare until I got into a discussion (friendly!!!) with Ian, and also doing work for Ross - well, both of them have sent me starters we determined were very original (now that's honestly rare - no matter what folks say or believe, very FEW starters on cars today are 100% untouched originals) but these were, as well as one I had on my shelves.
I could not go by the starter on my 70 because I could tell it had been off and I didn't trust the finish on it. Anyway, I did a whole lot of digging, forensics if you will, literally with new razor blades, acetone, mineral spirits (to remove dirt/grease but not factory paint) and so on and here's what I discovered - The starters were at least in late 60s to very early 70s were sent to AMC black, including the drive end housing (the aluminum part) How well is was painted? Not well at all the body appears to have received the best - the nose the worst or thinnest. AMC bolted the starters on and painted the engines. So why are so few of them all black with AMC engine color? The black paint was a bad job - thin in spots, and some of the parts weren't cleaned for painting. They were stamped, etc. and installed, and the starter shot with a quick black. I had a starter from Ross where I literally CAREFULLY used solvent to gently remove grease and dirt and tried hard to not scrub. I then used razor blades and carefully lifted the paint where I could - engine color. What was under the engine color, when I flaked the paint off, was black. The black came off the starter, the blue didn't come off the black. So when I got paint off, both layers came off - showing the black was not adhered well. But when I flaked off blue, on the back side of the blue paint was black. That's likely why we rarely see blue paint on the starters - because it was over the black and the black came off some parts really easily. The starter motor frame seems to have held paint the best. Again, perhaps due tot he manufacturing process - maybe the frame was cleaner? Maybe there was some sort of release agent on the aluminum nose? the bands and pole shoe covers I have bought had to be cleaned well before paint or powder would stick to them.. Granted, most are third party replacements, but still - maybe it was that way with the ford originals? NOS brush end plates come in the packages bare - and usually RUSTY. I have photos someplace if I can find them - dang it - I took good pictures of the starters I checked out from Ian and Ross so I could later prove what I found, which seemed to agree with what both of them were telling me - that originally there was engine color overspray on the starters. So two reasons you don't see much of that today - the black paint stunk and didn't adhere well, likely because they didn't care and the parts weren't cleaned and prepped VERY FEW starters today are TRULY original. I've been send starters in the past "I swear, it's original, my car hasn't been worked on" only to get inside and find replacement brushes, replacement screws, incorrect parts, whatever..... I can very often tell, once I get one on my bench, if I'm the first person to be inside a starter.
If I can find the pics of Ross's starter I was so careful to take apart and try to discover correct finishes, I'll post them. Crazy day - they are resurfacing our road, messing with the driveway and yard, can't get in or out easily........... so we'll see how things go. |
|
|
|
|
billd
Moderator Group
Forum Administrator Joined: Jun/27/2007 Location: Iowa Status: Offline Points: 30894 |
Post Options
Thanks(0)
Quote Reply
Posted: Apr/30/2018 at 6:08pm |
|
I found pics of a couple starters I've done that I know were originals (could tell several ways, they had never been apart or worked on in the past)
Tip - if you want the starter to retain original look and paint and not rust, ensure your engine has oil leaks and never clean it off. Most folks hate that - but I actually appreciate getting starters and alternators that are absolutely greasy and/or oily. 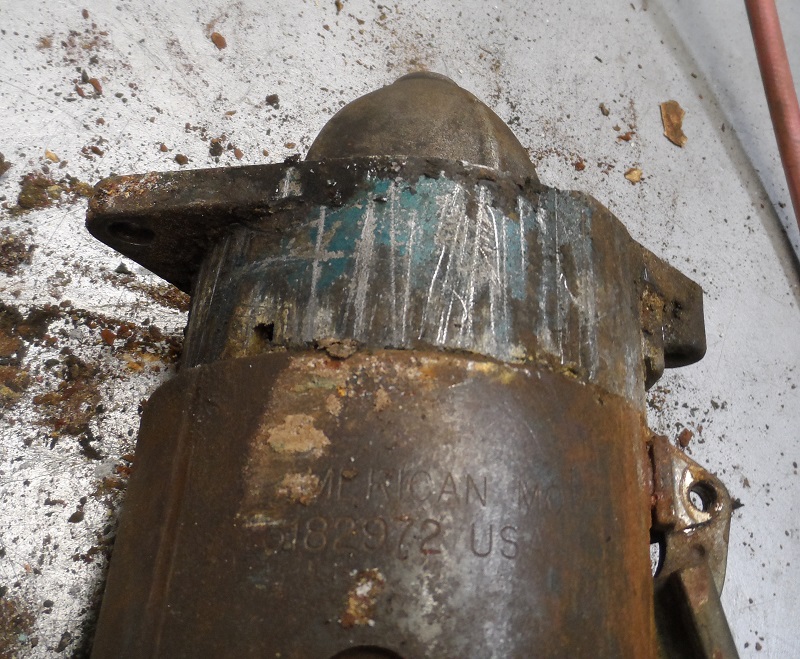 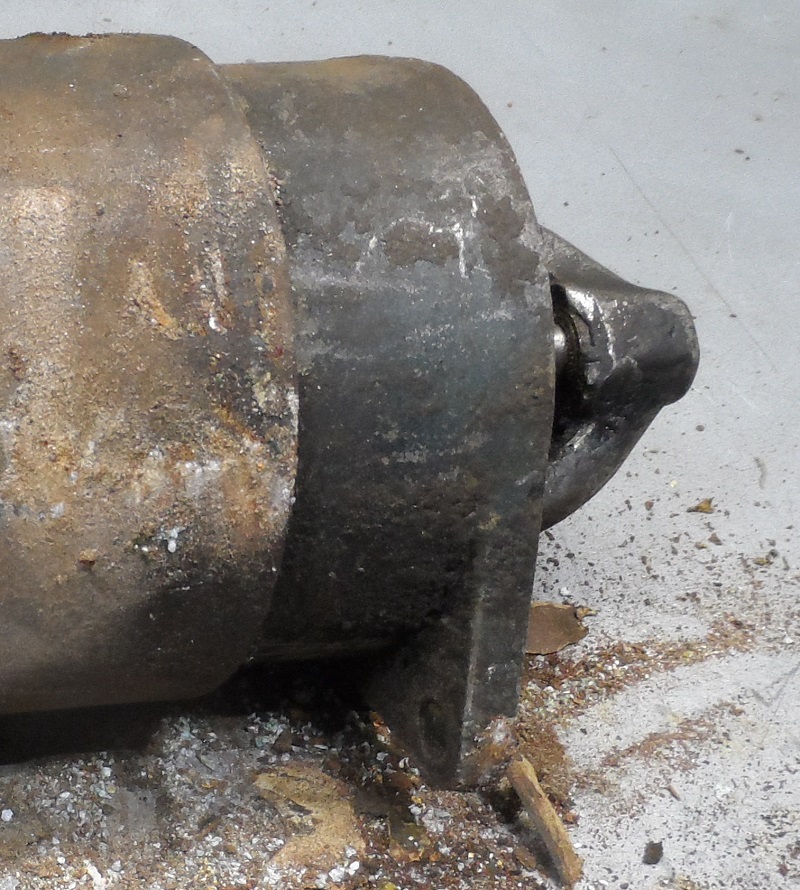 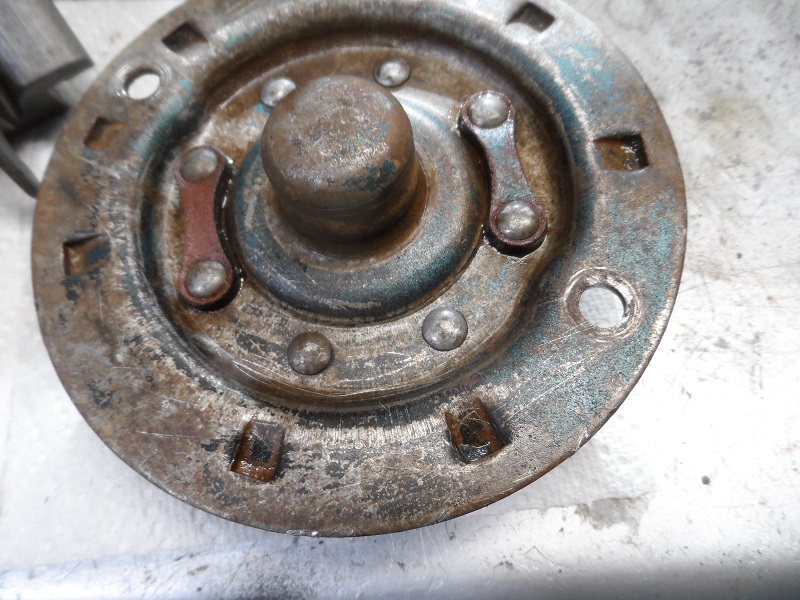 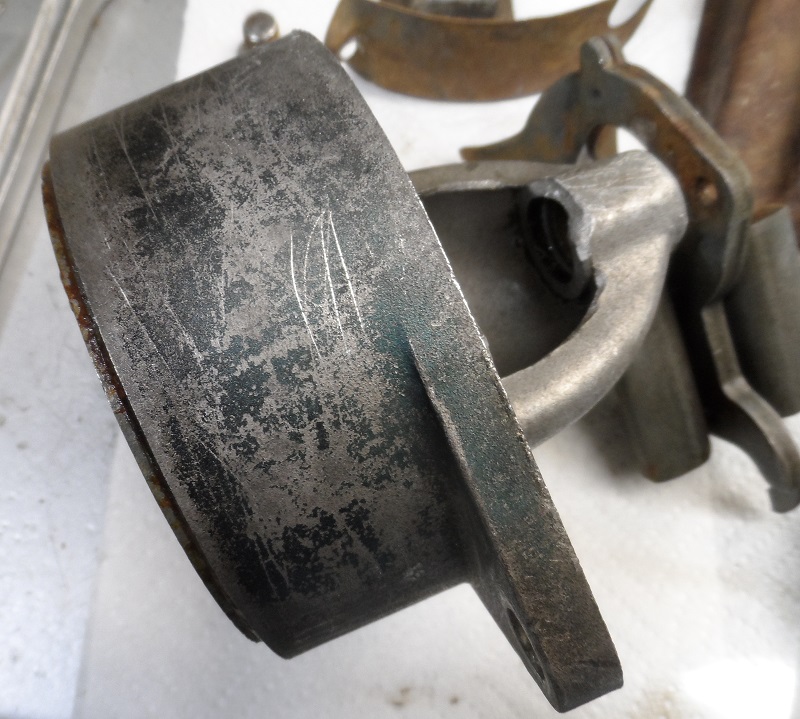     |
|
|
|
|
Post Reply
|
Page <1 8182838485 95> |
 Tweet
Tweet
|
| Forum Jump | Forum Permissions You cannot post new topics in this forum You cannot reply to topics in this forum You cannot delete your posts in this forum You cannot edit your posts in this forum You cannot create polls in this forum You cannot vote in polls in this forum |


 Click for TheAMCForum Rules

 Topic Options